
talpia-2
This article, completely original, is copyrighted by its author, me. Please do not reproduce it.
本文为原创作品,作者 Kolyn090 拥有其著作权,受法律保护。严禁复制、转载、仿冒或以任何形式使用。
Category: Tutorial
Prerequisite: Basic Python
Hello there! This is the second part of me learning python by coding a simple pixel art editor. To recap, I made a working pixel art canvas with python’s tkinter framework.
However, as you probably have noticed, this editor is not interesting. First of all, the users can only draw black pixels. Secondly, there is no way to erase the drawing.
Luckily, both problems can be solved by implementing a color picker and that is exactly what I’m going to do today.
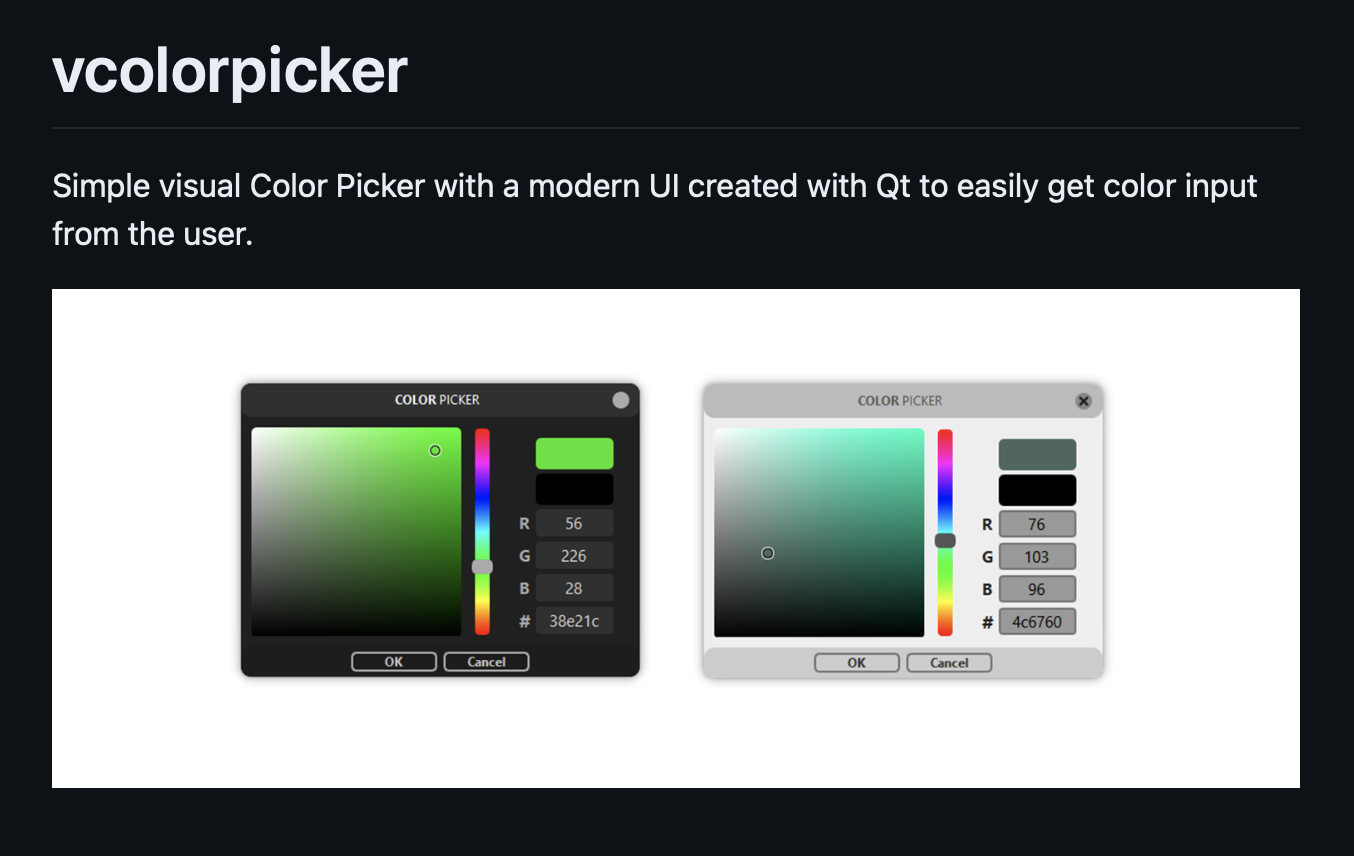
Credit: pyqt colorpicker
Again, one of the advantages of using python is because of its rich library base. There are at least dozens of open-source libraries of color picker available on GitHub, but ultimately I was settled with this one.
Install vcolorpicker
pip install vcolorpickerThe first thing to do is to get a color. A color can be interpreted in different ways, but the most common way to represent it is using the RGB color system (Red Green Blue color system).
It can either look like
# Example (Don't copy)
# Decimal code
 R    G    B
(255, 255, 255)
or
# Example (Don't copy)
# Hex code
#FFFFFF

 (R) (G) (B)
#(FF)(FF)(FF)
Both represent color white.
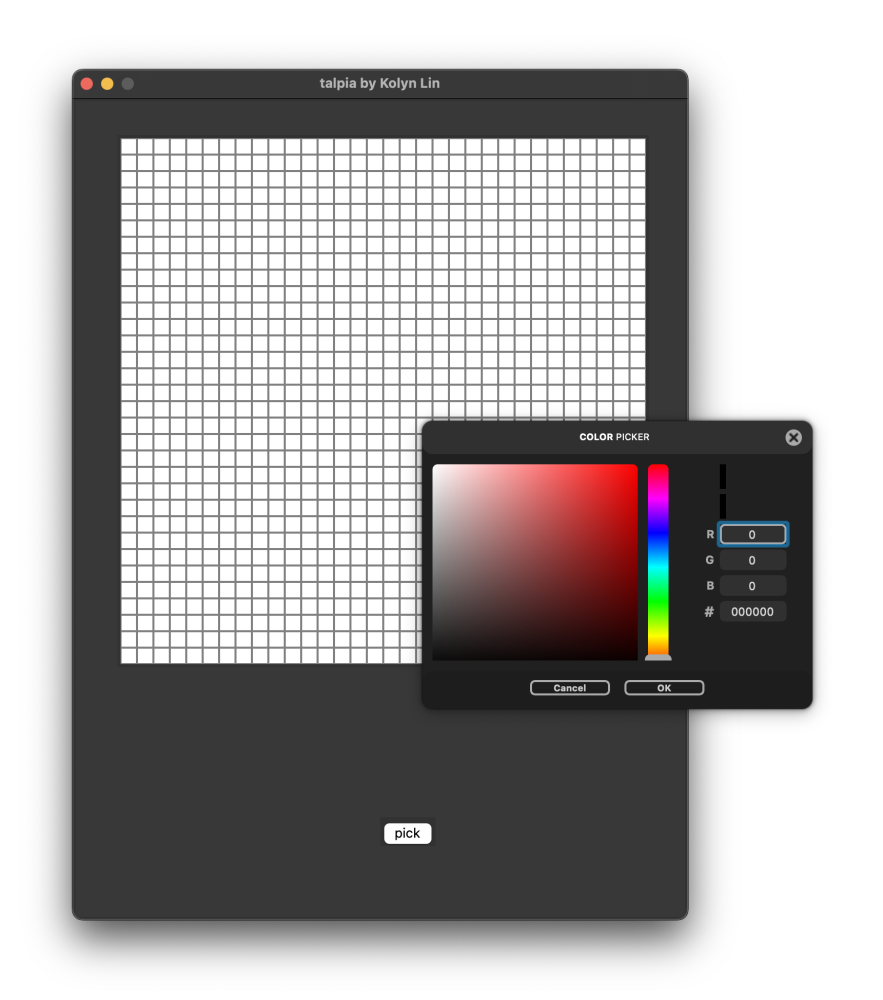
Now it’s time to invoke the color-picking menu. To do so, I’ll import the getColor() function from the vcolorpicker library.
from vcolorpicker import getColor
getColor()
Press run, get
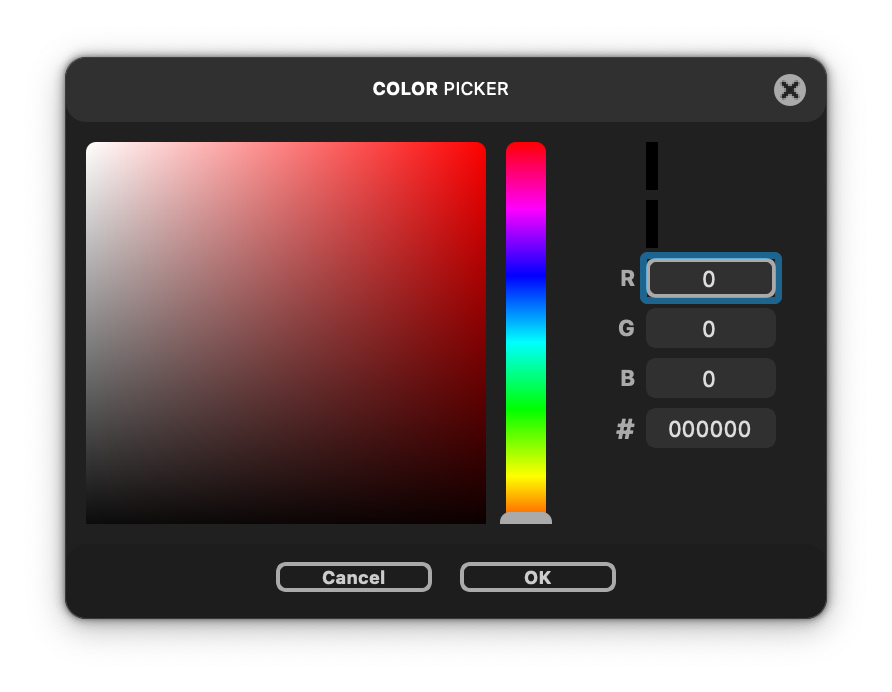
That was a quick setup. Now I can enter number to the RGB field between range [0, 255] to get different colors. What getColor() does is to pick a RGB color, and represent it as (decimal, decimal, decimal). This can be verified with the following code
# Example (Don't copy)
print(getColor())
If nothing is done and ‘OK’ button is pressed, the terminal would print (0.0, 0.0, 0.0) instead.
Why does this matter? Well, remember this function?
# Example (Don't copy)
def set_color(self, event=None):
    self.canvas.itemconfig(self.id, fill='black')
It would be great if ‘black’ can be replaced with our chosen color. However, before doing that, I need to convert the color into hex code. To do so
from vcolorpicker import getColor
from vcolorpicker import rgb2hex

getColor()
# optional
print(f'#{rgb2hex(getColor())}')
Now the terminal will print #000000 instead. This is the same thing as (0.0, 0.0, 0.0), but the fill prop does not work with decimal codes so I need to convert it into hex first.
Now, as you probably have noticed, our canvas will not open if getColor() is directly invoked. This indicates that I need a trigger in my editor, and a button would be prefect for this task.
Time to learn how to create a button in tkinter. I know it has been a while we have not talked about the editor itself. To recap, the editor consists two parts: its base and a canvas. The canvas is where the user draws pixels. However, in this case, I will put a button on the base.
from vcolorpicker import getColor
from vcolorpicker import rgb2hex
import tkinter as tk

button = tk.Button(base
                   text='pick',
                   command=getColor)
button.config(width=2, height=1)
button.place(x=300, y=700)
Get
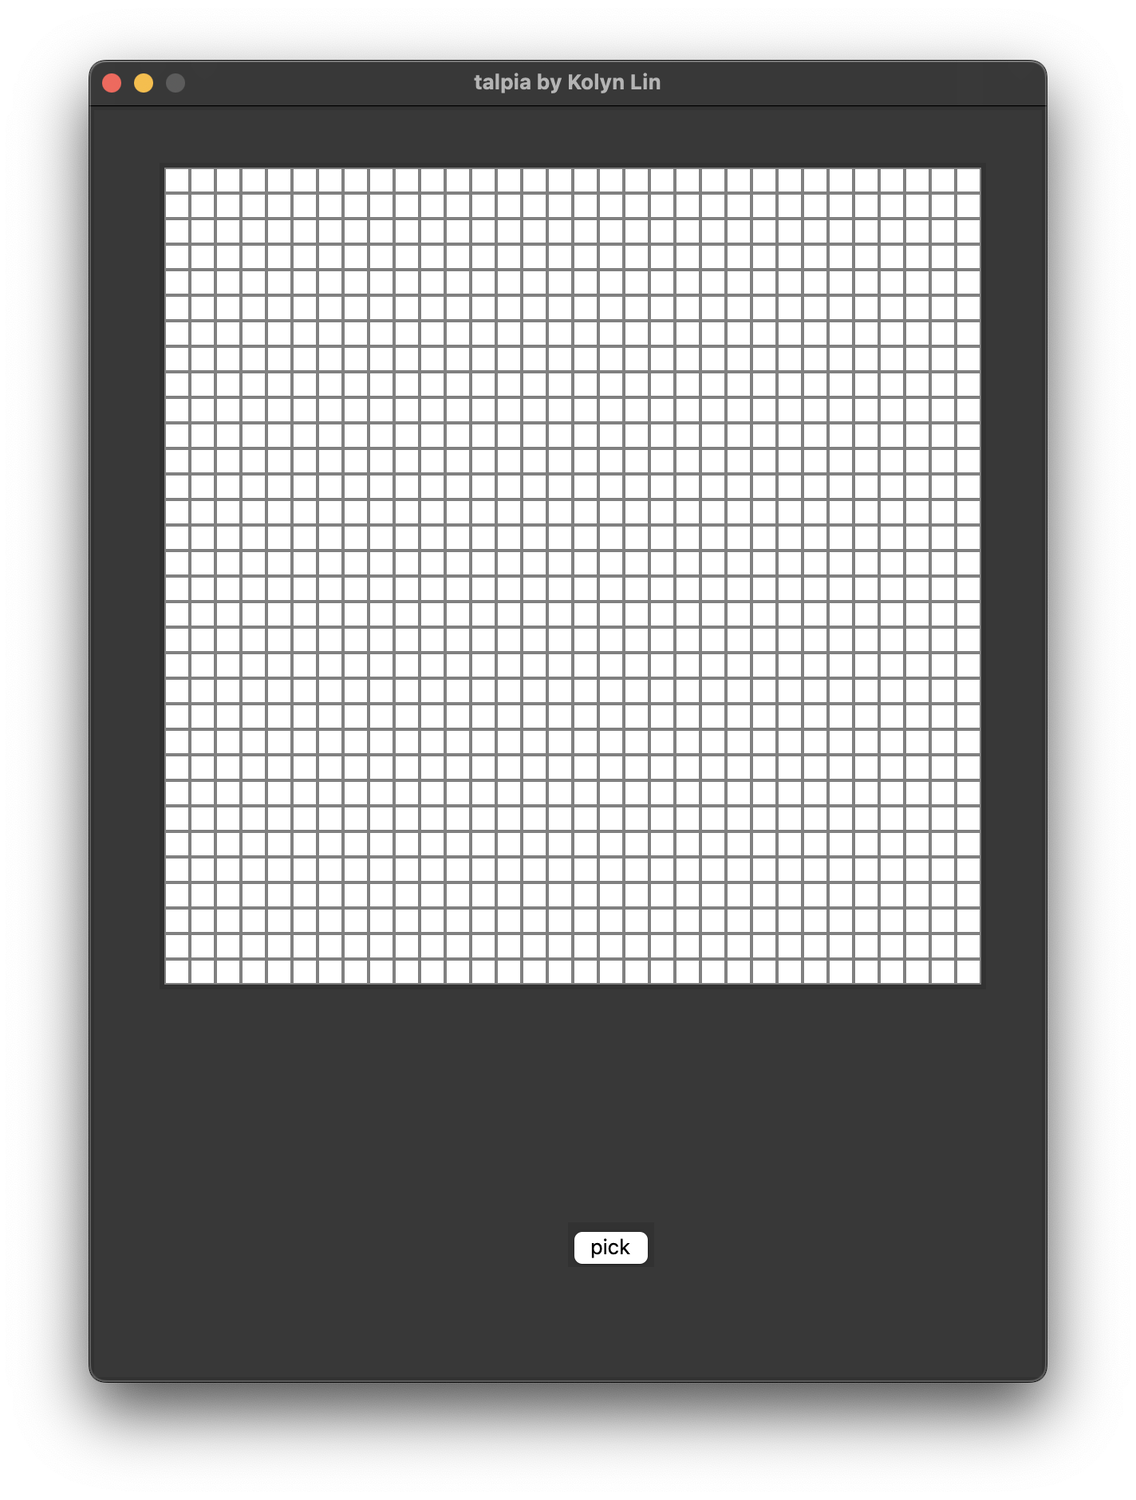
After clicking on the ‘pick’ button
Now it’s time to modify the set_color() function we have. Oh wait, I suddenly realized that the hex color code is not being stored anywhere. To fix that, I will modify the button’s command.
from vcolorpicker import getColor
from vcolorpicker import rgb2hex
import tkinter as tk

base_height = 800
base_width = 600
theme_color = '#383838'
canvas_len = 512
outline_width = 2
grid_len = 32
sqsize = canvas_len / grid_len
color = '#FFFFFF'

def pick_color():
    global color
    color = f'#{rgb2hex(getColor())}'

button = tk.Button(base
                   text='pick',
                   command=pick_color)
button.config(width=2, height=1)
button.place(x=300, y=700)
The color value will be modified after getColor() returns a result (when the ‘OK’ button in color picker is pressed). Now we can go back to set_color() function.
class OnePixel:
    def __init__(self, m_canvas, pixel_row, pixel_col,
                 start_x, start_y, size, outline, width):
        self.canvas = m_canvas
        self.id = self.canvas.create_rectangle((start_x,
                                                start_y,
                                                start_x + size,
                                                start_y + size),
                                               fill="white",
                                               outline=outline,
                                               width=width)
        self.canvas.tag_bind(self.id, "<ButtonPress-1>", self.set_color)
        self.row = pixel_row
        self.col = pixel_col

    def set_color(self, event=None):
        self.canvas.itemconfig(self.id, fill=color)
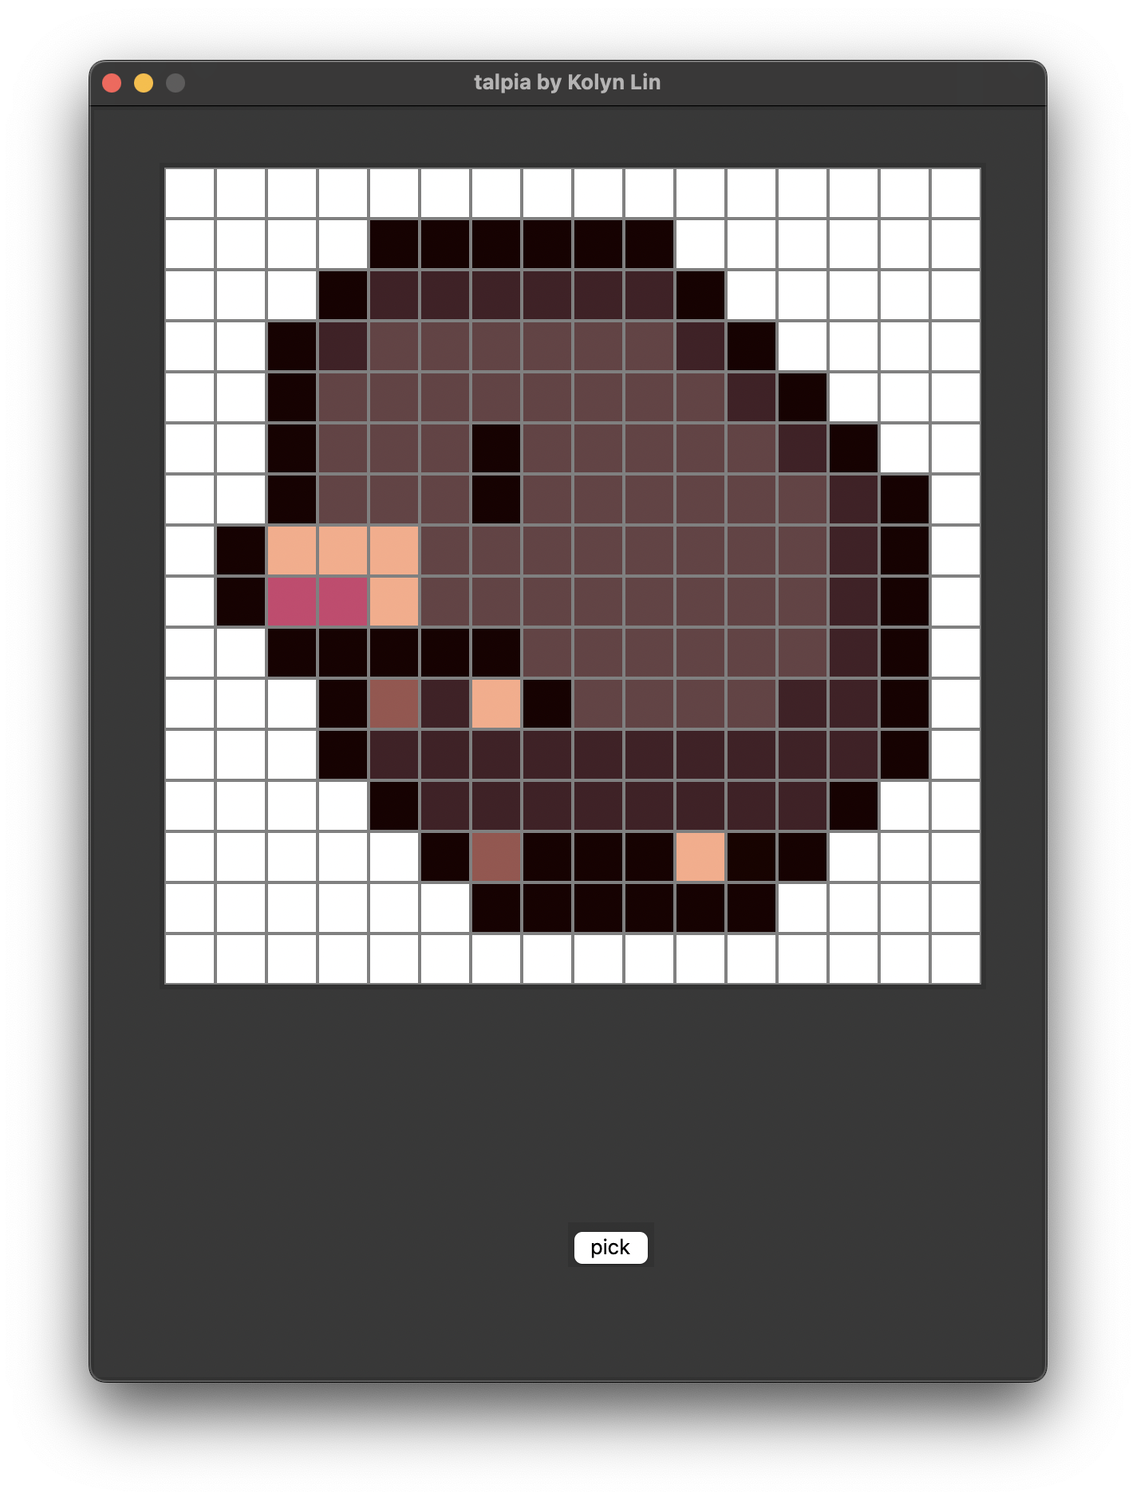
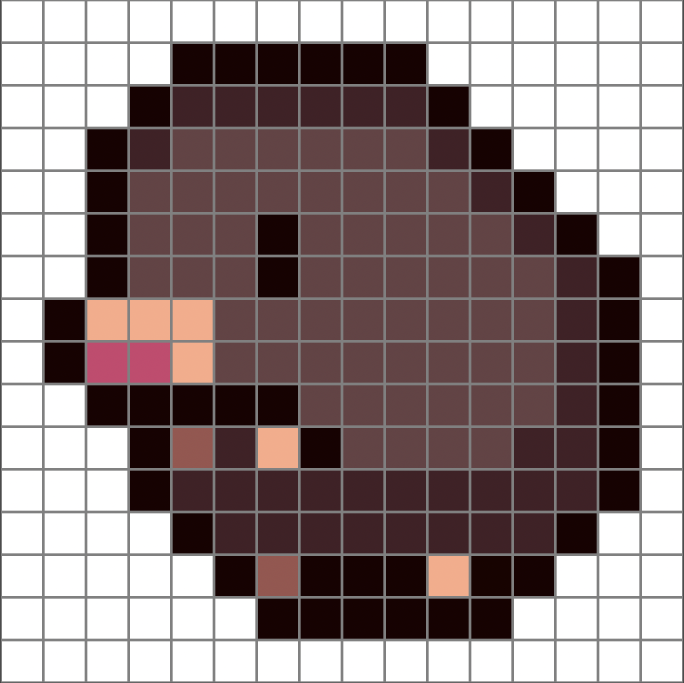
Artwork by Kolyn Lin. Notice that I have changed grid_len to 16.
The editor just acquired the ability to paint different colors!
I’ve learned something today, how about you?
Find the code on my GitHub page, under the part_2 directory.
If you liked this tutorial, consider giving a Star to this repository or a Like to the original post.
🍯 Happy Coding 🍯
👉 Read next: talpia-3
This article, completely original, is copyrighted by its author, me. Please do not reproduce it.
本文为原创作品,作者 Kolyn090 拥有其著作权,受法律保护。严禁复制、转载、仿冒或以任何形式使用。