
Planning a battle AI model in SvZ Defense
This article, completely original, is copyrighted by its author, me. Please do not reproduce it.
本文为原创作品,作者 Kolyn090 拥有其著作权,受法律保护。严禁复制、转载、仿冒或以任何形式使用。
Category: Tutorial
Recap
Previously we have built a lazy learning pachinko player in SvZ Defense. You have learned how to set up the game environment (Bluestacks & Python) and use various libraries to simulate interactions on the game, and most importantly, you have had a simple taste on building a ML program that can play a game. Now I think it’s the time to set our view on something greater! The main SvZ Defense game - killing the zombies!
The plan
This is obviously going to be much more difficult than playing the pachinko machine. Our goal will be building a model that can learn from trying the game, like a real player. That’s why I choose Reinforcement Learning, also referred as RL. I will explain more details in the future posts. For now, I am going with the high-level ideas so that you could understand what will be taking place.
Step 1: Make computer ‘see’ what we see
Since we are using screenshot approach, a lot of data are not directly provided to us. That’s why it’s necessary to analyze the screenshots and extract the information. Here is the list of information we will need:
1 . The player’s health. We will need this for the computer to identify actions that are dangerous. The tricky part is to convert the health bar to a numeric value aka the remaining HP ratio.

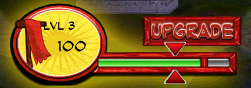
2 . The level progress. This contains a numeric value that increases each time an enemy is defeated. Our goal is achieved once it reaches 100%. Therefore, this is also a very important value for the computer to learn.

3 . The leadership cost, for deploying allies. We will include this value and hoping that computer will learn strategies to deploy units.
4 . The allies and skill’s cooldown. Again, we include these in the hope that computer will be able to learn some strategies. We will be applying computer graphics to determine the cooldown value.


5 . Indicate whether the game is in battle mode. To avoid collecting unwanted data, one thing we need to do is to make sure we only start training during battle mode. One typical approach is to observe for a particular UI element that only and always appears in battle mode. For this purpose, the ‘pause’ button is a great choice.

6 . The screenshot of the battlefield. This is perhaps the most important data we are going to feed to computer. There are two general ways to go with this. The harder way is to train an image recognition model that can identify all units in the screenshot. We want information like location, is it attacking, is it dead… The easier way is to just include the screenshots as part of the training so that you won’t have to worry about everything else. If you go with the harder way, you will have more emphasis on the details and computer might learn better. However, in this tutorial I will just walk you through the easier way for simplicity. I might teach you the harder way in other games.

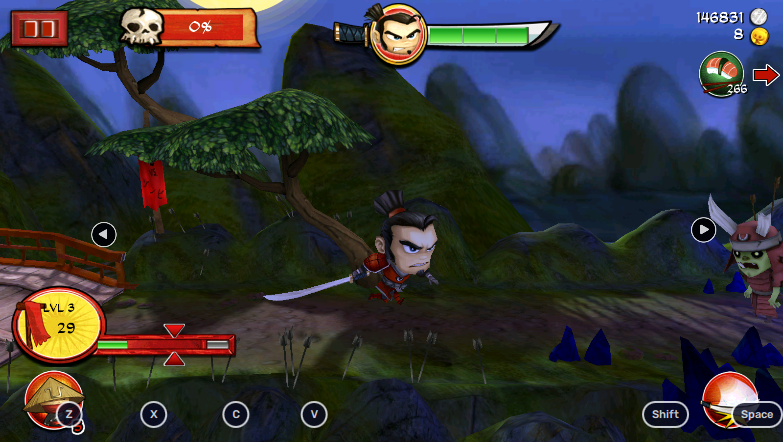
🤓 FYI, this is an example of battlefield screenshot we will be feeding to the model.
Note: I have omitted game currencies (coins and glu credits) because I found out that they are increased on enemy kill, not from the coins that your character obtains, so it’s meaningless to keep track of them. Therefore, don’t including them even if you wanted the model to learn picking up coins. It won’t work! I have also omitted using items for simplicity. Feel free to modify the program once you have completed the series!
Step 2: Design what computer can do
The next step is to design the possible actions computer can do. In the battle mode, the following image shows all actions we will need, circled in yellow color.
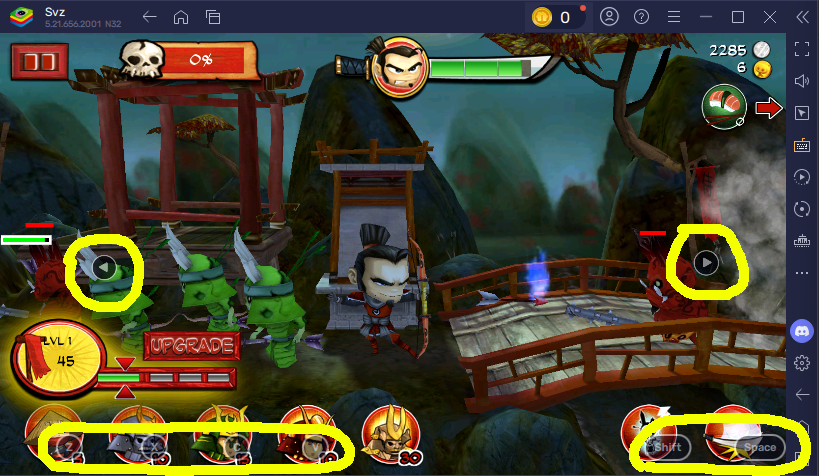
We will be using Bluestacks’s control support to further simplify things. This means that we will be simulating keyboard interactions to trigger actions. Pressing left and right arrow key will move our character (Samurai). Pressing z, x, c, v for deploying units (unfortunately it’s missing a unit but shouldn’t be a big deal!) Pressing shift and space for casting skills.
There are also some other UIs we will be dealing with but don’t worry I will be guiding you through them!
Step 3: Make computer ‘smart’
This is the step of machine learning. This very high level idea is to make computer play the game and learn. Remember in step 1 we have feed it with so many data? We are hoping that it can build some connections between them. For that to happen, we will also need a way to measure whether some actions are good in a given situation. This is often called as ‘rewards’.
If something good happen we give it a higher reward, we give a lower reward (or even a negative reward) if something bad happens. How to define what is good and what is bad, you ask? This is easy after we have the data: if we want to keep the player’s hp high, we will award high hp and punish low hp. Since we have the numeric value for hp, we can just multiply it with some factor and add that to the reward.
After training for long enough, we should see the computer to actually pick better actions.
Step 4: Check if it has really became ‘smart’
Sometimes it’s difficult to verify if the computer is learning. I would say that human observations are enough in our case. If you play this game enough, you will know what actions are good and what are bad. This often apply to most of the other games as well. However, it is important to bear in mind that computers don’t think like humans do, so it might also be obscure to draw conclusions!
If you really want to, you can write another program that takes totally random actions. Pick a testing level and let your model and random program play the same level and see if the model is performing much better than the other.
In this tutorial I won’t be providing code for programmatically tests. However, I might include my own observations so that you could reference.
🎉 Well, that’s all I wanted to say today. I hope you like this tutorial. Stay tunned for more!
🍯 Happy Coding 🍯
This article, completely original, is copyrighted by its author, me. Please do not reproduce it.
本文为原创作品,作者 Kolyn090 拥有其著作权,受法律保护。严禁复制、转载、仿冒或以任何形式使用。