

Create a website like Cyber Spatula, as an Absolute Beginner.
This article, completely original, is copyrighted by its author, me. Please do not reproduce it.
本文为原创作品,作者 Kolyn090 拥有其著作权,受法律保护。严禁复制、转载、仿冒或以任何形式使用。
Category: Tutorial
Prerequisite: Know how to use a computer and perform online searches
Hello, there. Ever wondered how to build a blogging website like the one you are seeing now? If so, you have came to the right place! Let me tell you a secret: it only took me two days from zero knowledge about web hosting to keep it running. Wanna know how to do that? Keep reading and learn!
The first thing
This site uses GitHub Pages. You should be aware that GitHub Pages are mainly used for writing blogs or project wikis. These pages are static, meaning they display the same content to every user. If your goal is to build a dynamic page website (content change based on user actions or data retrieval from database), you will need to avoid using GitHub Pages.
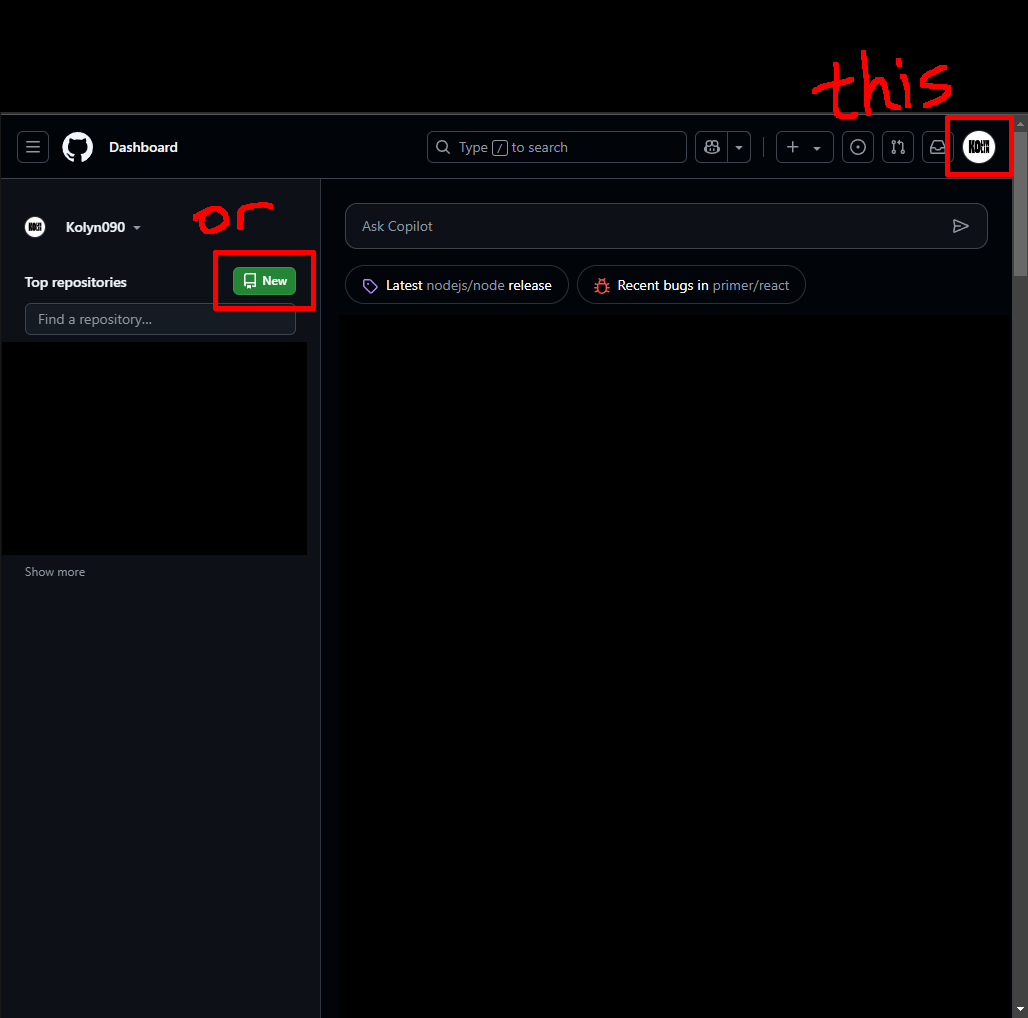
If you already know how to use git and GitHub, you can jump to:
If you don’t have Ruby installed:
Table of Contents
- Download an IDE
- Clone this GitHub repo
- Install Ruby
- Running jekyll locally
- Configure GitHub with Git
- Create a GitHub Pages repo
- Edit jekyll posts
- Using Cyber Spatula jekyll customization
- Maintain your project with Git
- Troubleshoot
Use other tools for more guidance
Let’s face it, you are going to encounter many problems and so did I when I first started this project. That’s why I highly recommend using AI tools like ChatGPT to suggest possible fixes for you. In this article I will be teaching you what I know about GitHub websites.
Getting the website running
Step 1
In this tutorial I am going to assume you have no background knowledge regarding programming. So the first step will be downloading an IDE so that you can view the files better. IDE stands for Integrated Development Environment. It’s a software that has tools needed for software development in one place. It’s OK if you don’t understand what I am saying. You’ll do better once you try it out yourself. Different programmers might have different IDE preferences. I, for one, use Visual Studio Code the most often. It is also currently what I’m using to write this article.
If you don’t have a specific preference, go ahead and download Visual Studio Code.
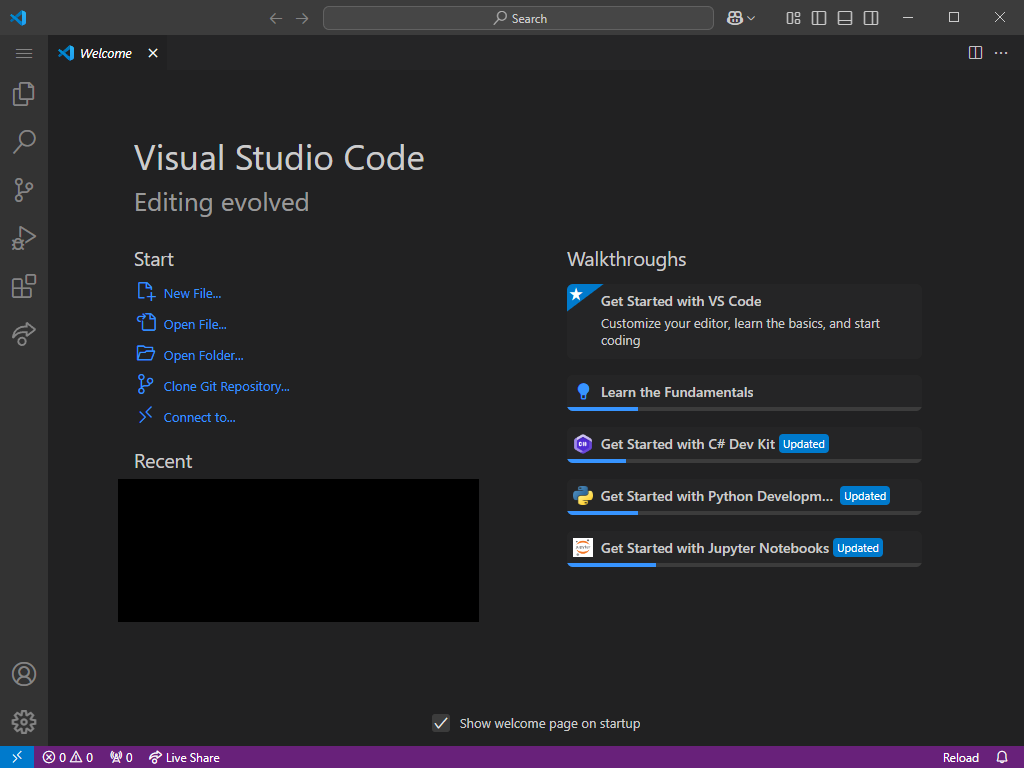
After you have successfully install an IDE, open it. I will use vscode (Visual Studio Code) as example.
Here is the welcome page of vscode. This is Windows system, if you are using a different operating system like MacOS the page layout might be slightly different.
Step 2
Wouldn’t it be so much better if you could get familiar with GitHub Pages while learning how to use an IDE?
Now I will be using this project as an example. First, create a new folder somewhere in your computer. Next, you will want to open this folder in vscode.
Open vscode, go to Settings, select File -> Open Folder… If you don’t know how to do this, you can try the hot-key instead: Ctrl + K, Ctrl + O. That will also do Open Folder for you. Next, locate your folder and open it.
After you have done that, you will be prompted with a greeting window like below.
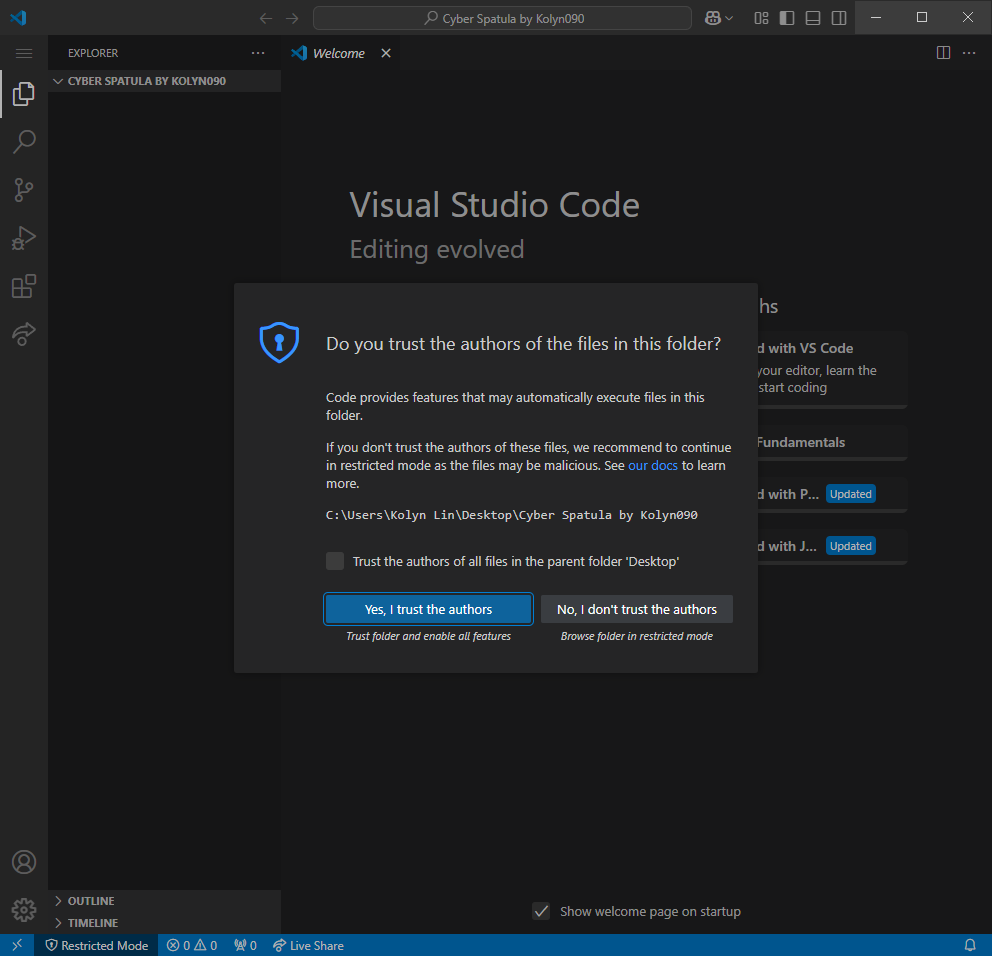
Click ‘Yes, I trust the authors’ to continue.
Next I want you to open a terminal within vscode. Go to Settings, select Terminal -> New Terminal. Its hotkey is Ctrl + Shift + `. The last key is called a backtick.
You should see something like this
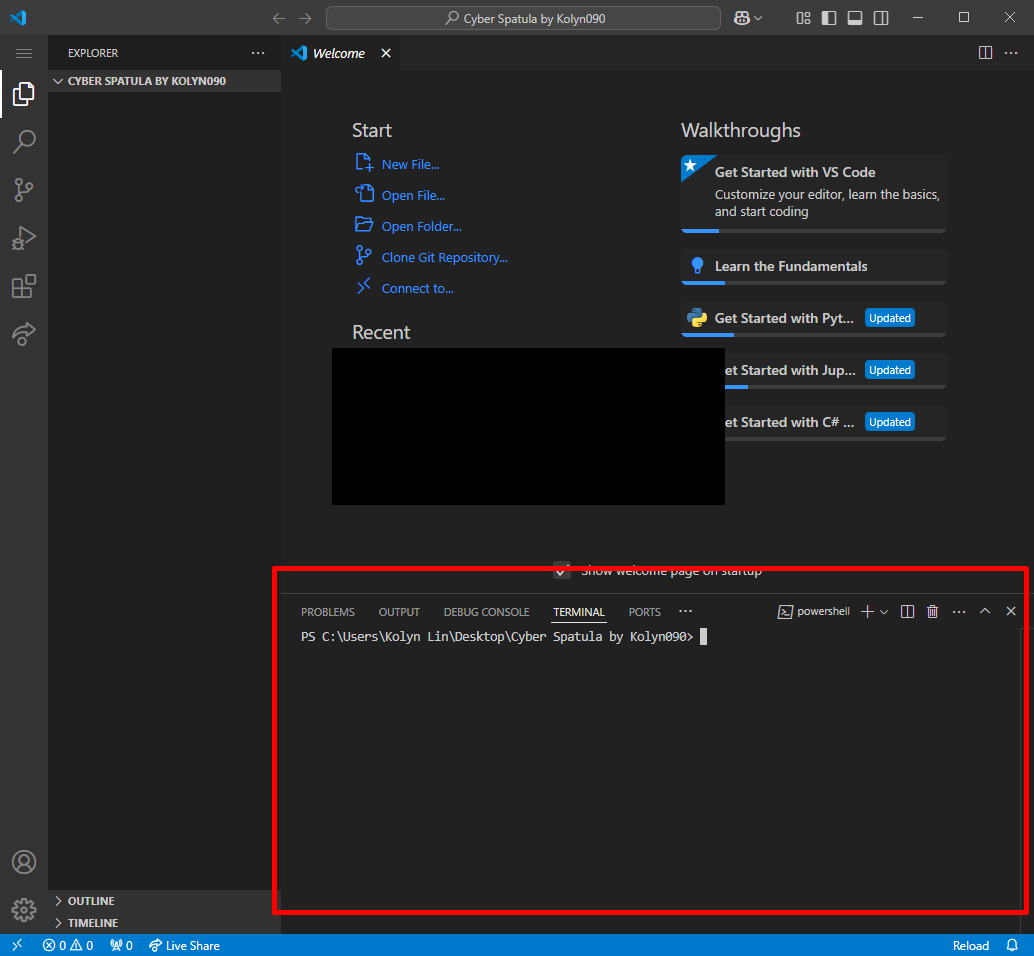
Within this panel, you can enter commands and the computer will do some works based on the command you typed in. Now we will want to clone a repository. This essentially means that you will download a folder from the internet. In this case, we want to clone this repository and we can achieve this through the terminal.
In the terminal, type this and hit enter on your keyboard
git clone https://github.com/cyberspatula/cyberspatula.github.io.git
You should see a new folder being created in the folder you created.
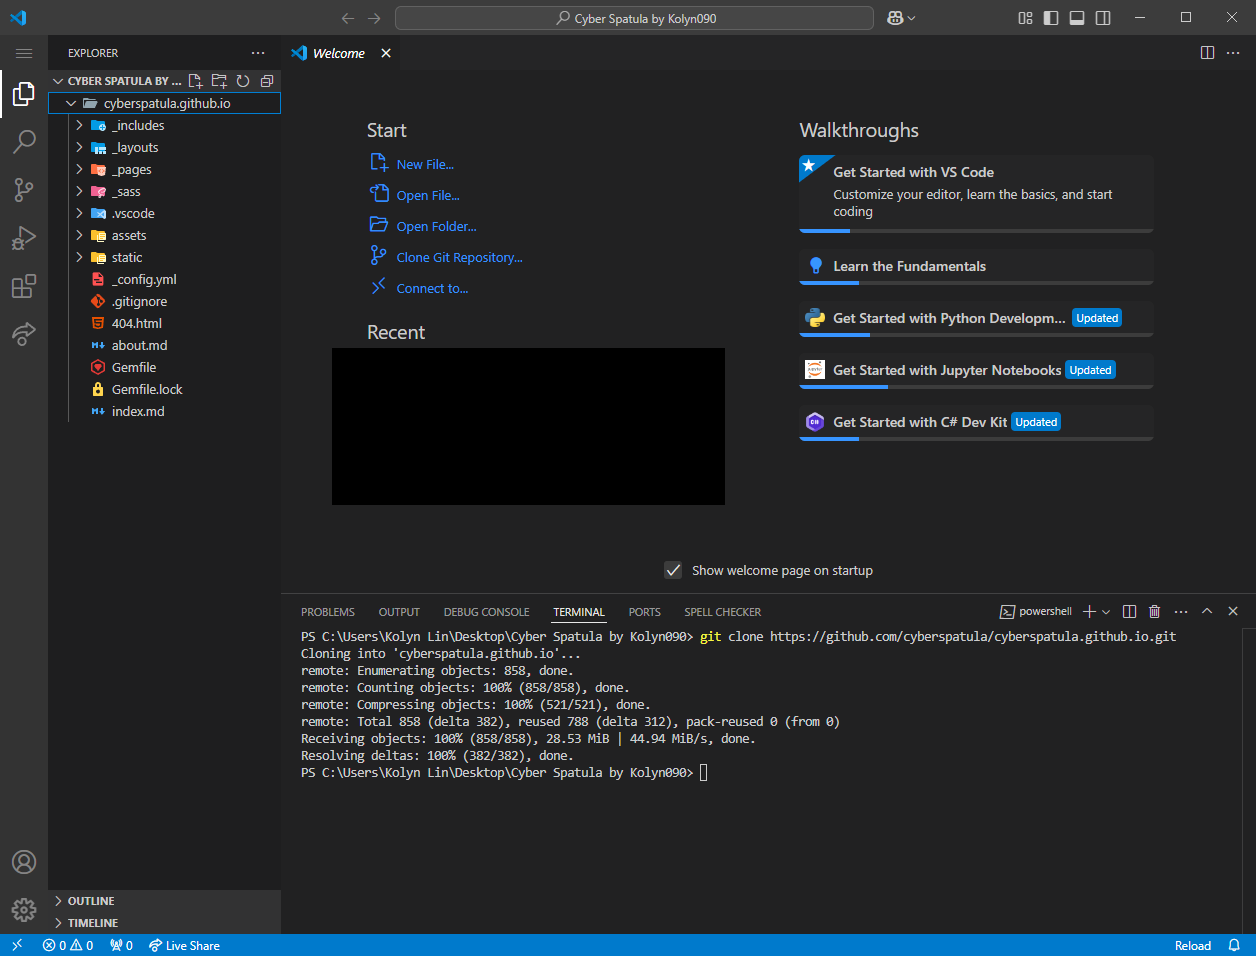
📍 Troubleshoot: If you see errors like git has not been installed in your computer, you should go to the official git website and download git from there. Follow the instructions and you should be good.
Now check the files in cyberspatula.github.io, see if you can make sense what each of them is supposed to be doing. The files are located on the left side of the window of vscode. You can expand a folder by clicking on it. Click a file to view it in vscode.
👨🔬 Challenge: try if you can find the file that contains contents in this page. (Hint: use ‘file search’ in vscode)
I have already filled cyberspatula.github.io with a lot of things. You should be able to use it by running a local server. It essentially means that you will be able to open a website and your computer is going to be its server. Other people won’t be able to see this website.
You will have to type in several commands this time. If you are on Mac, you might need to do some extra works in order to use Ruby. It’s the programming language that Jekyll uses, and we will be using Jekyll to format our website.
You should check if you already have Ruby. Type this command in the terminal and hit enter on your keyboard.
ruby -vInstall Ruby
On Windows, if you don’t have Ruby, you should download it from here and follow the instructions and you should be good.
On Mac, you are guaranteed to have Ruby. BUT, your Ruby version is likely to be old, like 2.6 something. We want it to be at least 3.0 above. This problem cannot be resolved by just updating Ruby because your MacOS is actually relying on it. One way to solve this is by using something called chruby.
1 . Install chruby via Homebrew. That means you should type the following in the terminal and hit enter on your keyboard.
brew install chruby2 . The other way to install it is via the source code. Try this way if the above didn’t work. Clone this repository
git clone https://github.com/postmodern/chruby.git- Go to the
chrubyfolder by entering
cd chruby🤓 cd means change directory.
- Run the installation script
sudo make install3 . Install ruby-install. Again, it’s possible to install this via Homebrew.
brew install ruby-install4 . Or you can do it manually if the above didn’t work.
git clone https://github.com/postmodern/ruby-install.git
cd ruby-install
sudo make install
5 . The next step could be a little difficult for you if you have never had programming experience before. In this step you will want to use a text editor like nano or vim. It’s not important which one you choose. In this case I will choose vim. You can use them by enter the command and hit enter on your keyboard. This will open a text editor in terminal.
vim ~./zshrc- Replace with nano if you want to use nano. Replace with
~./bashrcif you are using bash shell.
📍 It’s going to be a little tricky to use vim text editor. First of all, you need to enter the insertion mode by typing i on your keyboard. Then you start typing in the editor. After you are done, hit Esc on your keyboard. Then enter :wq to save the changes and exit from vim.
6 . Enter the following text via vim, then save and exit from it.
source /usr/local/share/chruby/chruby.sh
source /usr/local/share/chruby/auto.sh
7 . After you are back in the terminal. Enter the following and hit enter on your keyboard.
source ~./zshrc- Replace with
~./bashrcif you are using bash shell.
8 . Enter the following and hit enter on your keyboard.
ruby-install ruby 3.1.19 . Use chruby to switch your current ruby version to 3.1.1
chruby ruby-3.1.110 . Verify you have successfully switched the Ruby version
ruby -vYou should see something like ruby 3.1.1. Be sure to perform online searches or inquiry ChatGPT if you encounter any problems not covered here.
Running jekyll locally
Now, after you have installed Ruby. I want you to go back to cyberspatula.github.io. If you are lost where you are, you can do Open Folder again in vscode. Open the terminal again and enter this command and hit enter on your keyboard.
bundle installThis installs all dependencies in cyberspatula.github.io.
Next, run this command to start the local server.
bundle exec jekyll serveIf the above one didn’t work, try this instead
jekyll serveYou can check whether it worked or not by typing http://127.0.0.1:4000/ in a web browser like Safari, Google Chrome…
🎉 That wasn’t so bad, huh?
Step 3
In the next step I will be teaching you how to start a fresh new Jekyll setup like the one use in Cyber Spatula. Then I will discuss what each component in Jekyll does, in the manner that assuming you have no programming knowledge.
GitHub account
Since we are going to host the web page on GitHub Pages, you are going to need a GitHub account. Register one if you don’t have it.
1 . Connect git with your GitHub account. In terminal, set your Git username with
git config --global user.name "Username"📍 Replace “Username” with your username!
- Confirm the Git username has been set correctly.
git config --global user.name- You should see your username being printed.
Username2 . The other thing you will want to do is to set your Git email.
git config --global user.email "Your email"- Confirm the Git email has been set correctly.
git config --global user.email- You should see your email address being printed.
Your email3 . The next thing you will want to do is to set up GitHub Authentication. This step is a little complicated. I recommend you to watch and follow this video.
Now you have set up git and GitHub account, the next thing is to create your own repository (repo). A repository stores your code and assets remotely in GitHub’s database. It can either be public or private. A public repository can be seen by all GitHub users while a private one can only be seen by yourself. Other developers can clone or fork your public repositories.
[Go to top]
Create a GitHub Pages repo
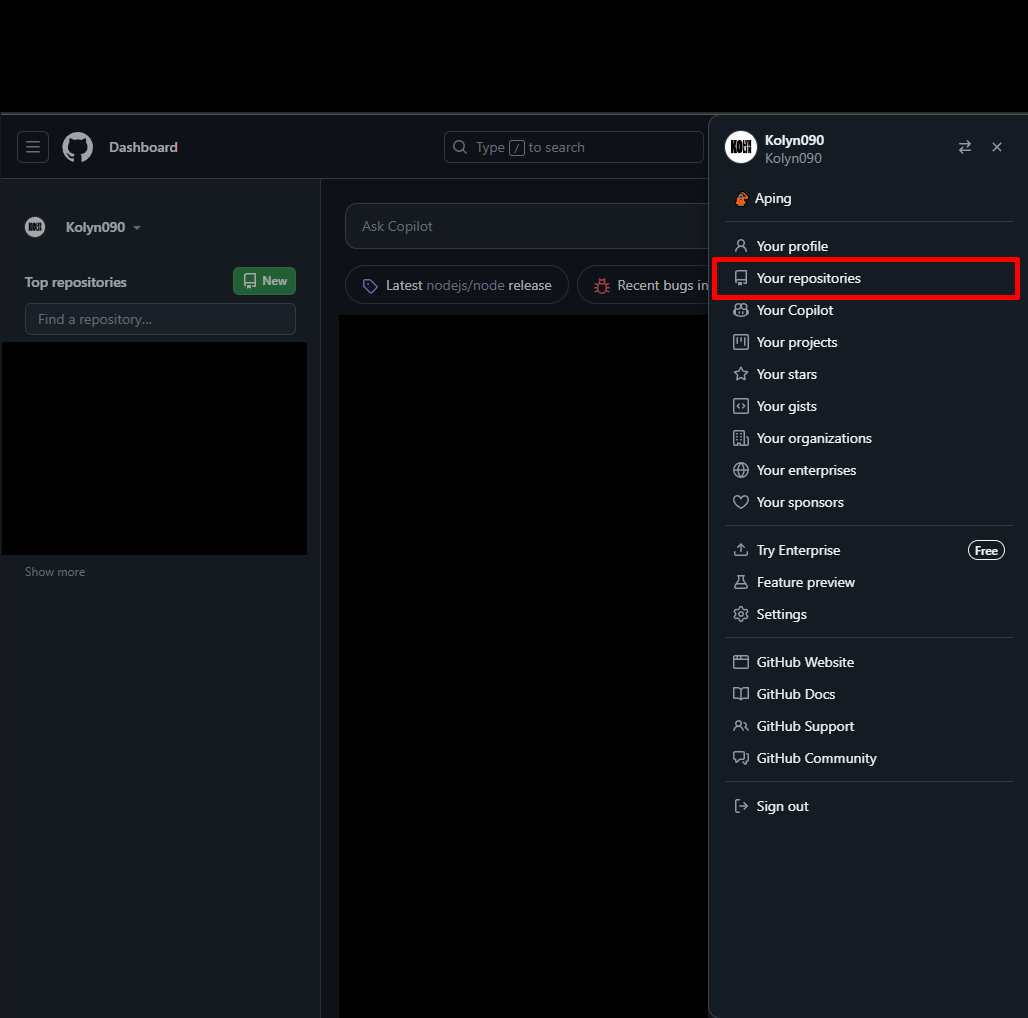
Assuming this is the first time you are creating a GitHub repository, go to GitHub and follow these steps.
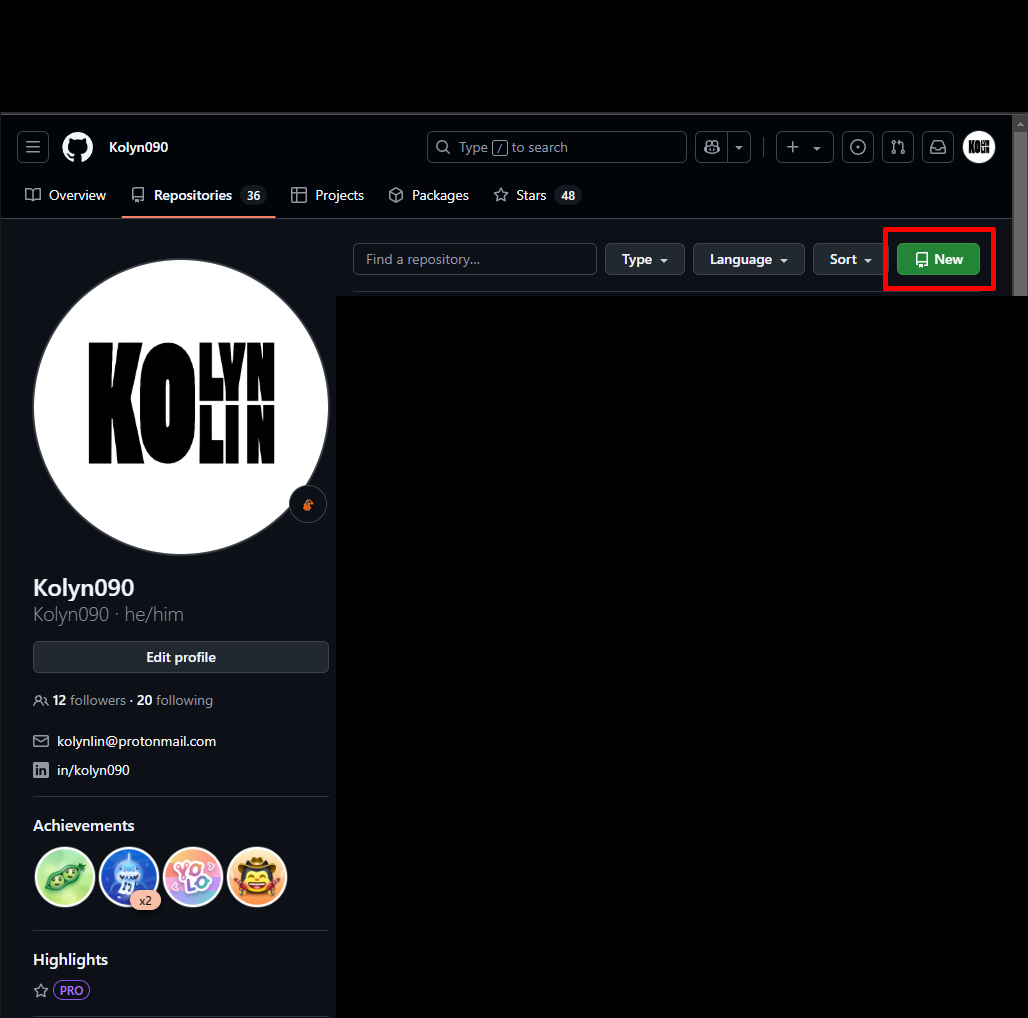
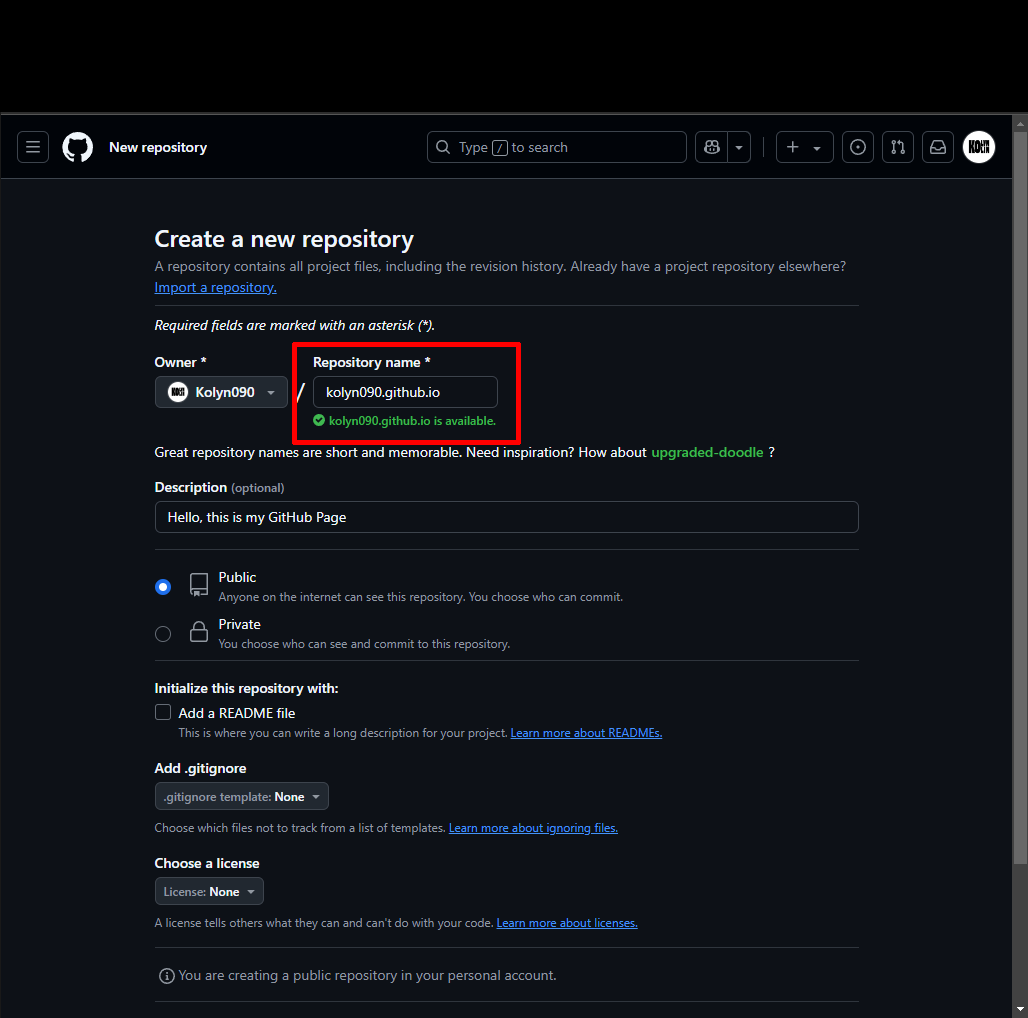
📍 Very important: the Repository name must be yourusername.github.io. Replace yourusername with your actual username and must be lowercased. In a normal repository you don’t have to follow the format.
You can also use GitHub Organizations instead of your own account to create GitHub Pages. Naming follows the same format.
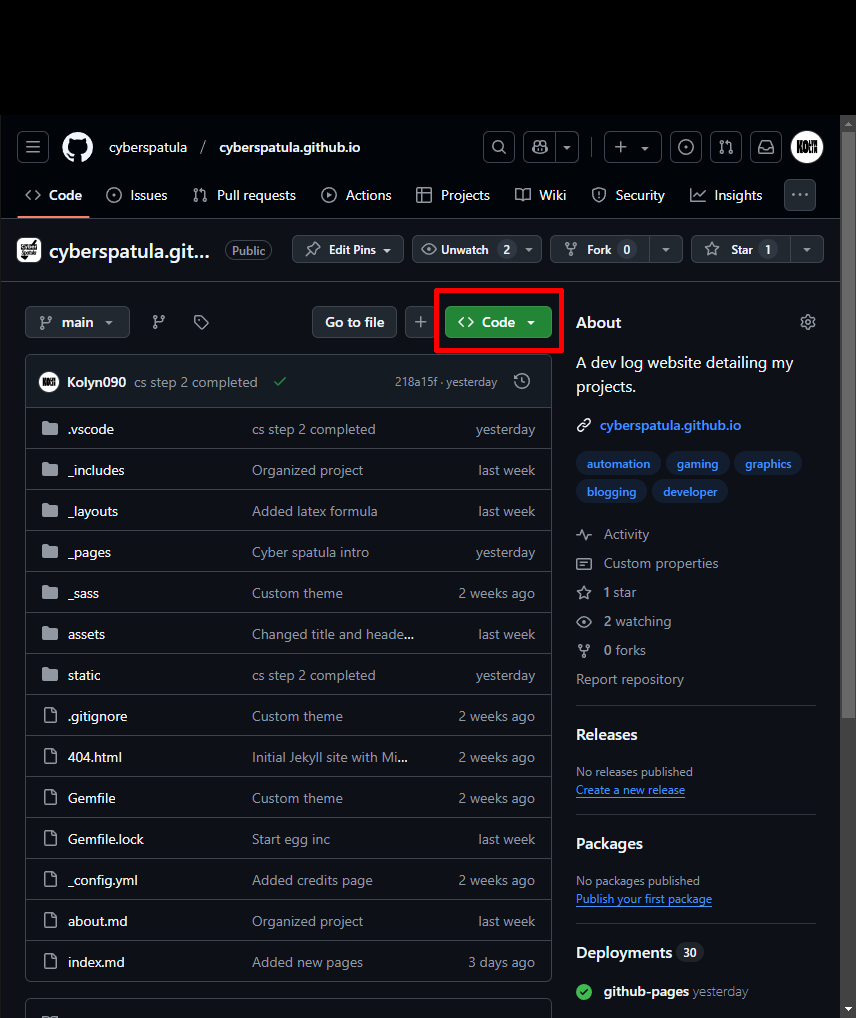
After you have created the repository, you will go to the page of your repository. Here I am using cyberspatula.github.io as example. Click ‘Code’.
Copy your repository URL.
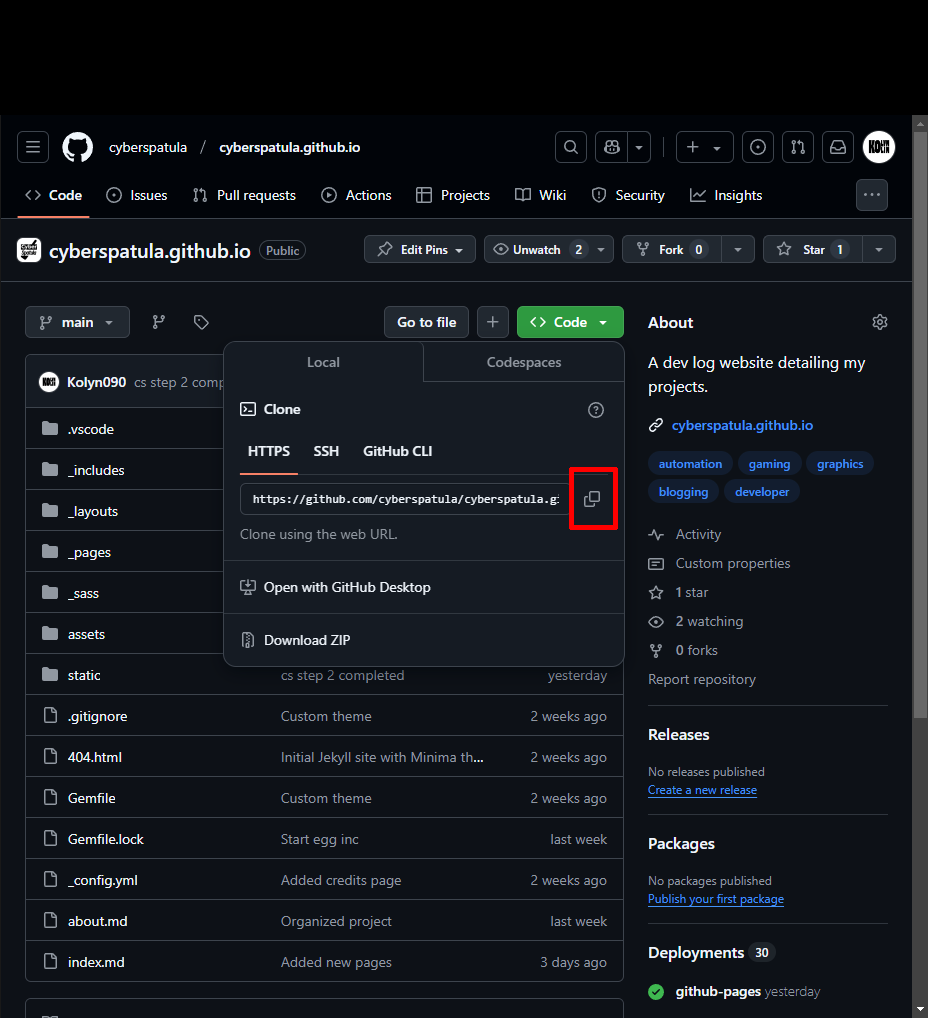
Now the next thing is something you have already done in step 2. Create a new folder on your computer, open it on vscode, and type the following command in terminal and hit enter on your keyboard.
git clone https://github.com/cyberspatula/cyberspatula.github.io.gitRemember, you should use your own repository URL here.
Used cd to change directory to your repository folder.
cd cyberspatula.github.io.gitThis should be the last part of your repository URL.
Now enter the following in terminal and hit enter on your keyboard.
jekyll new . --forceYou should see the following files generated. This is the bare-bone form of Jekyll.
Next, run this command in terminal.
bundle installYou should see something like
Bundle complete! 7 Gemfile dependencies, 38 gems now installed.
Use `bundle info [gemname]` to see where a bundled gem is installed.
Next let’s take a look at _config.yml, by default it looks like:
title: Your awesome title
email: your-email@example.com
description: >- # this means to ignore newlines until "baseurl:"
  Write an awesome description for your new site here. You can edit this
  line in _config.yml. It will appear in your document head meta (for
  Google search results) and in your feed.xml site description.
baseurl: "" # the subpath of your site, e.g. /blog
url: "" # the base hostname & protocol for your site, e.g. http://example.com
twitter_username: jekyllrb
github_username:  jekyll

# Build settings
theme: minima
plugins:
  - jekyll-feed
You can configure your site’s settings in _config.yml. Each time you modify this file you will have to open the local server again to apply the changes. To close the local server, press Ctrl + C in terminal. To open the local server, type the following and hit enter on your keyboard.
bundle exec jekyll serveUse this instead if the above didn’t work.
jekyll serve
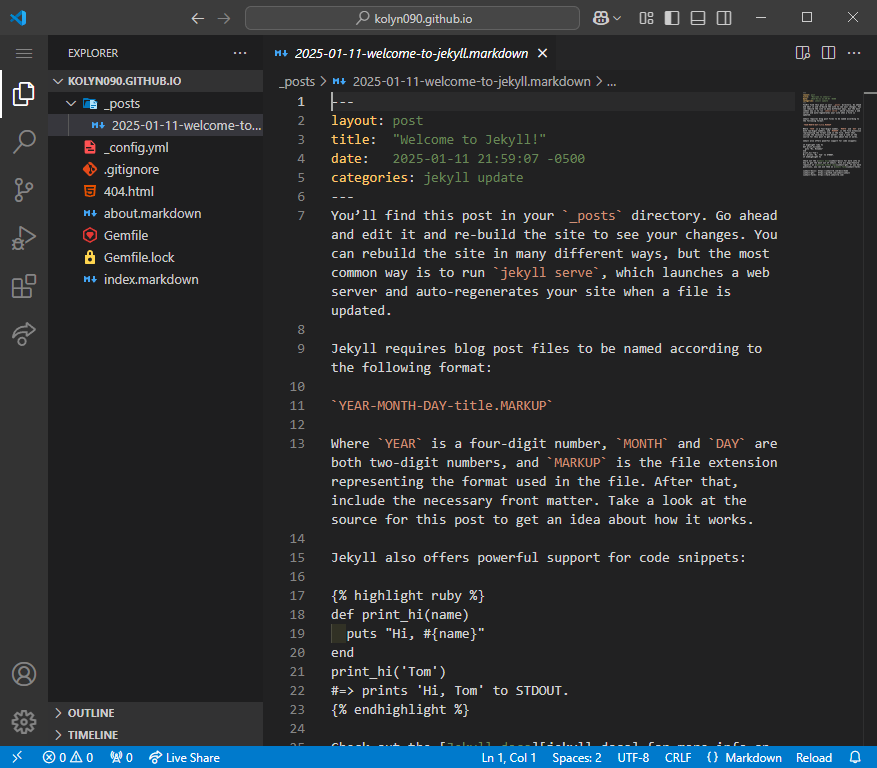
Type http://127.0.0.1:4000/ in a web browser and you will see a greeting page like this.
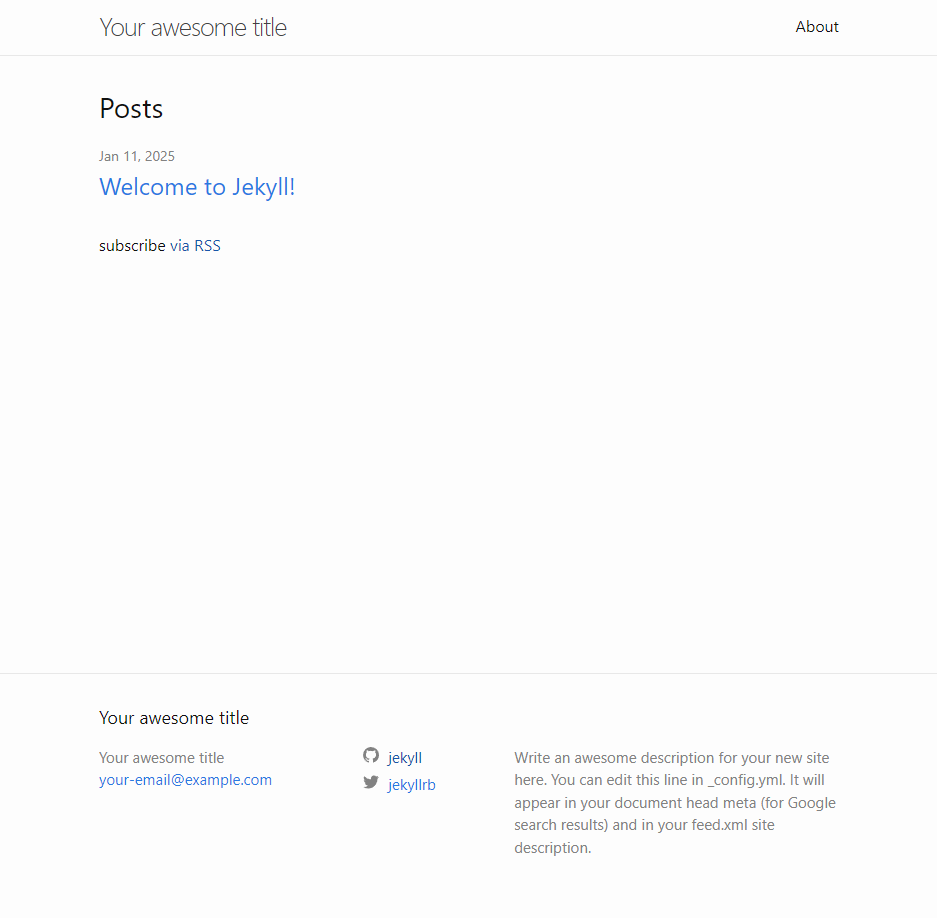
Open post ‘Welcome to Jekyll!’
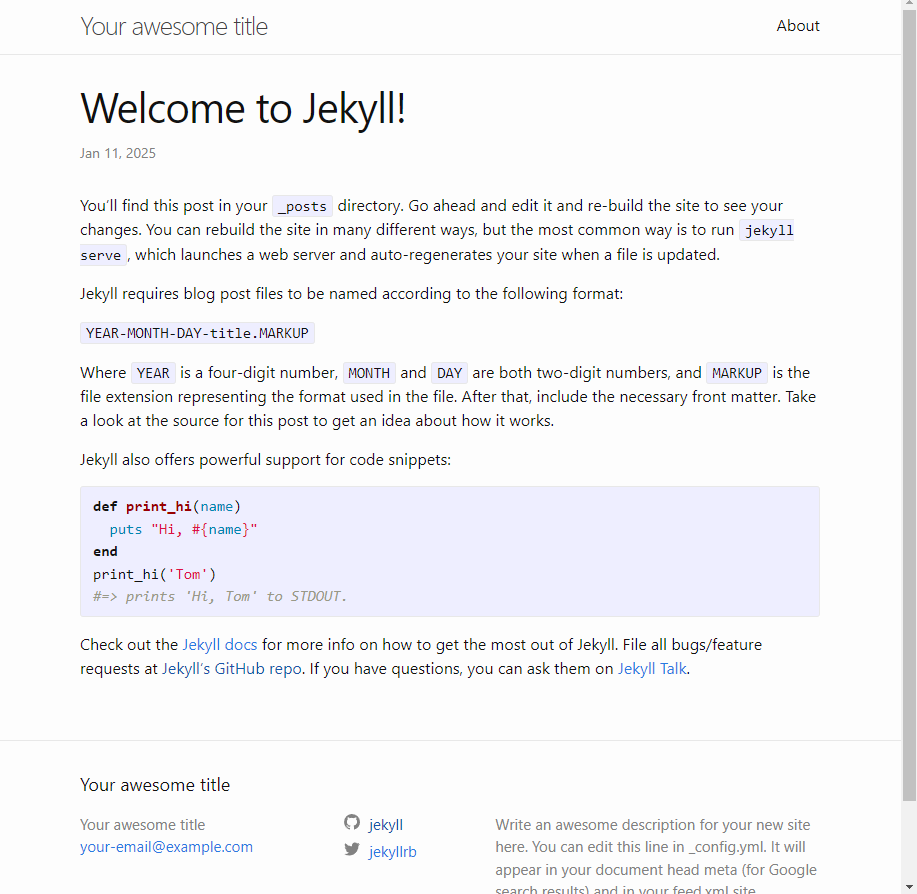
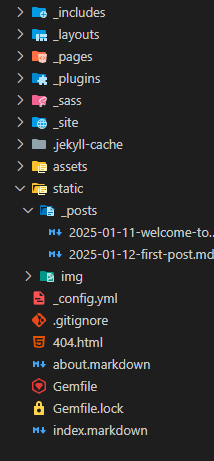
👨🔬 Observe _posts/welcome-to-jekyll.markdown in your repository folder. See if you can figure out its connections with this page by yourself.
Now let’s take a look at the files in the hands.
-
.gitignore: This file is not jekyll specific and it’s for git. File names put inside will be ignored by git commands. -
404.html: This is a web page showing that the page is not found. -
about.markdown: This is a jekyll post that shows about information. -
Gemfile: Manage and specify the dependencies required for the project. Normally you don’t modify this. -
Gemfile.lock: This file is automatically generated by the system. -
index.markdown: This is the home jekyll post. The first thing shown on a jekyll webpage. -
_config.yml: You can configure the site’s settings in this file. Each time after you modify this file you need to re-host the local server to apply the changes. -
_posts: The place where you store the jekyll posts (.markdown). By the way, you can use.mdextension as well. It is important to note that all post names should start with a date. Like2025-01-12-first-post.md. You can create folders inside_postsand store posts in them. Jekyll will automatically locate them. -
.jekyll-cache: Cache folder for jekyll.
Next, let’s create our first post.
Under _posts, create 2025-01-12-first-post.md. Inside the created file, put
---
layout: post
title: "Our first post"
date: 2025-01-12 12:00:00 -0500
categories: log
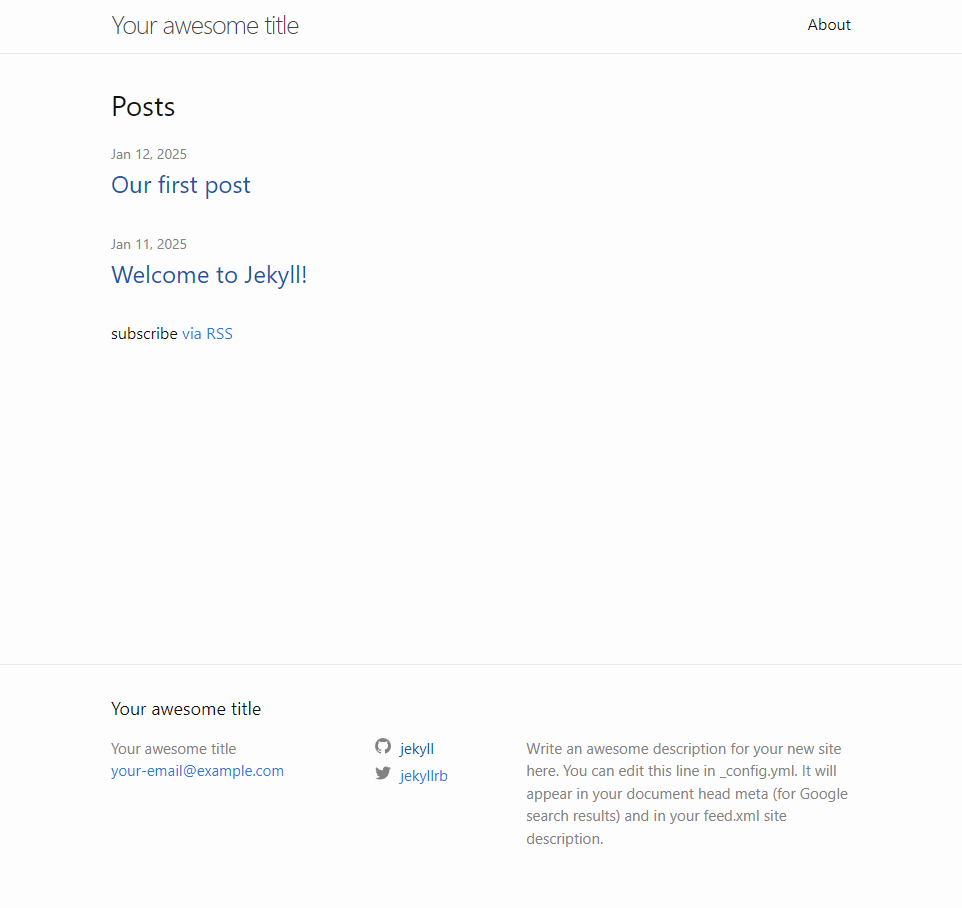
---Load the webpage, you should see a new post added.
You can as an author for the post, like this:
---
author: Your Name
layout: post
title:  "Our first post"
date:   2025-01-12 12:00:00 -0500
categories: log
---
You should also add a link for your post so that you can reference it in other posts.
---
author: Your Name
layout: post
title:  "Our first post"
date:   2025-01-12 12:00:00 -0500
categories: log
permalink: /my-first-post/
---
Refresh the webpage, you should see your name next to the date and the website link becomes 127.0.0.1:4000/my-first-post/.
Edit jekyll posts
There is a lot you can do in a jekyll post. The most basic text is like this one you are seeing right now. Change your post to and refresh the webpage.
---
author: Your Name
layout: post
title:  "Our first post"
date:   2025-01-12 12:00:00 -0500
categories: log
permalink: /my-first-post/
---


This is basic text.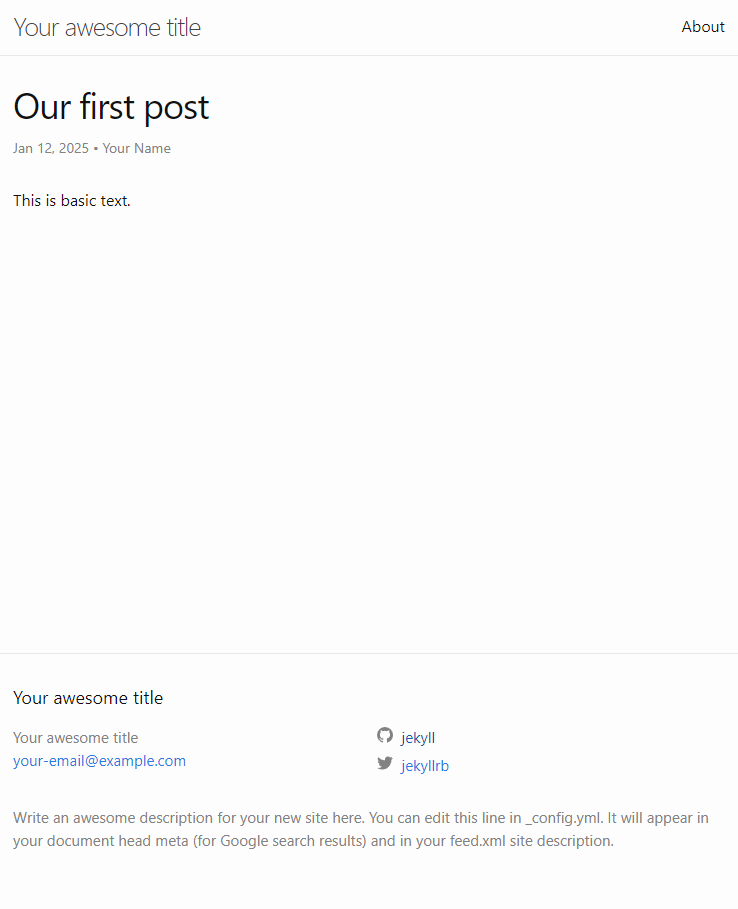
You can also add titles by adding the pound sign before the text. Here is the effect:
#### Big

### Big

## Big

# Big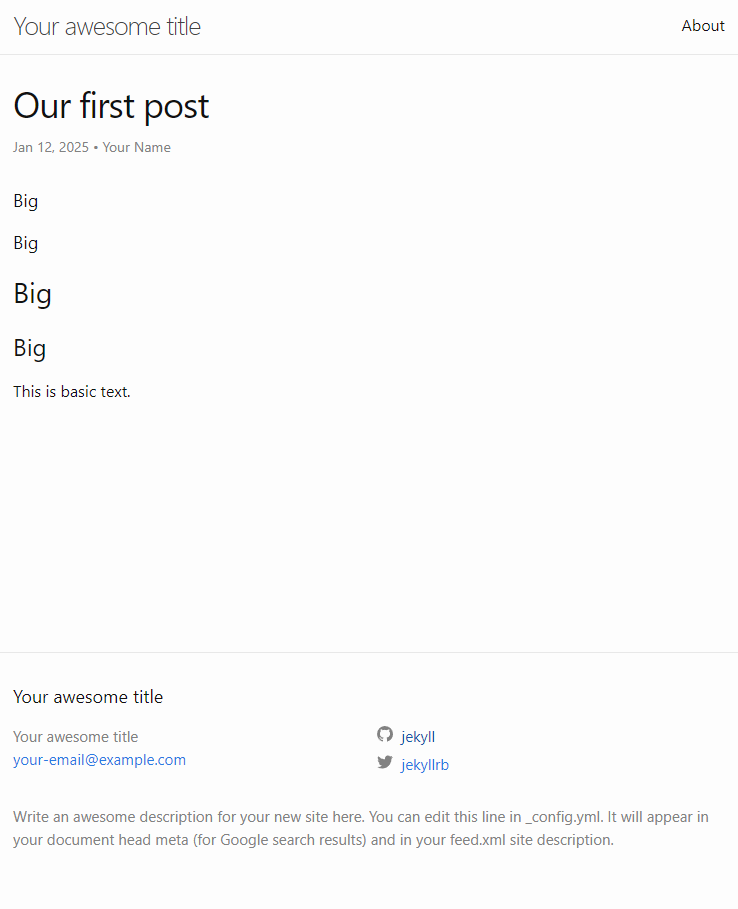
You can also bold the text by adding double asterisk symbols around it.
**Important**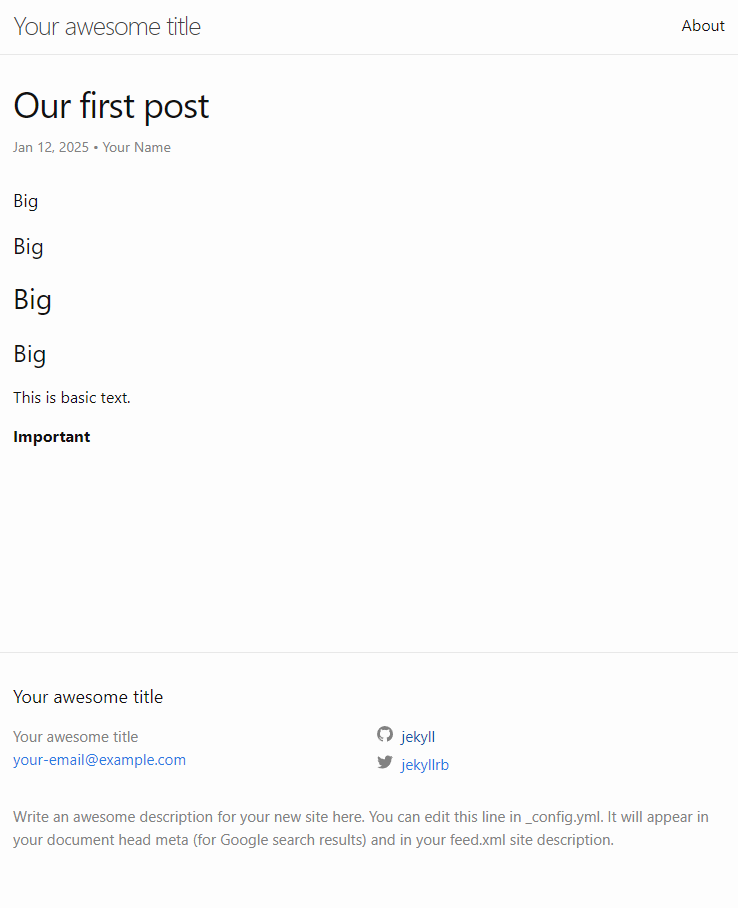
You can underscore the text by doing
<u>This is underscored text.</u>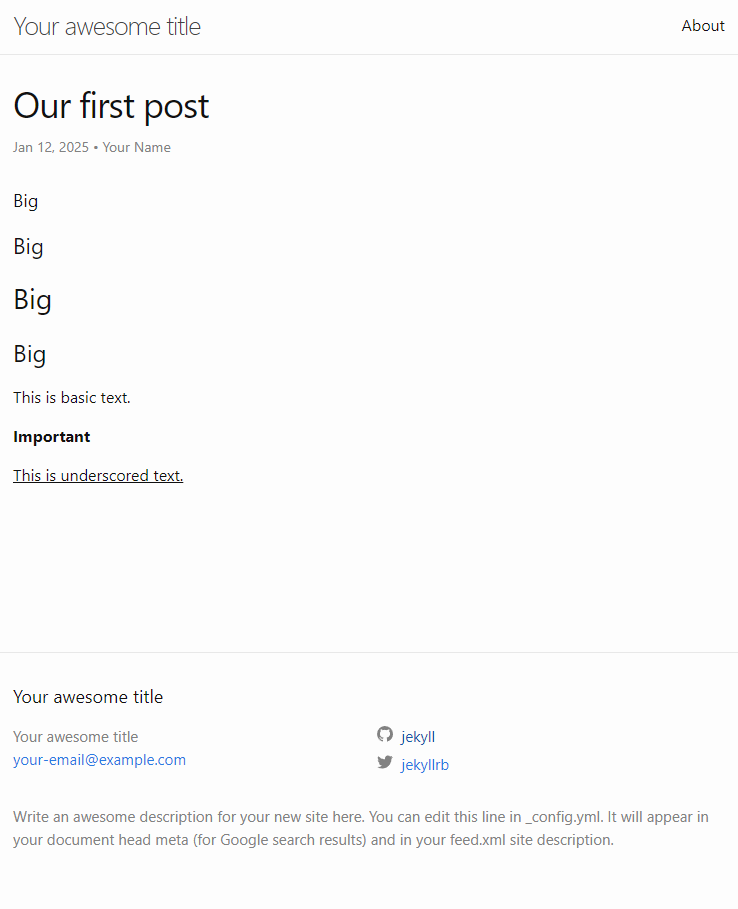
You can add a new line by writing this between lines
<br>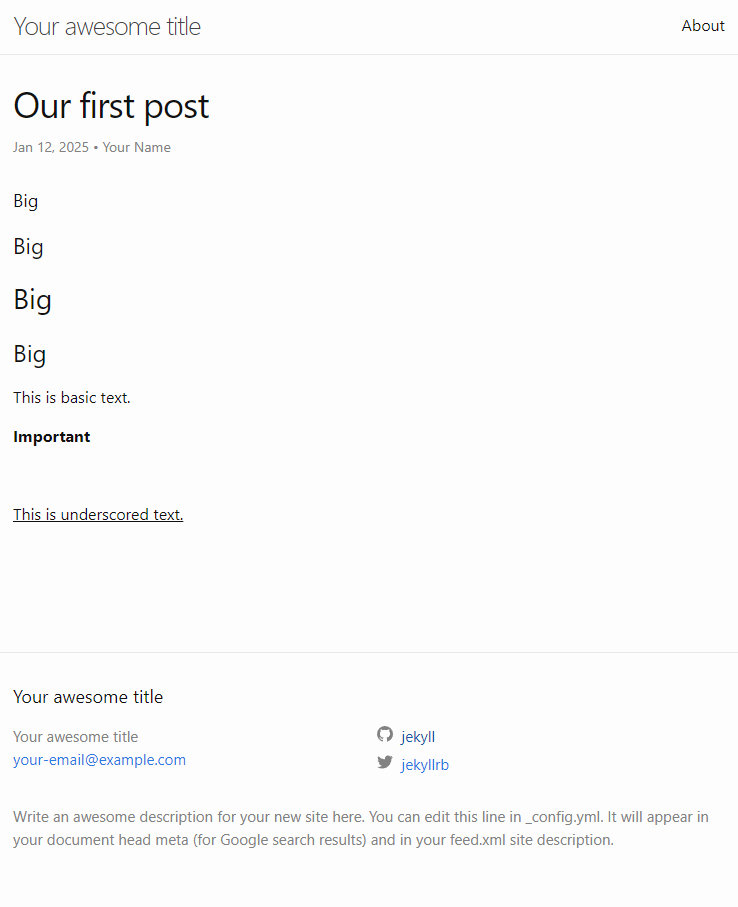
You can list things out by doing
Things to buy:
- potato
- milk
- banana
- avocado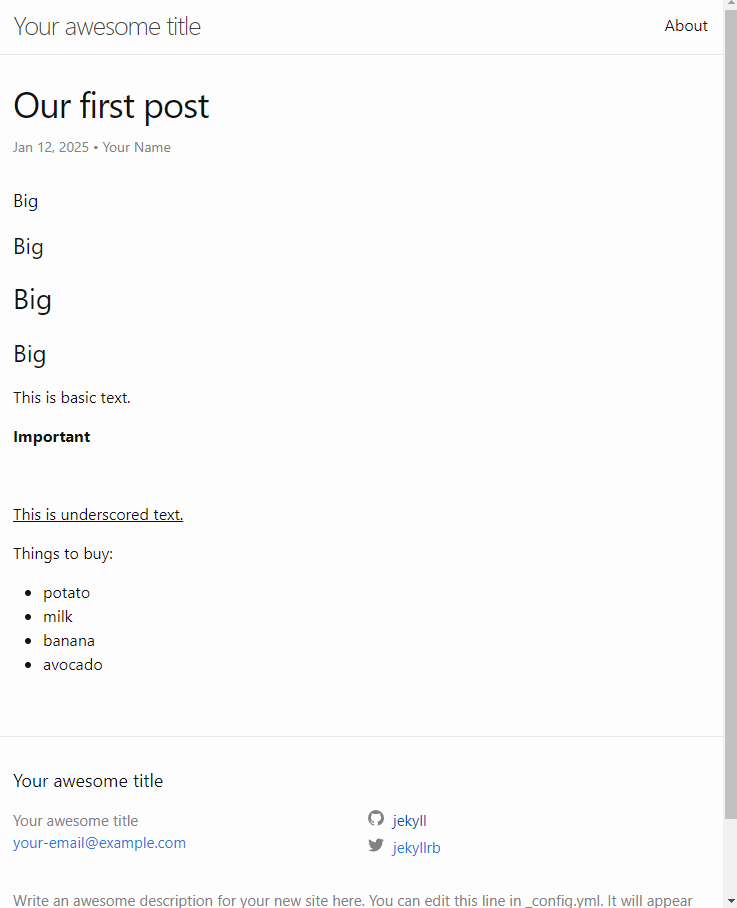
Numbered version
Things to prepare in order:
1. potato
2. milk
3. banana
4. avocado
Alphabetic version
Which is the best among them?
a. potato
b. milk
c. banana
d. avocado
However, sometimes I prefer this instead when the layout is broken.
Things to prepare in order:
1 . potato
2 . milk
3 . banana
4 . avocado
You can also add hyperlinks by doing
[Visit my blogging website](https://cyberspatula.github.io)You can also add link to your posts
[See my post](/my-first-post/)You can also add link to assets in this project. Make sure the file exists in the path.
You can add break lines by doing
---For programmers,
Use backtick to indicate code.
`int foo = 0`Add block of code
{% highlight java %}
public static int addNumbers(int a, int b) {
    return a + b;
}
{% endhighlight %}
These are the most common ways of writing I do in jekyll posts. But you can almost apply any markdown rules in jekyll. If you are happy with the current situation. You can skip Step 4.
[Go to top]
Step 4
To enable customizations, you will have to learn how to write html and css. You can learn both of them through the help of ChatGPT.
There are some files you will have to add to your project. You can either copy the modified versions from cyberspatula.github.io or start out fresh by running this in terminal
jekyll new-theme minimaYou should see a new folder called minima. This means that you are using this theme. There are other themes you can use as well. Here is a website for jekyll themes.
Now I will be proceeding using the modified version approach. You can still continue reading even if you have chosen to start out fresh, but note that if you hear any file you don’t have that means it’s in cyberspatula.github.io.
In case you didn’t follow Step 2, here is the repository.
git clone https://github.com/cyberspatula/cyberspatula.github.io.gitFrom cyberspatula.github.io, copy the following folders to your project.
- _includes
- _layouts
- _sass
- assets
Next, create the following folders.
- _pages
- _plugins
- static
Now inside static, do
- Move
_poststostatic - Create a folder
img
Lastly, copy _config.yml into your project.
After you have done above, our project structure should look very similar. Let’s take a look at their purposes before going any further.
- _includes: Contains page components of the site. The most important files are
footer.html,head.html, andheader.html. - _layouts: Contains format for pages. You can create template pages and assign them to your posts.
- _sass: Contains the theme files from jekyll. Normally you don’t modify files in this folder unless you want to change the default theme such as font and text color.
- assets: Currently contains a folder
cssthat has all styles of the site pages. You can try to write your own if you know how. To apply them you need to add them to the html tags, like
<div class="your-style">
  ...
</div>- _pages: Contains all specialized markdown pages for your posts.
- _plugins: Contains all customized plugins for jekyll, typically written with Ruby.
- static: You can put your assets here. Such as
imgfor images.
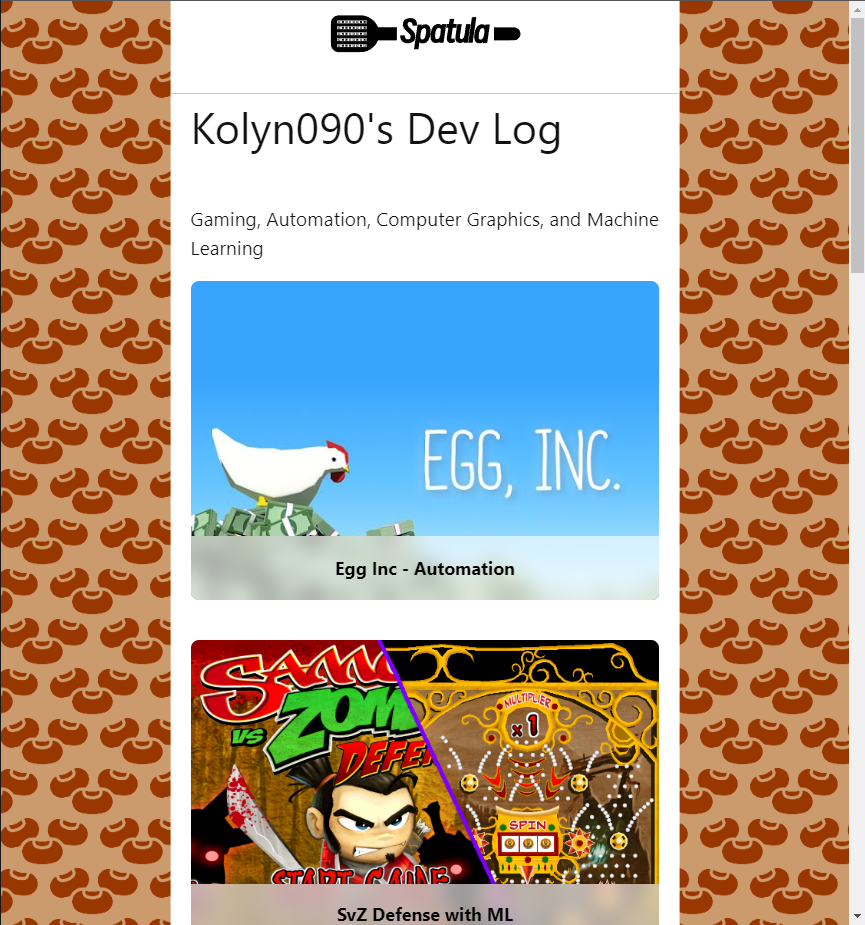
You can design your site in any way you wish it to be. In Cyber Spatula, the navigation and layout is designed to be simple for blogging.
In the homepage, readers can select the category which they might be interested in.
Then a list of articles within the selected category will be displayed.
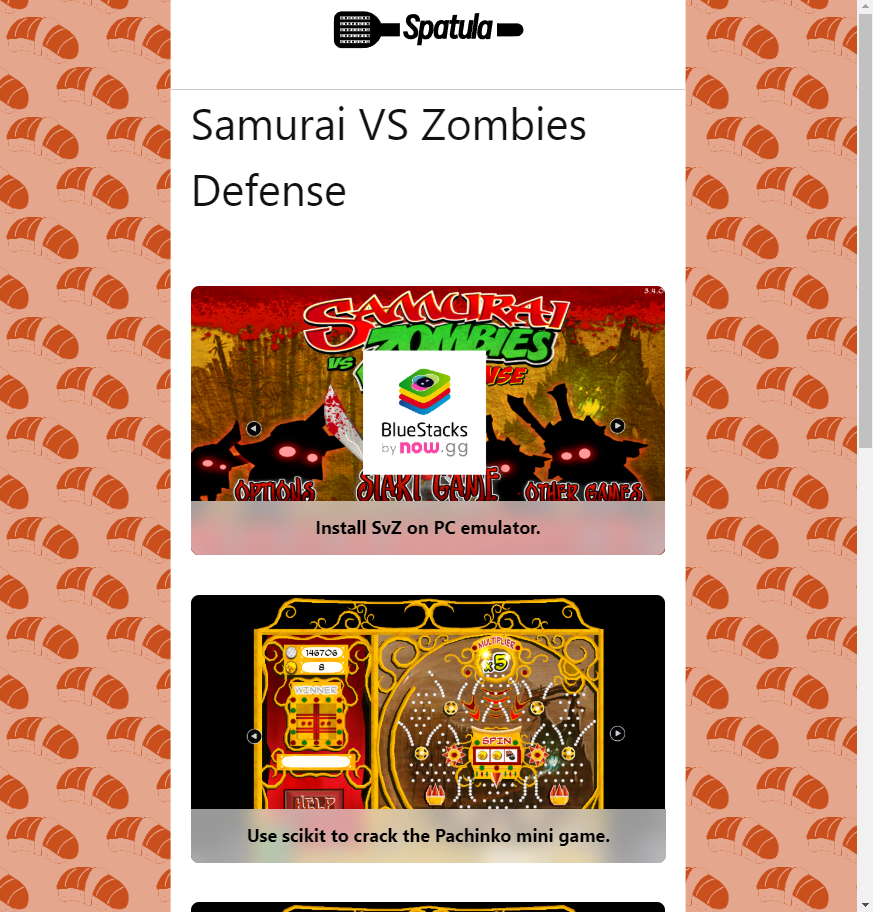
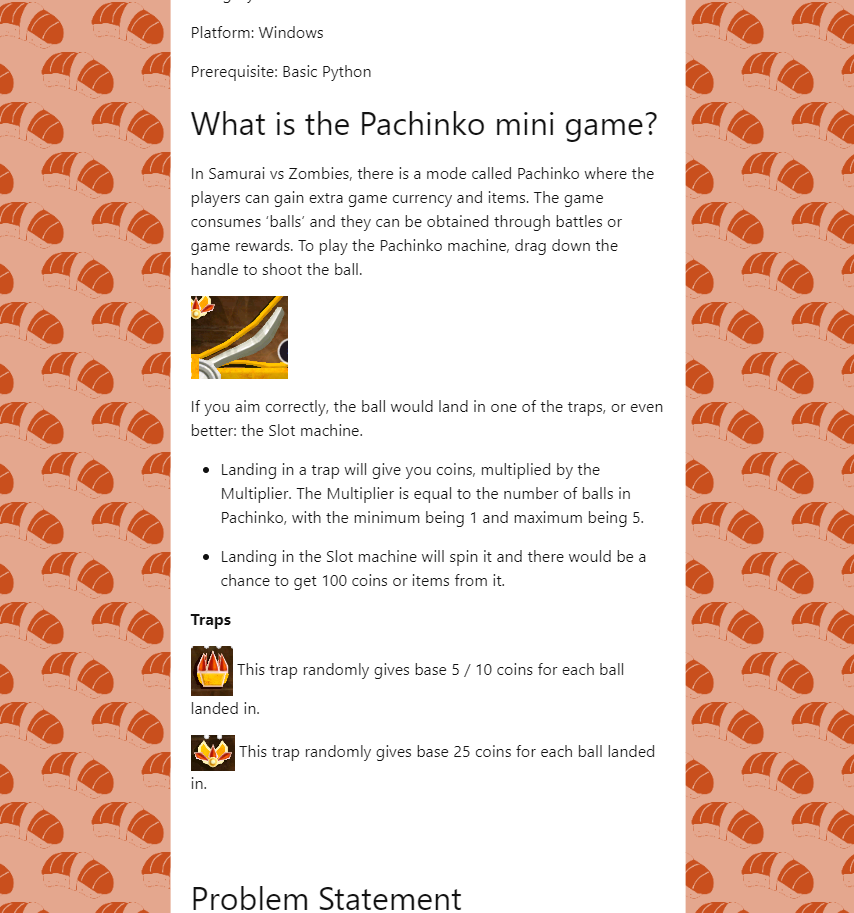
Finally, the article.
If you want to use the same layout as Cyber Spatula, you might be wondering how to add new categories, change the background, add banners for the articles…
Homepage
As we have said before, index.markdown is the home page of your site. If you observe this file in cyberspatula.github.io, you will find out that its layout is very simple and indeed resembles the homepage.
 ---
# Feel free to add content and custom Front Matter to this file.
# To modify the layout, see https://jekyllrb.com/docs/themes/#overriding-theme-defaults

layout: selector
title: Kolyn090's Dev Log
header: Gaming, Automation, Computer Graphics, and Machine Learning
permalink: /
buttons:
  - url: /egg-inc-main/
    image: /static/img/egg-inc/egg-inc.jpg
    alt: Egg Inc. Main
    description: Egg Inc - Automation

  - url: /svz-main/
    image: /static/img/svz/svz.png
    alt: Samurai VS Zombies Main
    description: SvZ Defense with ML

  - url: /pvz2-main/
    image: /static/img/pvz2/pvz2-main-menu.png
    alt: Use AI to beat PvZ2
    description: AI PvZ2

  - url: /battle-cats-main/
    image: /static/img/battle-cats/The_Battle_Cats-title.jpg
    alt: The Battle Cats Main
    description: AFK The Battle Cats

  - url: /page5/
    image: /static/img/the-escapists3d/The_Escapists_3D-thumb.png
    alt: Page 5
    description: The Escapists 3D made by me using Unity

  - url: /softwares-main/
    image: /static/img/1-default/not-found.jpg
    alt: My Softwares
    description: My Softwares

  - url: /school/
    image: /static/img/1-default/not-found.jpg
    alt: My School Projects
    description: My School Projects
---
The selector layout is telling the program that we are using the template page with a scrollable list of buttons with image. To use this template, you will also have to specify the buttons, which are the categories we just discussed earlier.
For a button, you will need to include its url, this should be the same as the article’s permalink. You will also need an image, alt in the case cannot read image, and description for the category.
Category page
So where do /egg-inc-main/, /svz-main/… exist? The answer is _pages. If you open it, you will find some markdown files ending with main. Open one of them.
---
layout: selector
permalink: /battle-cats-main/
title: The Battle Cats
theme: cat
buttons:
  - url: /battle-cats-afk/
    image: /static/img/battle-cats/accessibility-afk-thumb.jpg
    alt: The Battle Cats AFK Farm using iOS Accessibility feature.
    description: AFK Farm with iOS Accessibility feature. No programming required!
categories: Game Tutorial
---
Here we can see this page has a very similar structure as the homepage. With the exception of a new setting called theme. This controls the page’s background. BTW, these settings can be completely customized in jekyll. For example, I customized theme and buttons myself. If you don’t specify theme, the program will use the default theme for this page.
It’s also quite simple to make your own theme as well. To do so, go to assets/css/background.css. You should see
body {
    position: relative;
    margin: 0;
    padding: 0;
    background-image:
        url('/static/img/1-default/soybean.png'),
        url('/static/img/1-default/soybean.png');
    background-color: #cc9b6d;
    background-size: 100px 100px, 100px 100px;
    background-repeat: repeat, repeat;
    background-position:  0 0, 50px 50px;
    background-blend-mode: overlay, overlay;
    animation: movePattern 10s linear infinite;
}

body.egg {
    position: relative;
    margin: 0;
    padding: 0;
    background-image:
        url('/static/img/egg-inc/egg.png');
    background-color: #cc62d6;
    background-size: 100px 100px;
    background-repeat: repeat;
    background-position:  0 0;
    background-blend-mode: overlay;
    animation: movePattern-single 20s linear infinite;
}

...
The the first style is the default theme (background) called body. It has many attributes such as position, margin… but it’s only recommended to modify background-image, background-color, background-size, background-repeat, background-position, background-blend-mode, animation. You can try to modify them and see what happens. Things usually needs some trial-and-errors in order to get working. BTW, I hope you agree with me that it’s pretty smart to paint soybean with red color to make red beans here…
Also, in body, you might have noticed that we have used two background images here. That’s for creating a staggering effect, which means that there is an offset for some of the repeating elements. Since we have added a new image here, we will need extra pair of background-size, background-repeat, background-position, background-blend-mode.
I have to admit that I asked ChatGPT for animation, so can you! Try to ask it to make the program do better things. I have faith in you.
The next style is body.egg. Before we have been article used setting theme: cat, so it’s straightforward that we can use this theme with theme: egg. Basically, if you want to create more themes, just do body.theme. Remember you can inquiry ChatGPT if you want to do something but don’t know where to start it.
Credits page
Credits page is something good to have. There are times you might have borrowed other people’s works and you will want to cite them in this page. The quick way to make this page is to copy it from cyberspatula.github.io\_pages\credits.md and modify it from there.
The articles
The next thing I want to mention is the articles. I have been using the words articles, posts, logs interchangeably even though they don’t have the same meaning, but I want to emphasize that they mean the same thing here. So, in an article, it has a banner and the text body. I have already taught you how to write an article and now let’s look at its settings. Using this article for example.
📍 The recommended banner size ratio is 3:2 (width:height).
---
author: Kolyn090
banner: /static/img/1-default/not-found.jpg
categories: Tutorial
custom_class: custom-page-content
date: 2025-01-10 17:00:00 -0500
layout: post
permalink: /software-cyber-spatula/
title: Create a website like Cyber Spatula, as an Absolute Beginner.
---
Immediately we see a new setting banner. This is the image located at the top of an article. Here, this is a ‘Not Found’ image. As you might have noticed, we have specified banner image twice. The first one is in category page and here again. This means that these images can be different for the same article. The downside of this design is that you have to type the image path twice if you intend to use the same image. You can also exclude banner image by not specifying one.
Next we have a new setting called custom_class, but I want you to ignore it because I had some issue with css design and I couldn’t get the banner align correctly so I came up with this fix.
Next we have layout and it is a post, that makes sense.
The most important thing is the permalink. You can change this but remember you should add slashes around it, and I highly recommend the link should be relevant to the article. As mentioned before, the link of buttons in category pages should reference this permalink.
The Logo
To change the logo, go to _includes/header.html and replace src to your image’s path.
<img src="/static/img/1-default/cyber-spatula.svg" alt="Cyber Spatula" class="site-logo">Colored text
The last thing I want to cover is colored text. Even though I barely use them, I think some of you might want this feature. Go ahead and copy colorize.rb under _plugins to your _plugins folder. There you have colored text feature. Here is an example on how to use it.
{% highlight ruby %}
{{ "This text is red" | colorize: "red" }}
{% endhighlight %}
The effect:
This text is red
🎉 That should be covering most about how to build a website like Cyber Spatula, as of 1/13/2025. Try to keep exploring the files and see what you can do with them. You can send an issue ticket to ask me if you have any doubts about this step.
Step 5
After you have built the webpage, you will want to maintain it. Since we are using GitHub Pages, the site is automatically compiled and hosted by GitHub. This means that if you open a browser and search https://<your-username>.github.io, you should see your page.
However, if you have never used GitHub before, you might not know how to maintain your project. It’s not going to be just adding things to it. You will need to know how to use git!
After you have added something, you will want to save the current progress. You can achieve this by using git. Check out the git commands at the git documentation, specifically git add, git commit, and git push.
Each time you push some changes in a GitHub Pages project, [GitHub Actions](https://github.com/features/actions) will perform checks on them. If every check passes, it will be updated in the GitHub Pages. This means that you can see the changes in https://<your-username>.github.io.
If you want to configure a custom domain for your site, you can follow this article by GitHub. I have not done this yet so I can’t offer more help. In the future I will update this article if I made any progress with that.
Alright, that was the end of this tutorial. I hope you have built a jekyll website with ease!
Troubleshoot
Solving ruby : The term 'bundle' is not recognized as the name of cmdlet... on Windows.
- If you are on Windows, your VS code is likely using powershell instead of Command Prompt. It can sometimes encounter unknown issues. In that case you will need to use Command Prompt to run the code. Open windows search by pressing
Win + S, typing in “cmd” and find Command Prompt. Use that instead of the terminal in VS code.
If you are still getting errors running (Windows),
- Try checking your system’s environment variables by pressing
Win + S, search for “Environment Variable”, look for “Edit the system environment variables”. You will be prompted with a menu. Go to “Advanced” -> “Environment Variables…” -> “Systsem variables\Path”, from there check if it contains a Path likeC:\RubyXX\bin; if not, add the path to there. Replace “XX” with your actual Ruby’s version.
If you liked this log, consider giving a Star to this repository.
🍯 Happy Coding 🍯
This article, completely original, is copyrighted by its author, me. Please do not reproduce it.
本文为原创作品,作者 Kolyn090 拥有其著作权,受法律保护。严禁复制、转载、仿冒或以任何形式使用。