
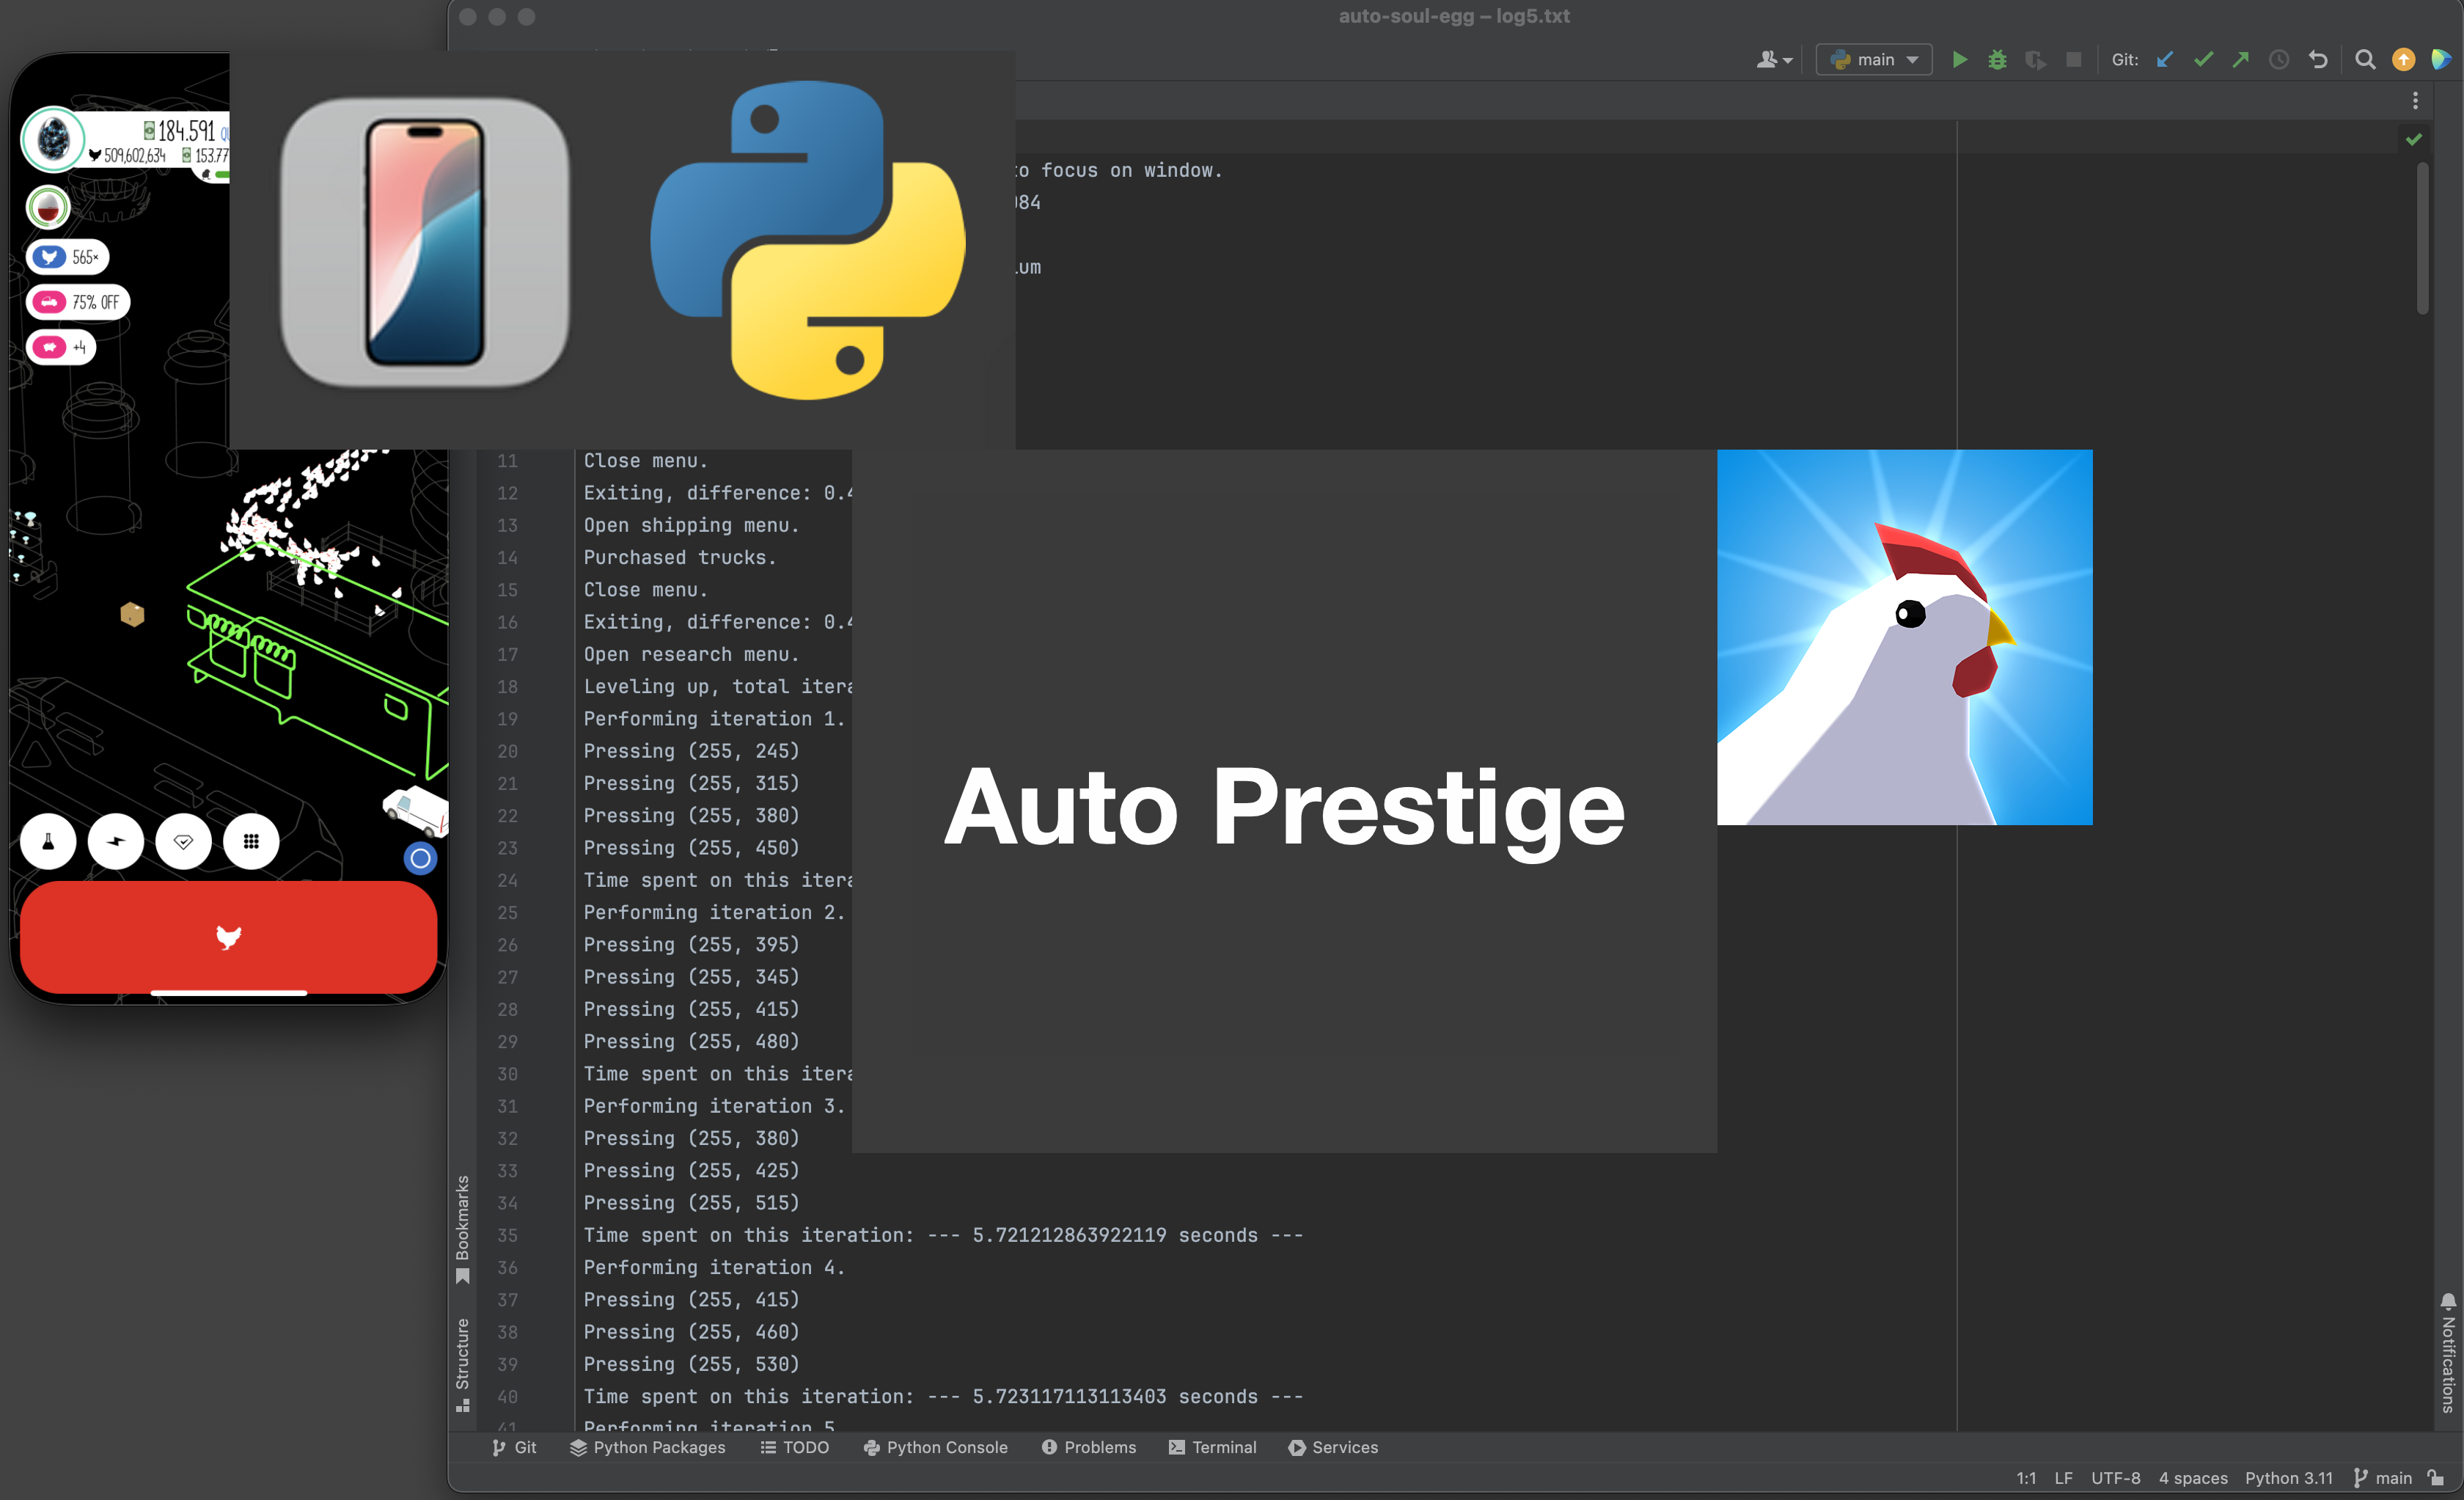
Auto Prestige with iPhone Mirroring and Python
This article, completely original, is copyrighted by its author, me. Please do not reproduce it.
本文为原创作品,作者 Kolyn090 拥有其著作权,受法律保护。严禁复制、转载、仿冒或以任何形式使用。
Category: Log
Platform: MacOS
Prerequisite: Basic Python
Introduction
Today I have randomly chosen from one of my favorite iOS games and decided to write a script for it, with iPhone Mirroring. It’s called Egg Inc. A game where you raise chickens, the chickens lay eggs, and you make profits by shipping the eggs. My goal today will be writing a program specifically for Prestige.
The Main Idea
On iPhone mirroring, mouse clicks simulate taps on the iPhone. This is great because I already know how to simulate clicks, presses, and drags. Prestige is a fairly mechanical process—it’s repeated over and over, and I have already identified a pattern in it. Essentially, this program will follow a specific pattern to perform prestige.
Very Important
⚠️ This is not a tutorial. I have intentionally omitted many details that are not directly related. In the future, I might write another log about them. Please do not be surprised if things don’t work after following everything in this blog. Also, please don’t have high expectations: even after optimizations, its efficiency is still terrible compared to manual prestige.
📍 Watch the demo on YouTube.
Limitations
That being said, if you’re looking for a one-size-fits-all program, you might be out of luck, as this is highly experimental. You’ll also need at least a basic understanding of programming to follow the materials presented in this article.∂
On top of that, players have different prestige strategies. I will list mine here.
- Start from Edible
- Jump to Dilithium
- Get enough farm value and jump to Universe
- Get soul eggs and prestige
Sounds easy? Okay, I admit I’ve omitted a lot of details. Now, I will follow this pattern and build a program based on it.
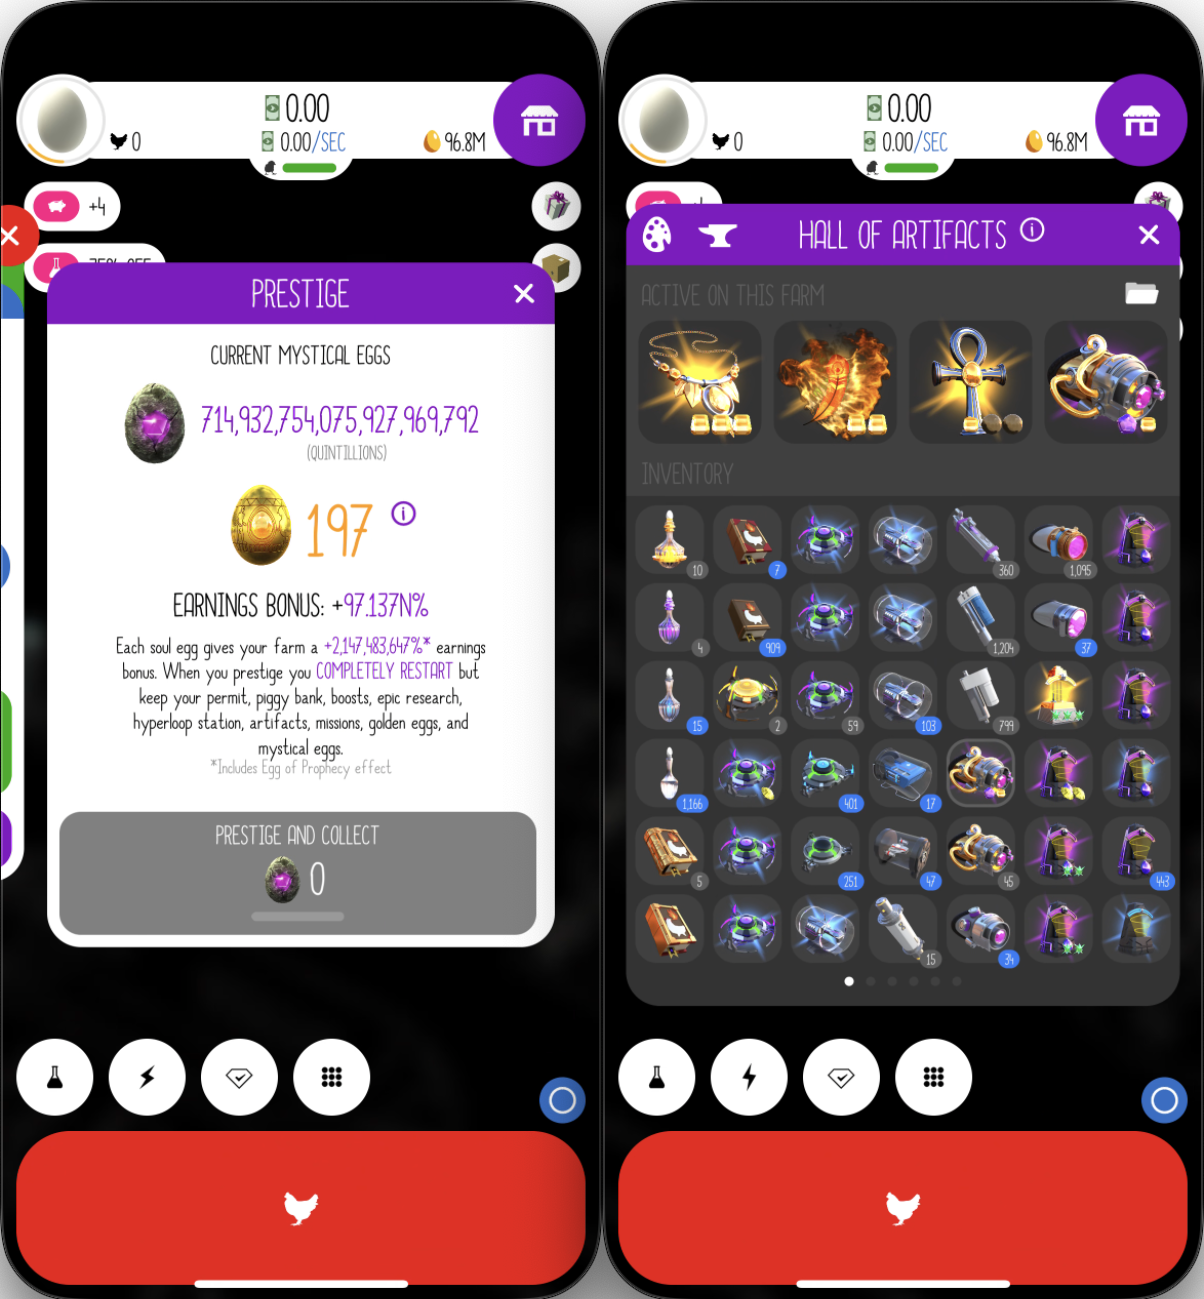
FYI, my current Earning Bonus and Prestige set:
The Program
Step 1
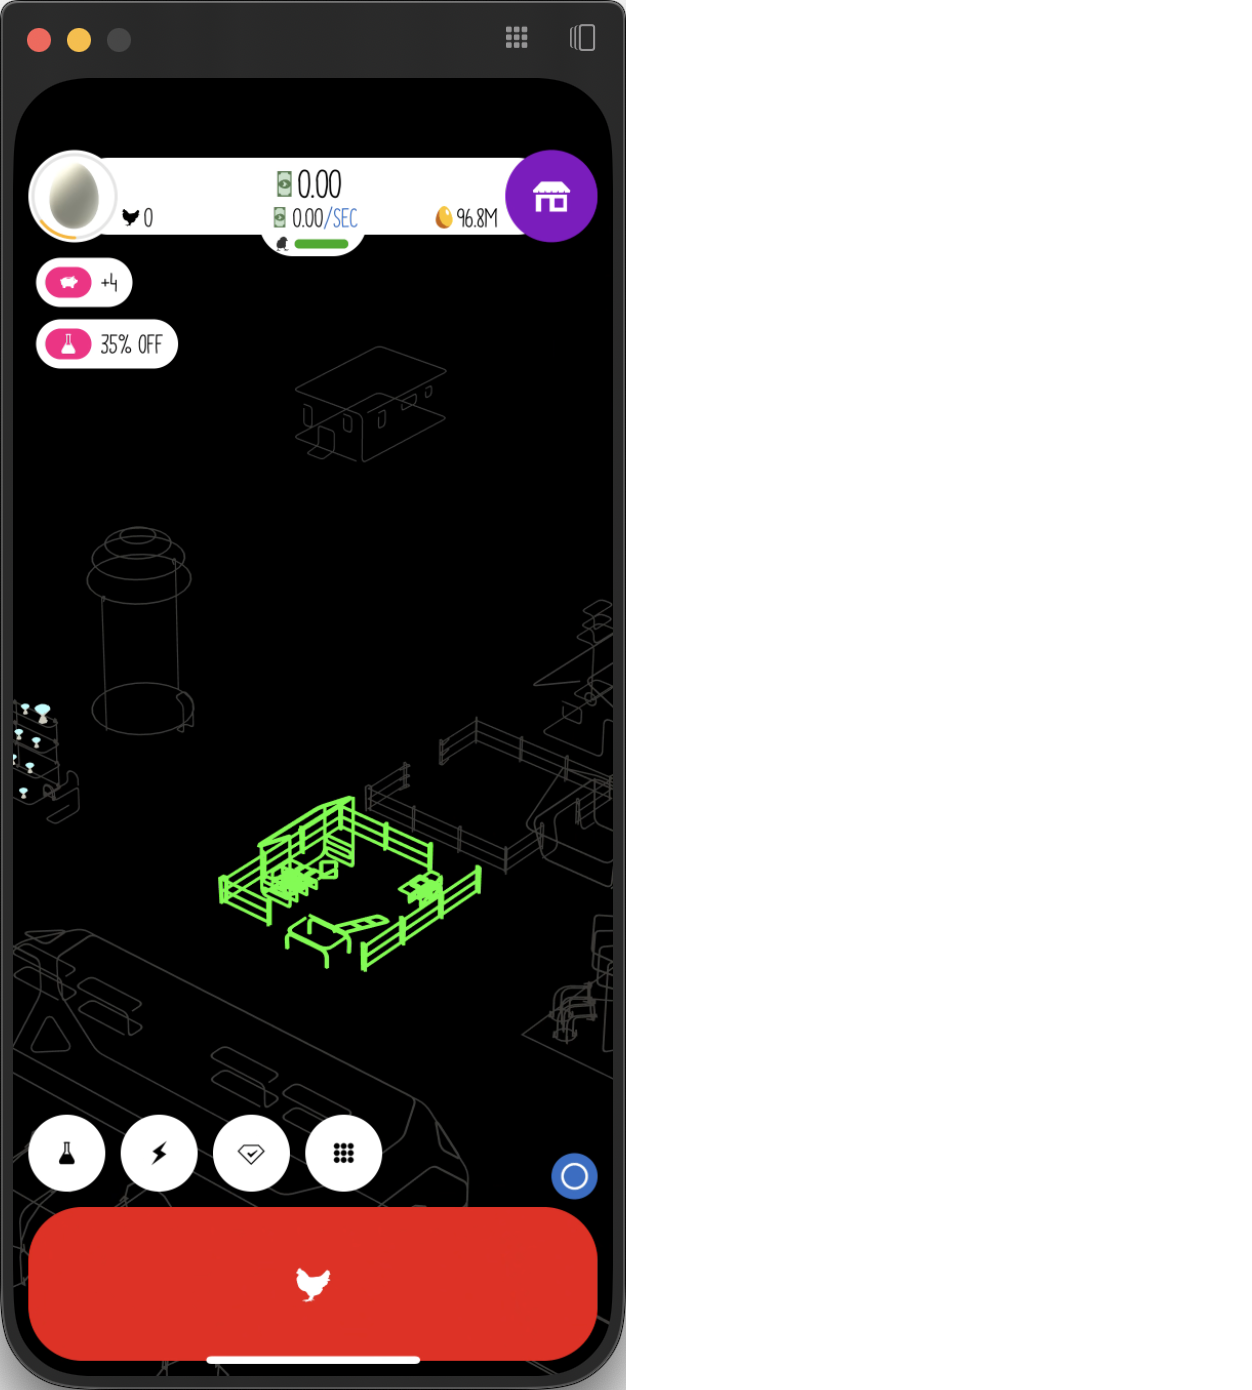
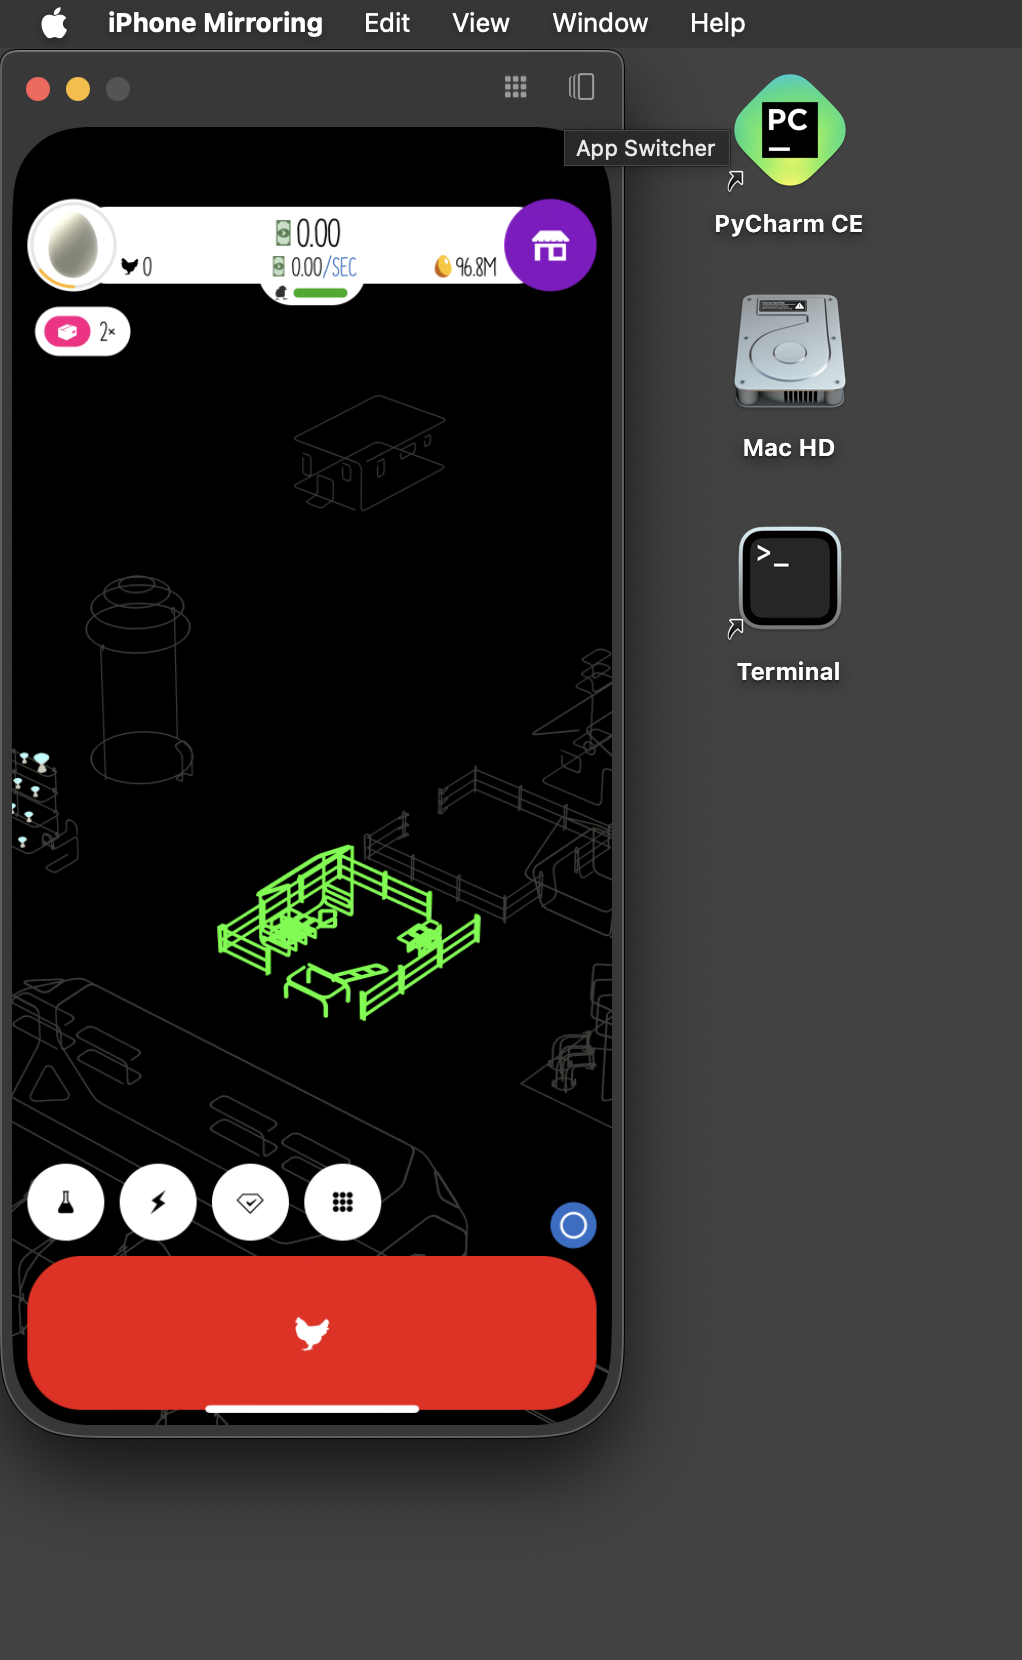
The first thing I’m going to do is open up my new toy, iPhone Mirroring.
Next, I start a new Python project.
Step 2
The next step is to confirm the window size and position so that it remains consistent every time I open it. It seems I can’t change the window size, which is fantastic because it means I won’t need to write a window_rescaler.py for it. I’ll simply place iPhone Mirroring in the top-left corner of my Desktop, to make sure that my clicks always occur in the expected positions.
Step 3
Let’s make some clicks. Create mouse.py under interaction.
import time
import pyautogui


class Mouse:
    def click_pos(self, pos, sleep_time=0.2, once=False):
        x, y = pos
        self.click(x, y, sleep_time, once)

    @staticmethod
    def click(x, y, sleep_time=0.2, once=False):
        pyautogui.click(x, y)
        if not once:
            pyautogui.click(x, y)
        time.sleep(sleep_time)

    @staticmethod
    def perform_drag(drag_from, drag_to, duration=0.5):
        start_x, start_y = drag_from[0], drag_from[1]
        end_x, end_y = drag_to[0], drag_to[1]
        pyautogui.moveTo(start_x, start_y)
        pyautogui.mouseDown()
        pyautogui.dragTo(end_x, end_y, duration=duration, button='left')
        pyautogui.mouseUp()

    def press_pos(self, pos, duration):
        x, y = pos
        self.click_pos(pos)
        self.press(x, y, duration)

    @staticmethod
    def press(x, y, duration):
        pyautogui.moveTo(x, y)
        pyautogui.mouseDown()
        time.sleep(duration)
        pyautogui.mouseUp()
Test the code. Here I tried to click on the ‘Send Chicken’ button.
if __name__ == '__main__':
    mouse = Mouse()
    mouse.click_pos([153, 665])
🎉 It works!
📍 Note: you will need to find the position using mouse_coordinate.py, which I will be introducing in step 4.
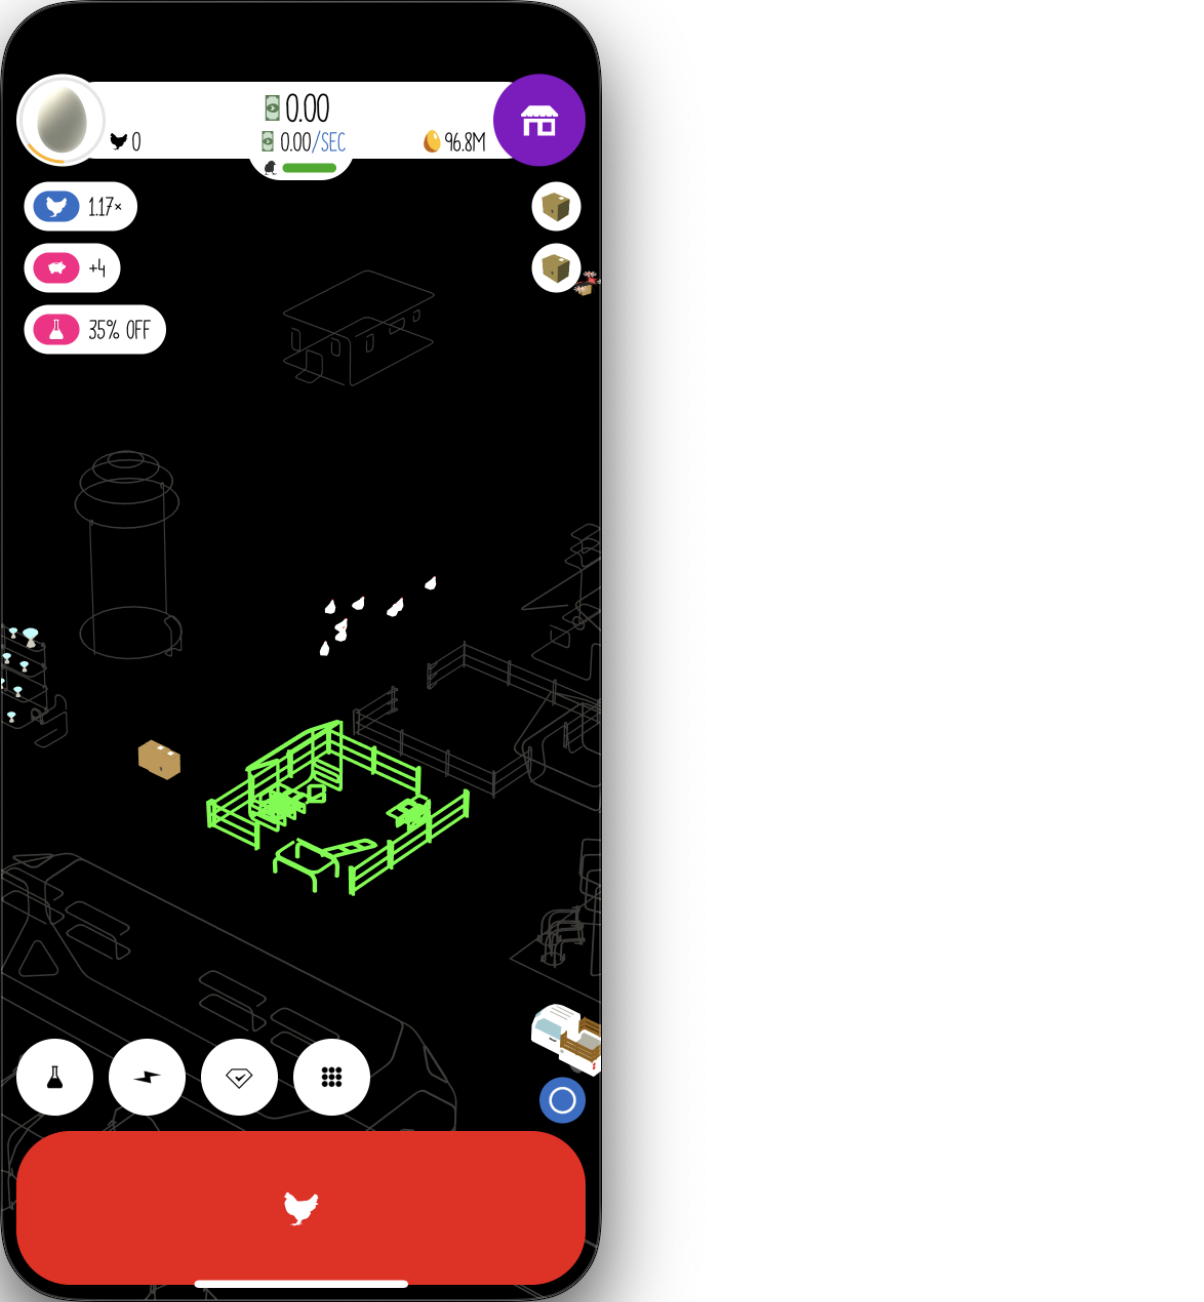
📍 However, I soon encountered a problem. It seems that sometimes I need to tap twice on the simulator for the interaction to work, and it doesn’t appear to be an issue of focusing. This complicates things. To address this, I added a flag once to indicate whether the click should be performed only once. By default, it performs two clicks.
That’s a good start. Now let’s see drags.
if __name__ == '__main__':
    mouse = Mouse()

    drag_from = [70, 540]
    drag_to = [70, 380]
    drag_duration = 1
    mouse.perform_drag(drag_from, drag_to, drag_duration)
🎉 Excellent, it dragged the research menu down. Now I am confident that I have everything I need to control the device.
Step 4
In this step I will create some utility scripts.
I imagine it’s going to have massive logs so I will need a class that can generate and store the logs. Create logger.py under log.
import os
import fnmatch
script_dir = os.path.dirname(os.path.abspath(__file__))
logs_path = os.path.join(script_dir, 'logs')
class Logger:
def __init__(self):
self._content = []
def add_content(self, line):
self._content.append(line)
def save_content(self):
os.makedirs(logs_path, exist_ok=True)
new_save_path = self.get_new_save_path()
with open(new_save_path, 'w') as file:
file.write("\n".join(self._content))
@staticmethod
def get_new_save_path():
prefix_name = 'log'
max_num = 0
for dirpath, dirnames, filenames in os.walk(logs_path):
for filename in fnmatch.filter(filenames, '*.txt'):
num = int(filename.replace(prefix_name, '').replace('.txt', ''))
if num > max_num:
max_num = num
return os.path.join(logs_path, prefix_name + str(max_num + 1) + '.txt')
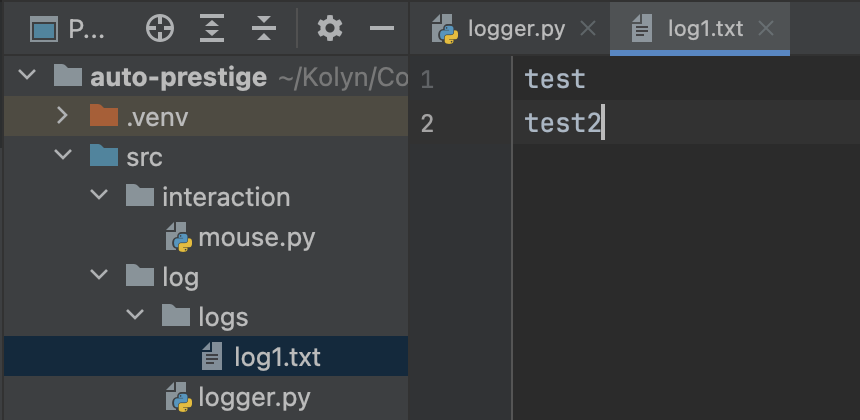
if __name__ == '__main__':
logger = Logger()
print(logger.get_new_save_path())
logger.add_content('test')
logger.add_content('test2')
logger.save_content()As expected.
Now, create a base class that takes in and is initialized with a Logger. Everything worth logging must inherit from this base class. Create debug_class under program.
from src.log.logger import Logger


class Debug_Class:
    def __init__(self, logger: Logger):
        self._debug = False
        self._logger = logger

    def message(self, content):
        if self._debug:
            print(content)
            self._logger.add_content(content)

    def set_verbose(self):
        self._debug = True
Next would be mouse_coordinate.py under util.
from pynput import *


def get_coords(x, y):
    print("Now at: {}".format((x, y)))


if __name__ == '__main__':
    with mouse.Listener(on_move=get_coords) as listen:
        listen.join()
🤓 This script gets the current position of the mouse. I will use it to get the positions of the UI.
Although I don’t know where I can apply this yet, I am fairly sure I am going to need to take screenshots. Let me copy & paste some code from my old screen-scraping projects. Create window_getter.py under util.
import platform
if platform.platform().startswith('macOS'):
    import Quartz
import PIL.ImageGrab


def get_window_with_title(title):
    def get_window_list_mac():
        window_list = []
        window_info_list = Quartz.CGWindowListCopyWindowInfo(Quartz.kCGWindowListOptionOnScreenOnly,
                                                             Quartz.kCGNullWindowID)
        for window_info in window_info_list:
            window_list.append(window_info)
        return window_list

    def get_mac_windows():
        result = []
        for m_window in get_window_list_mac():
            m_window_title = m_window.get('kCGWindowOwnerName', 'No Title')
            if title in m_window_title:
                result.append(m_window)
        return result

    if platform.platform().startswith('macOS'):
        windows = get_mac_windows()
        if len(windows) > 0:
            return windows[0]
    else:
        return None


def get_screenshot_of_chosen_window(chosen_window):
    def run_mac():
        bounds = chosen_window.get('kCGWindowBounds')
        h = int(bounds.get('Height'))
        w = int(bounds.get('Width'))
        x = int(bounds.get('X'))
        y = int(bounds.get('Y'))
        return PIL.ImageGrab.grab(bbox=(x, y, w+x, h+y),
                                  include_layered_windows=True,
                                  all_screens=True)
    if platform.platform().startswith('macOS'):
        return run_mac()
    else:
        return None
Test.
if __name__ == '__main__':
    chosen_window = get_window_with_title('iPhone Mirroring')
    print(chosen_window)
    get_screenshot_of_chosen_window(chosen_window).save('screenshot-test.png')
I got
{
    kCGWindowAlpha = 1;
    kCGWindowBounds =     {
        Height = 694;
        Width = 312;
        X = 0;
        Y = 25;
    };
    kCGWindowIsOnscreen = 1;
    kCGWindowLayer = 0;
    kCGWindowMemoryUsage = 2272;
    kCGWindowName = "iPhone Mirroring";
    kCGWindowNumber = 6958;
    kCGWindowOwnerName = "iPhone Mirroring";
    kCGWindowOwnerPID = 11641;
    kCGWindowSharingState = 1;
    kCGWindowStoreType = 1;
}
and
Let me do just these three for now.
Step 5
Now, after I have performed a prestige manually. I think here are the parts I will need to implement.
- depot - upgrade trucks
- egg_jump
- house - upgrade houses
- prestige
- research
- spawner - spawn chickens
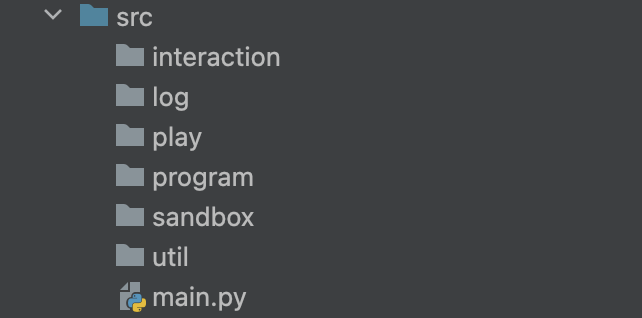
Put them under play
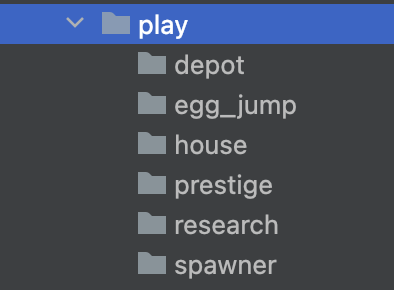
Also, create ui_position under each of them.
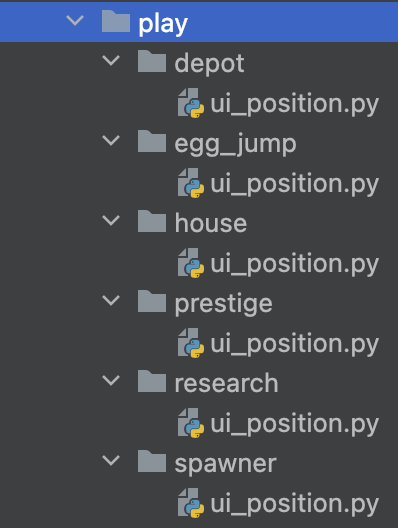
In the following steps, my task will be to implement each of them, and, in the end, I will combine everything together to write the final prestige machine in main.py.
Step 6
At last, I am going to implement something related to the game. Let me start with the first thing every player does in the game - spawn chickens.
In spawner/ui_position.py, put
spawn_pos = [153, 665]Create spawner.py under spawner.
import time
from src.interaction.mouse import Mouse
from src.play.spawner.ui_position import spawn_pos
from src.program.debug_class import Debug_Class


class Spawner(Debug_Class):
    def __init__(self, logger):
        super().__init__(logger)
        self._mouse = Mouse()

    async def spawn_chicken(self, duration=2):
        self.message(f"Spawn chicken for {duration} seconds.")
        self._mouse.click_pos(spawn_pos)
        self._mouse.press_pos(spawn_pos, duration)
        self.message(f"Resting for {round(duration * 0.75, 2)} seconds.")
        time.sleep(duration * 0.75)
🤓 spawn_chicken sends chickens for duration seconds and release for duration * 0.75 seconds.
Now test this.
import asyncio
from src.log.logger import Logger

async def main():
    logger = Logger()
    spawner = Spawner(logger)
    await spawner.spawn_chicken(10)

if __name__ == '__main__':
    asyncio.run(main())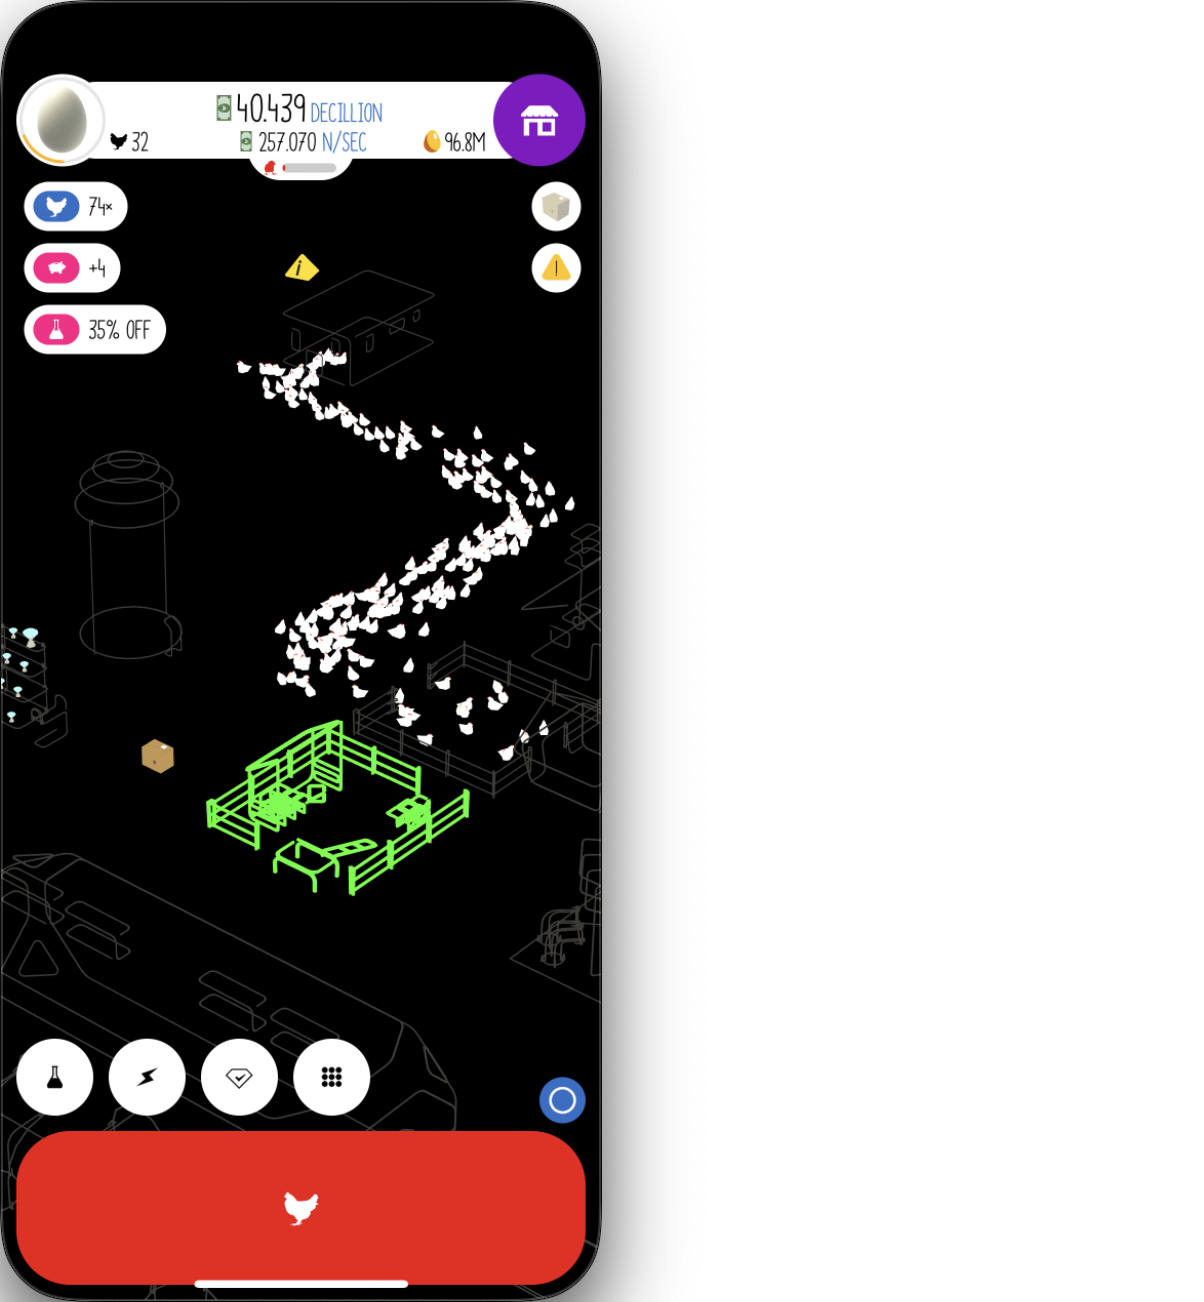
I can even repeat this.
async def spawn_continue(self, times=5, duration=2):
    self.message(f"Spawn {times} waves of chicken.")
    for i in range(times):
        self.message(f"Perform spawn wave {i + 1}.")
        await self.spawn_chicken(duration)
Test.
import asyncio
from src.log.logger import Logger

async def main():
    logger = Logger()
    spawner = Spawner(logger)
    await spawner.spawn_continue(5, 5)

if __name__ == '__main__':
    asyncio.run(main())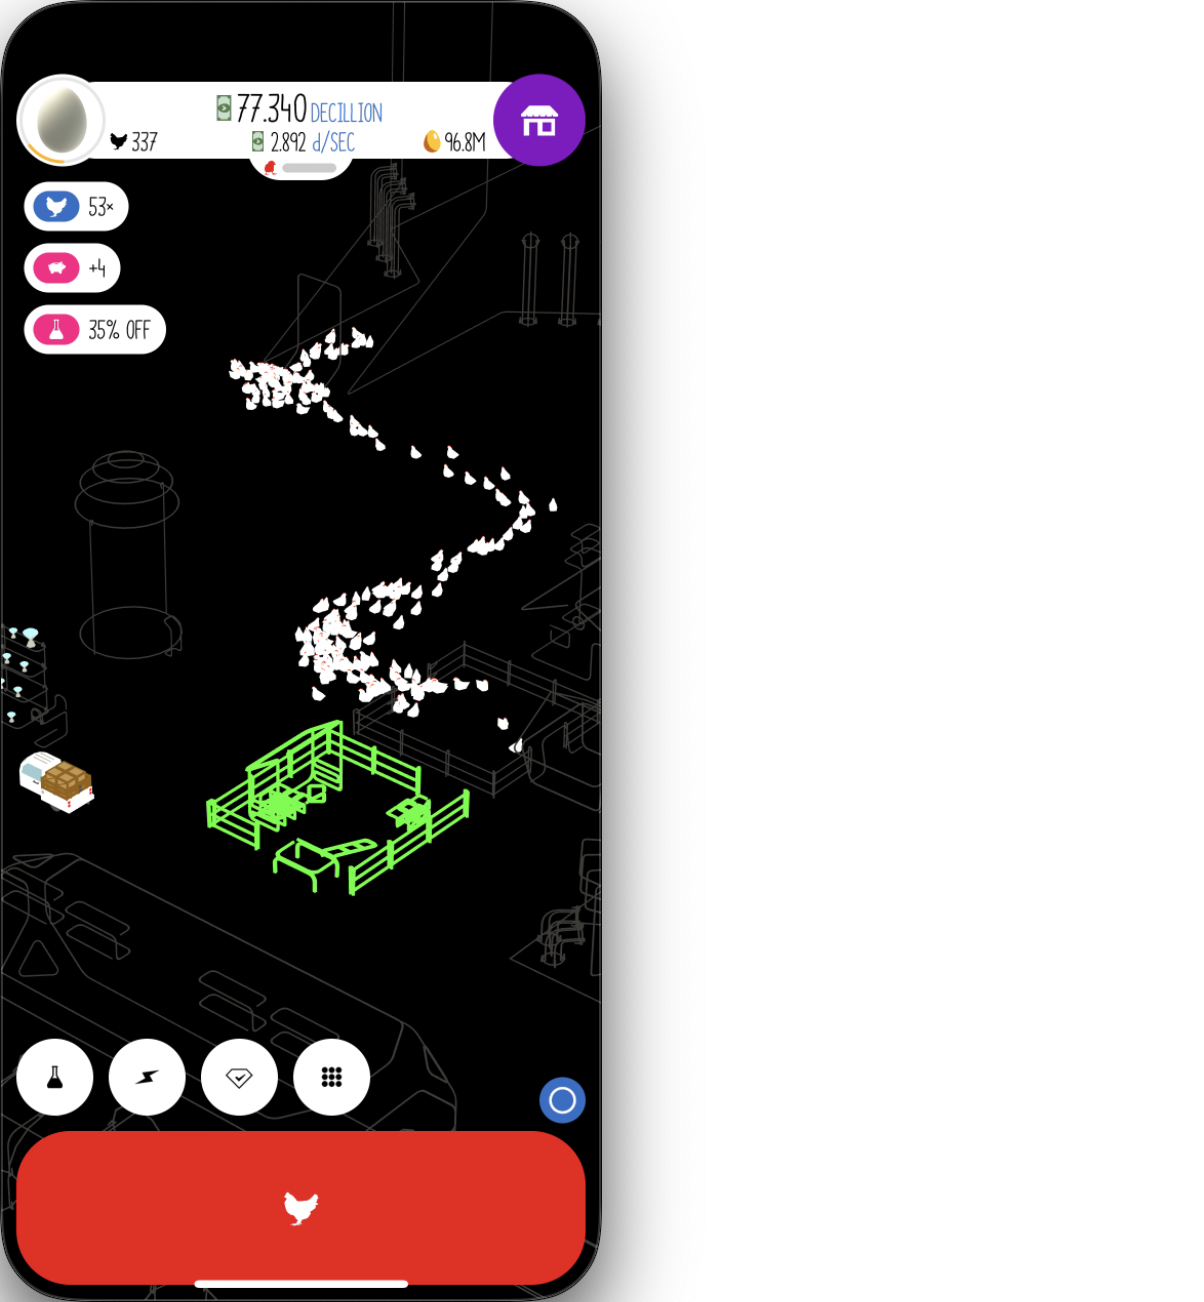
🎉 This should be everything about spawning chickens.
Step 7
The next easiest thing to do is to purchase chicken houses. Create house.py under house.
from src.interaction.mouse import Mouse
from src.program.debug_class import Debug_Class
from src.play.house.ui_position import (house_pos,
                                        max_pos1,
                                        max_pos2,
                                        max_pos3,
                                        max_pos4,
                                        exit_pos)

class House(Debug_Class):
    def __init__(self, logger):
        super().__init__(logger)
        self._mouse = Mouse()

    async def buy_new_house(self):
        # go to purchasing house menu
        # click multiple times (to prevent drones)
        self.message("Open house menu.")
        self._mouse.click_pos(house_pos, 0.7)
        self._mouse.click_pos(house_pos, 0.7)
        self._mouse.click_pos(house_pos, 0.7)

        # max out houses
        self._mouse.click_pos(max_pos1)
        self._mouse.click_pos(max_pos2)
        self._mouse.click_pos(max_pos3)
        self._mouse.click_pos(max_pos4)

        self.message("Purchased houses.")

        # exit
        self.message("Close menu.")
        self._mouse.click_pos(exit_pos, 0.7)
Add the following to house/ui_position.py.
house_pos = [183, 227]

max_pos1 = [121, 363]
max_pos2 = [223, 312]
max_pos3 = [82, 471]
max_pos4 = [223, 471]

exit_pos = [278, 173]
Test.
import asyncio
from src.log.logger import Logger

async def main():
    logger = Logger()
    house = House(logger)
    await house.buy_new_house()

if __name__ == '__main__':
    asyncio.run(main())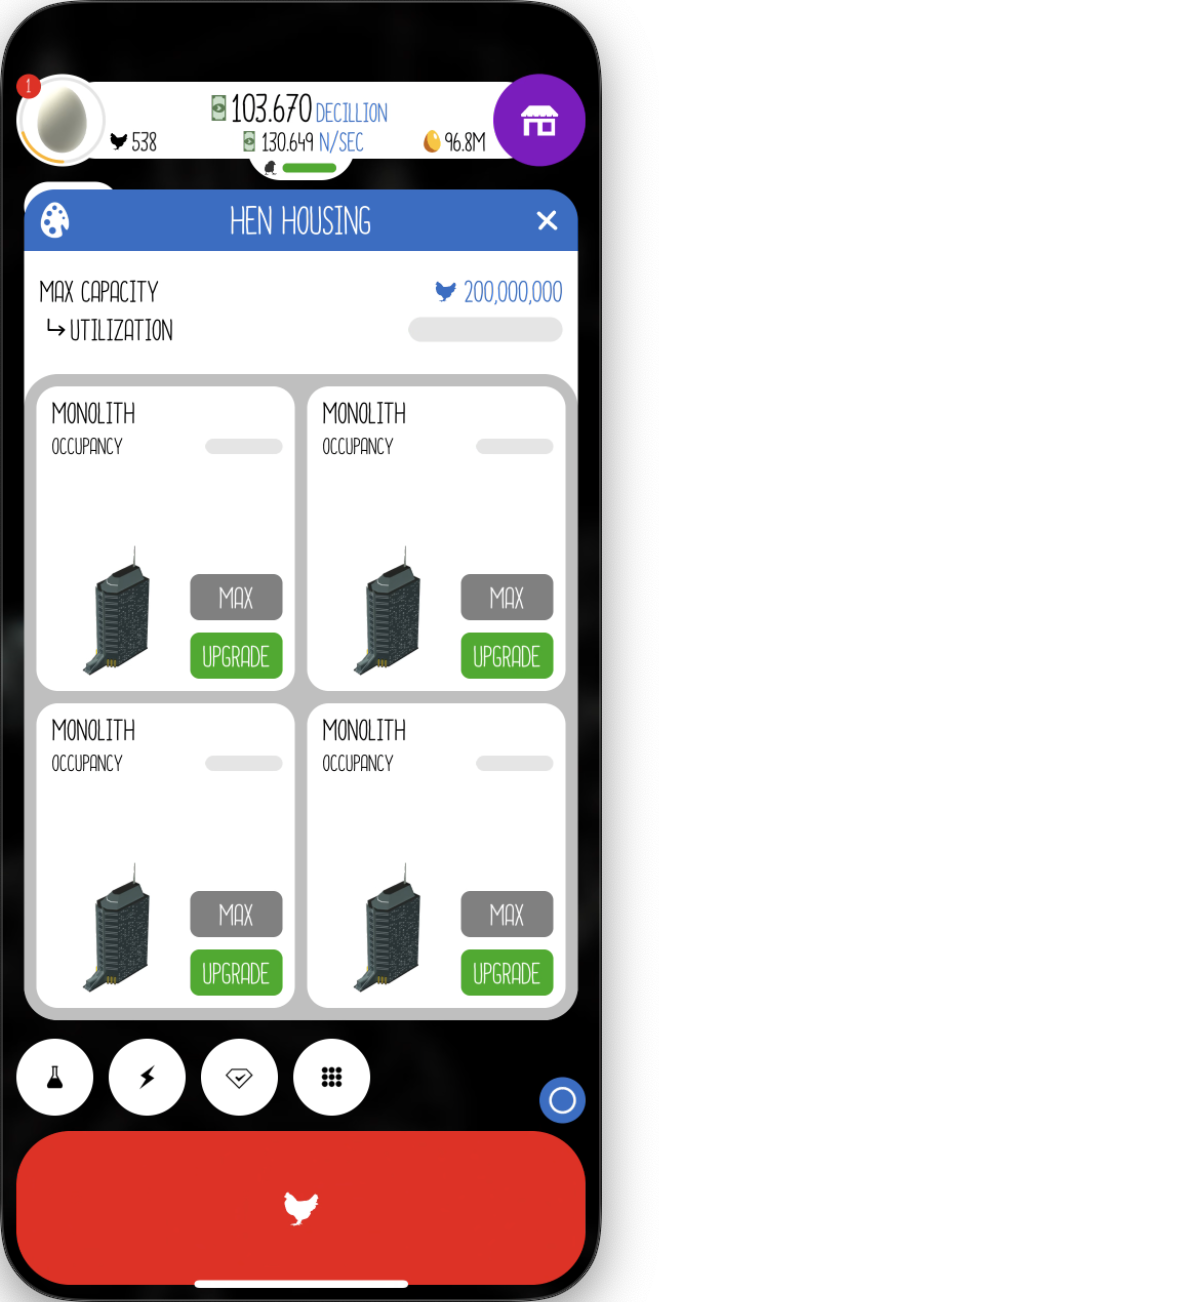
Step 8
After buying houses, now I need trucks. For simplicity, let me just buy 4. Create depot.py under depot.
from src.interaction.mouse import Mouse
from src.play.depot.ui_position import (depot_pos,
                                        max_pos1,
                                        max_pos2,
                                        max_pos3,
                                        max_pos4,
                                        exit_pos)
from src.program.debug_class import Debug_Class


class Depot(Debug_Class):
    def __init__(self, logger):
        super().__init__(logger)
        self._mouse = Mouse()

    async def buy_new_trucks(self):
        self.message("Open shipping menu.")
        self._mouse.click_pos(depot_pos, 0.7)
        self._mouse.click_pos(depot_pos, 0.7)
        self._mouse.click_pos(depot_pos, 0.7)

        # max out trucks
        self._mouse.click_pos(max_pos1)
        self._mouse.click_pos(max_pos2, once=True)
        self._mouse.click_pos(max_pos3, once=True)
        self._mouse.click_pos(max_pos4, once=True)

        self.message("Purchased trucks.")

        # exit
        self.message("Close menu.")
        self._mouse.click_pos(exit_pos, 0.7)
Add the following to depot/ui_position.py.
depot_pos = [175, 469]

max_pos1 = [266, 292]
max_pos2 = [247, 354]
max_pos3 = [247, 406]
max_pos4 = [247, 451]

exit_pos = [278, 173]
Test.
import asyncio
from src.log.logger import Logger

async def main():
    logger = Logger()
    depot = Depot(logger)
    await depot.buy_new_trucks()

if __name__ == '__main__':
    asyncio.run(main())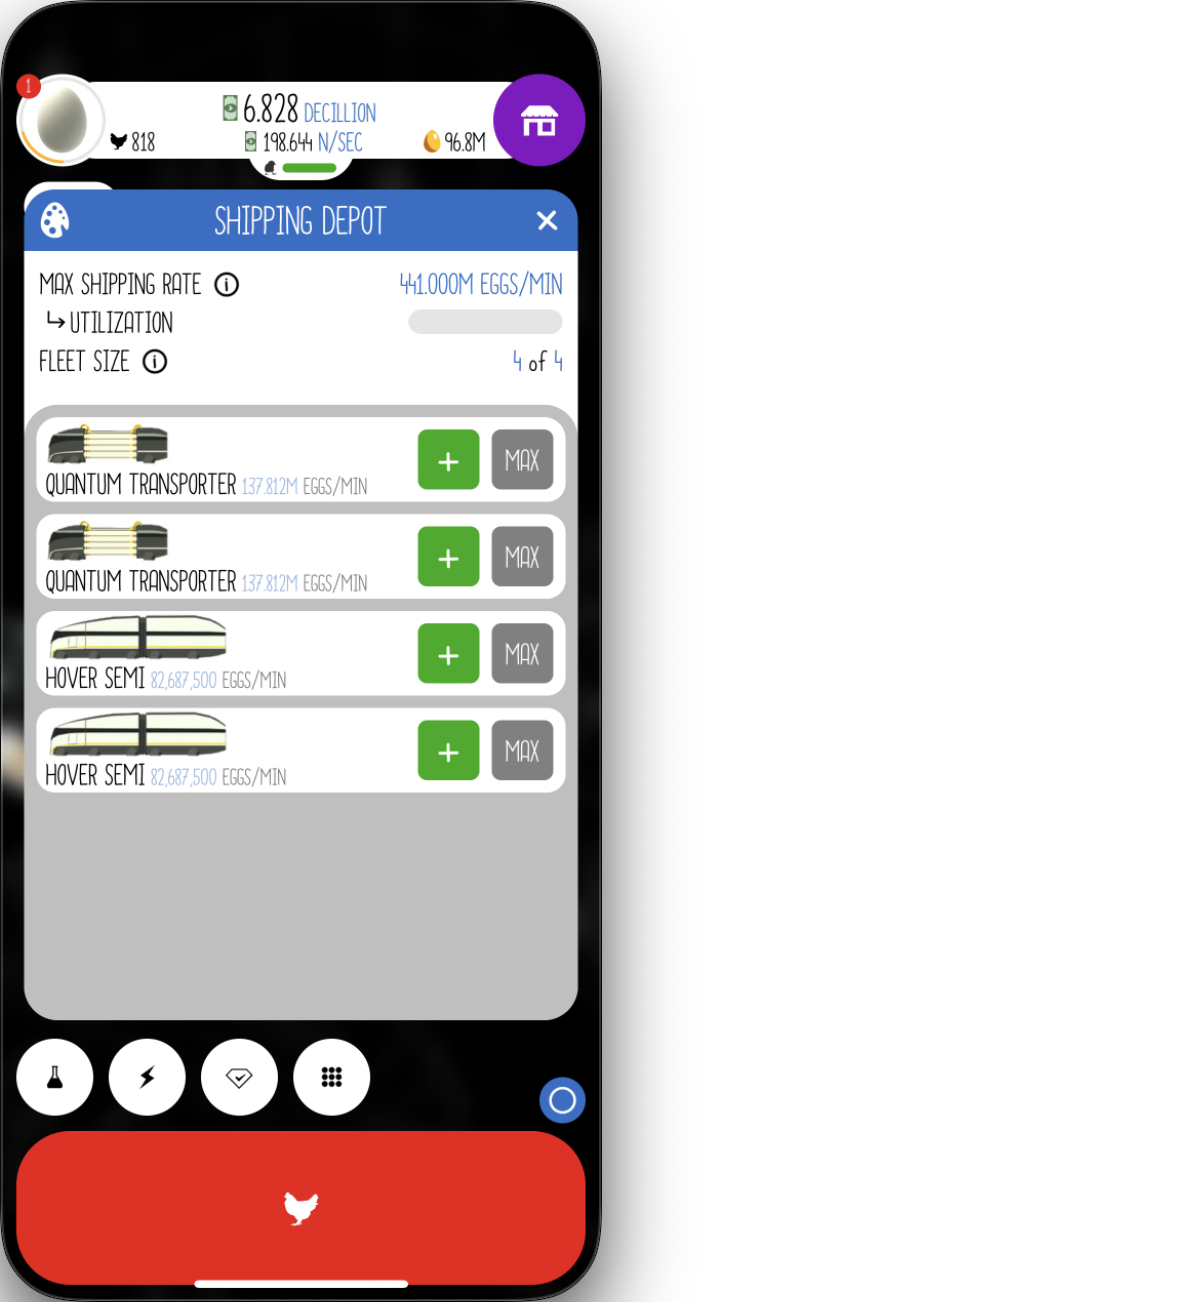
Step 9
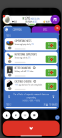
So far, things haven’t been very interesting. That’s why in the next step I’m going to make the program capable of upgrading Research. I’ll need to figure out a way for it to locate the upgrade buttons.
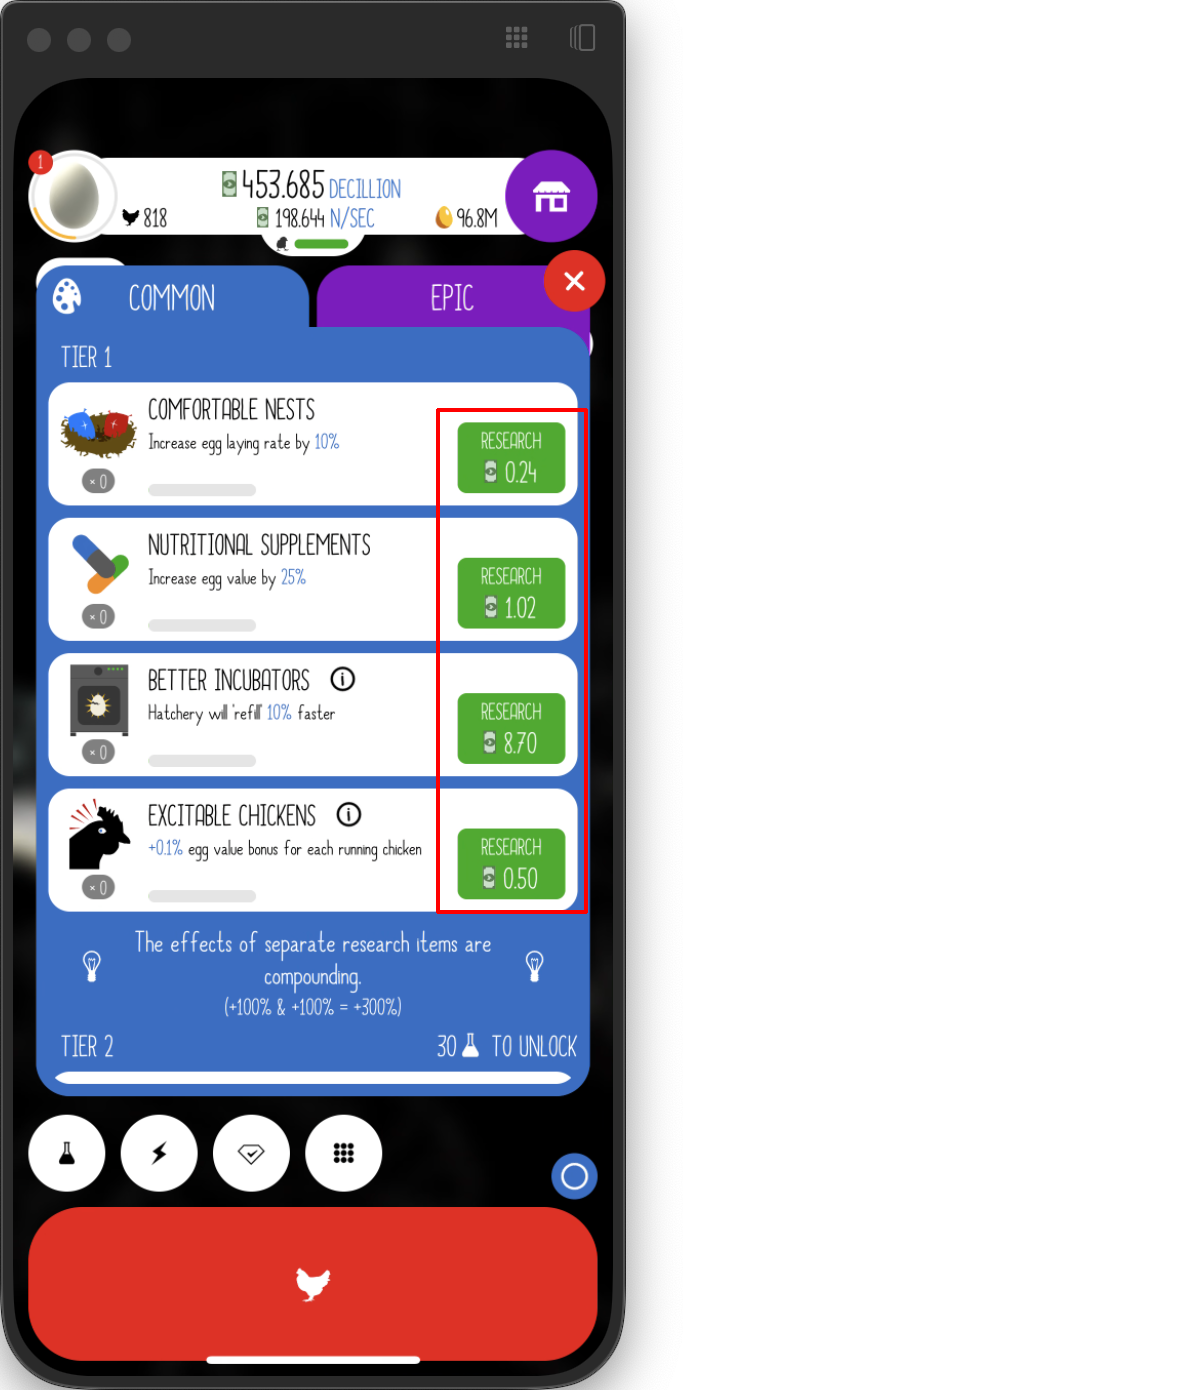
Fortunately, I’ve done this before. The high-level idea is to first pixelate the screenshot, crop out the green button, and save it as a template. Then, apply template matching to identify the positions of the buttons in the pixelated screenshot. Finally, map these positions back to the original screenshot, and voilà—the program knows where to press!
Let’s start coding! Create research.py under research.
import os
import cv2
import time
import numpy as np
from PIL import Image
from src.interaction.mouse import Mouse
from src.play.spawner.spawner import Spawner
from src.program.debug_class import Debug_Class
from src.util.window_getter import get_screenshot_of_chosen_window, get_window_with_title
from src.play.research.ui_position import (research_pos,
                                           drag_from,
                                           drag_to,
                                           exit_pos)


class Research(Debug_Class):
    def __init__(self, window, logger):
        super().__init__(logger)
        self._mouse = Mouse()
        self._window = window
Put these in research/ui_position.py.
research_pos = [31, 601]

drag_from = [70, 540]
drag_to = [70, 380]

exit_pos = [285, 164]
Next let me use this screenshot as an example and I will be finding all upgrade buttons in it.

The first step is to pixelate this screenshot.
def pixelate(pil_image, factor):
    width, height = pil_image.size

    # assuming factor = 3
    # calculate the new dimensions (each 3x3 block becomes 1 pixel)
    new_width = width // factor
    new_height = height // factor

    # create a new image with the new dimensions
    new_image = Image.new("RGB", (new_width, new_height))

    for i in range(new_width):
        for j in range(new_height):
            # initialize RGB accumulators
            r_total, g_total, b_total = 0, 0, 0

            # sum the colors in the 3x3 block
            for x in range(factor):
                for y in range(factor):
                    # get the pixel at the current position
                    pixel = pil_image.getpixel((i * factor + x, j * factor + y))
                    r_total += pixel[0]
                    g_total += pixel[1]
                    b_total += pixel[2]

            # calculate the average color
            r_avg = r_total // (factor * factor)
            g_avg = g_total // (factor * factor)
            b_avg = b_total // (factor * factor)

            # set the average color in the new image
            new_image.putpixel((i, j), (r_avg, g_avg, b_avg))

    return new_image
Now let me test this. I want the pixel factor to be 5.
![]()
That worked pretty well, but there is no need to process the entire image. However, that being said, for simplicity. I am not going to show how to optimize this.
Next I will save the green button template. It’s very small ➡️ 
📍 Here you can get your own template by using a pixel art editor.
After we have the template, we can use it.
script_dir = os.path.dirname(os.path.abspath(__file__))
self._template = cv2.imread(os.path.join(script_dir, 'button-template.png'))


def _get_research_position(self, screenshot, factor=5, similarity=0.97):
    result = match_position(self._template, pil_to_cv2(pixelate(screenshot, factor)), similarity)
    if result[1]:
        # map back to the original position
        return [int(item) * factor for item in list(result[1][0])]
    return None
Here is pil_to_cv2.
def pil_to_cv2(pil_image):
    pil_image = pil_image.convert('RGB')
    rgb_array = np.array(pil_image)
    bgr_image = cv2.cvtColor(rgb_array, cv2.COLOR_RGB2BGR)
    return bgr_image
Here is match_position.
def match_position(template, screenshot, similarity=0.97):
    # separate the alpha channel if present
    bgr_template = template[:, :, :3] if template.shape[2] == 4 else template

    # perform template matching
    result = cv2.matchTemplate(screenshot, bgr_template, cv2.TM_CCORR_NORMED)

    # get all locations with similarity above the threshold
    match_locations = np.where(result >= similarity)

    # get the size of the template
    template_h, template_w = bgr_template.shape[:2]

    # create a copy of the screenshot for visualization
    screenshot_with_dots = screenshot.copy()

    # calculate and draw the center positions
    centers = []
    for (x, y) in zip(match_locations[1], match_locations[0]):
        center_x = x + template_w // 2
        center_y = y + template_h // 2
        centers.append((center_x, center_y))

        # draw a red dot at the center
        # cv2.circle(screenshot_with_dots, (center_x, center_y), radius=1, color=(0, 0, 255), thickness=0)

    return screenshot_with_dots, centers
Test for template matching in pixelated image.
from src.log.logger import Logger


if __name__ == '__main__':
    chosen_window = get_window_with_title('iPhone Mirroring')
    logger = Logger()
    research = Research(chosen_window, logger)
    screenshot = Image.open('research-test2.png')
    print(research._get_research_position(screenshot))
📍 Troubleshoot: If you see error like AttributeError: 'NoneType' object has no attribute 'shape'. It’s very likely that your project is missing the screenshot and template.
- Put this image ⬇️ under
researchand name itresearch-test2.png.
- Put this image ⬇️ under
researchand name itbutton-template.png. (It’s a 10 x 7 green image, very small.)
Output:
[255, 225]This position in the screenshot.
BTW, match_position actually finds all of them. The program only took the first.
It’s in a good shape. Next I can make it to do some upgrades.
def _determine_research(self, factor=5, press_duration=2):
    screenshot = get_screenshot_of_chosen_window(self._window)
    position = self._get_research_position(screenshot, factor)
    while position:
        self.message(f"Pressing ({position[0]}, {position[1]+25})")
        # added 25 to fix margin error
        self._mouse.press(position[0], position[1]+25, press_duration)
        screenshot = get_screenshot_of_chosen_window(self._window)
        position = self._get_research_position(screenshot, factor)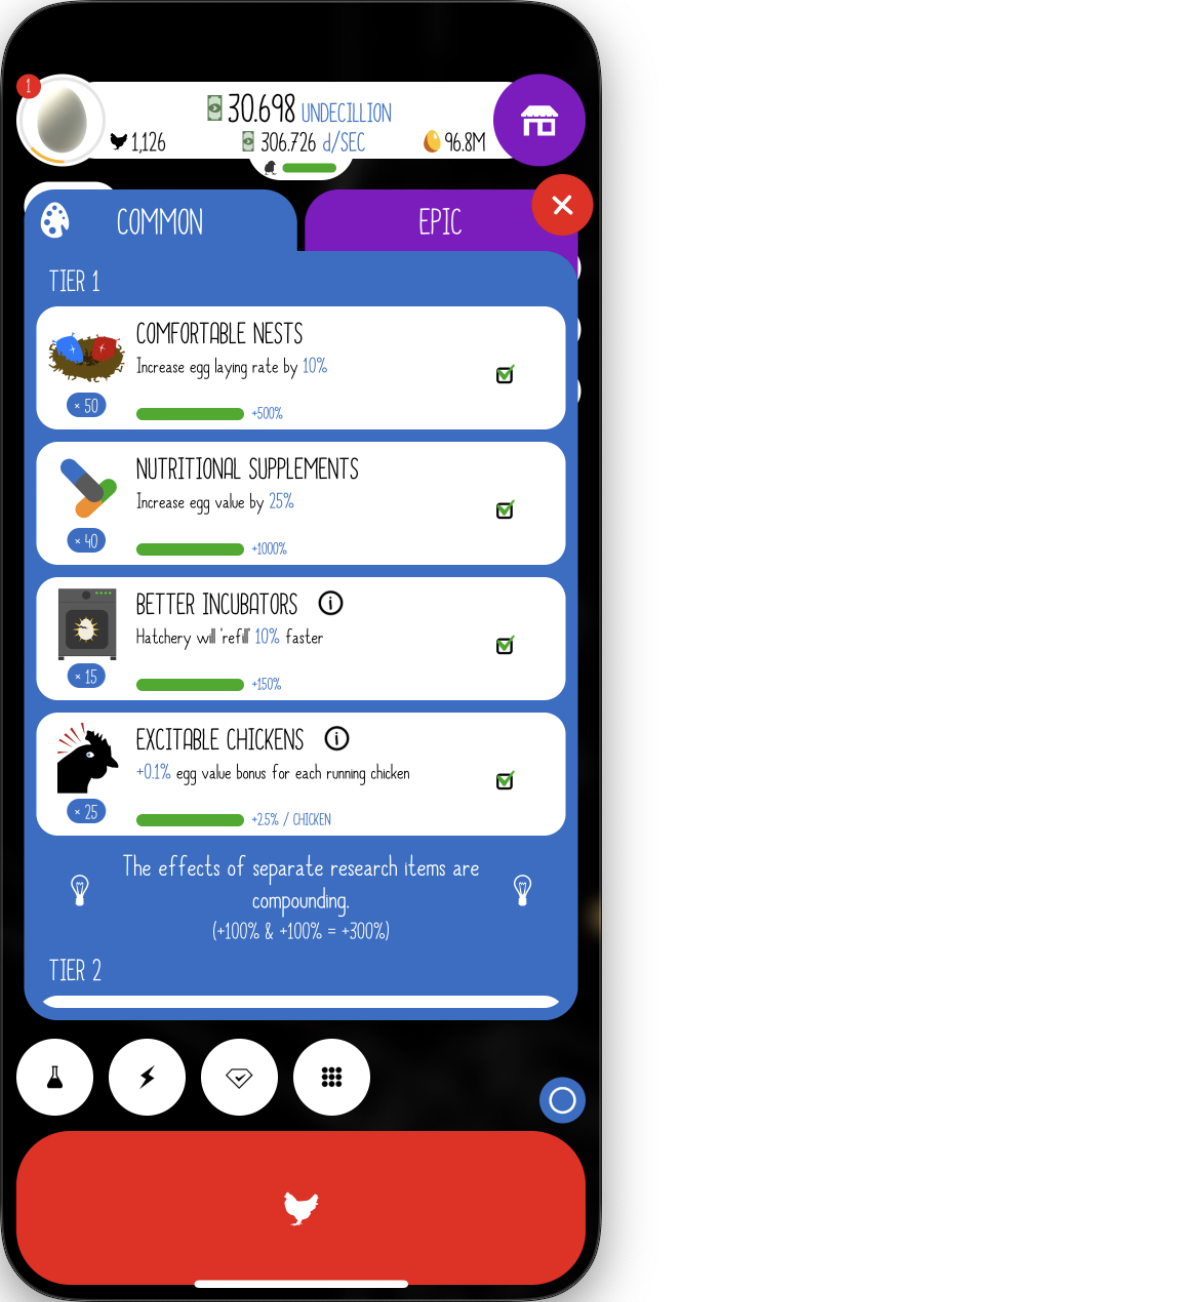
Create a loop to make this process repeated.
async def do_research(self, iterations=12, press_duration=2, check_wait=2):
    # go to the research menu
    self.message("Open research menu.")
    self._mouse.click_pos(research_pos, 0.4)

    self.message(f"Leveling up, total iterations: {iterations}.")
    # level up researches
    for i in range(iterations):
        start_time = time.time()
        self.message(f"Performing iteration {i+1}.")
        self._determine_research(factor=5, press_duration=press_duration)
        self.message("Time spent on this iteration: --- %s seconds ---" % (time.time() - start_time))
        time.sleep(check_wait)
        self._drag_menu(drag_duration=1)

    self.message("Close menu.")
    self._mouse.click_pos(exit_pos)
    time.sleep(1)

def _drag_menu(self, drag_duration=1.0):
    self._mouse.perform_drag(drag_from, drag_to, drag_duration)
Test.
import asyncio
from src.log.logger import Logger


async def main():
    chosen_window = get_window_with_title('iPhone Mirroring')
    logger = Logger()
    research = Research(chosen_window, logger)
    await research.do_research(15)


if __name__ == '__main__':
    asyncio.run(main())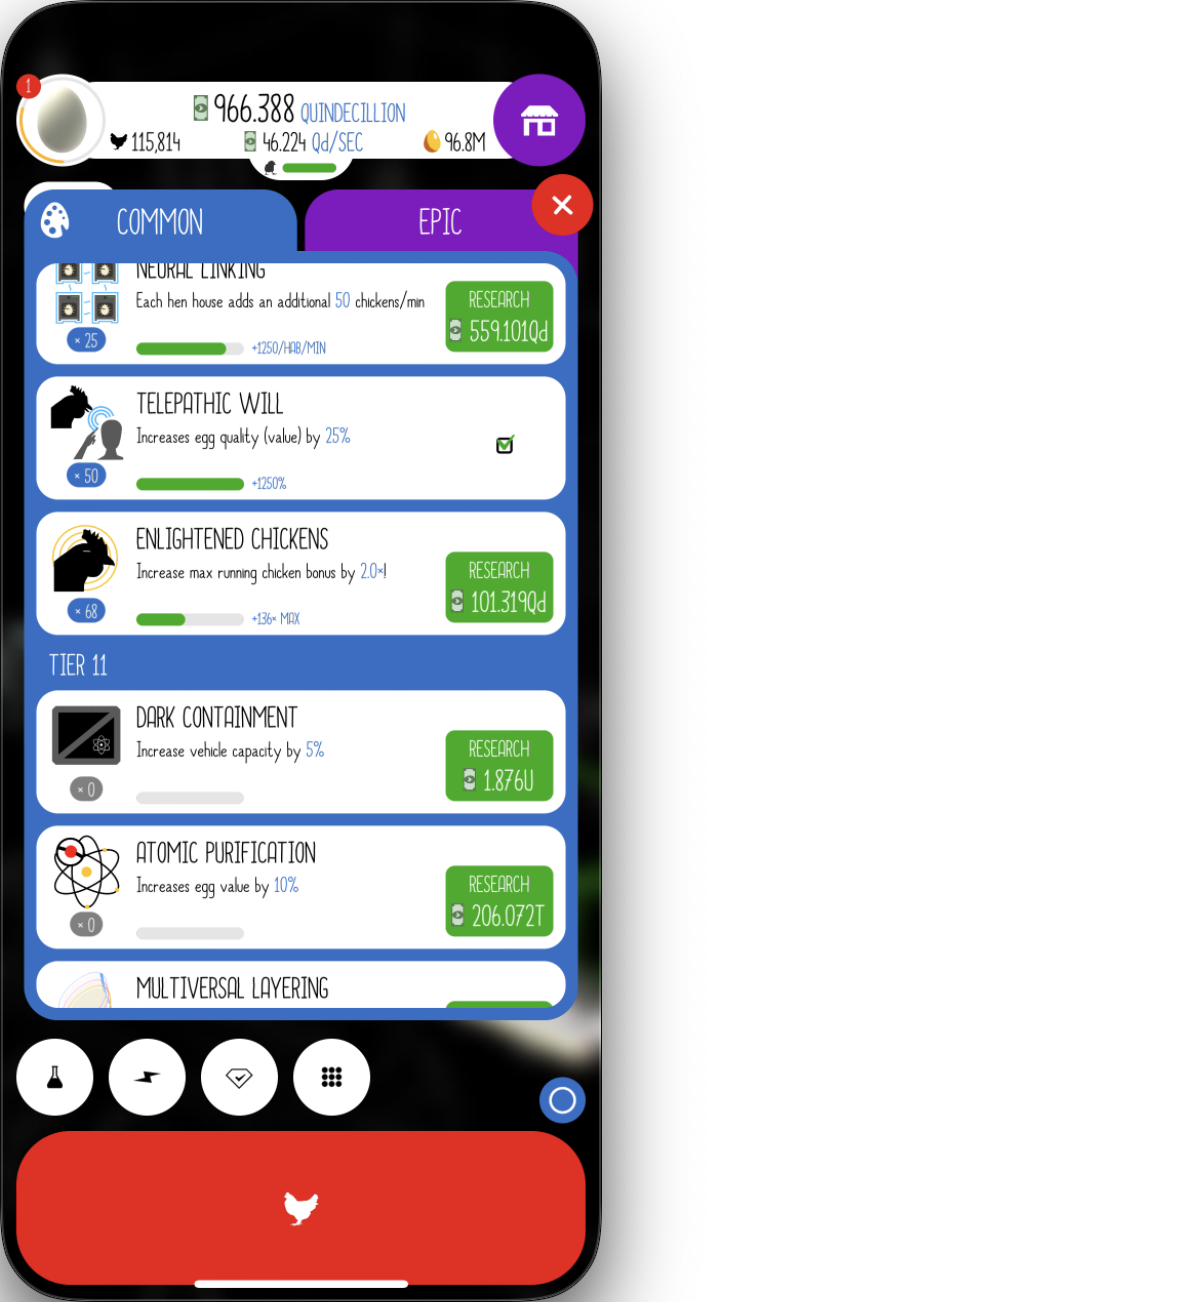
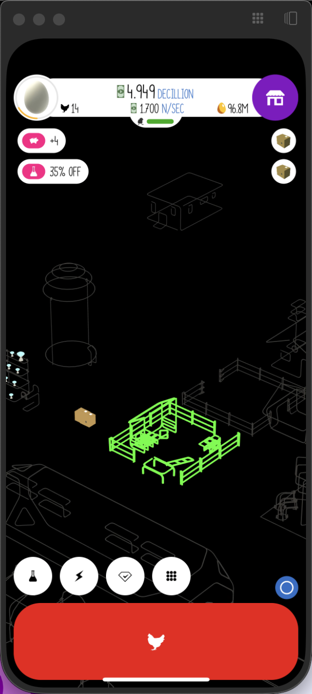
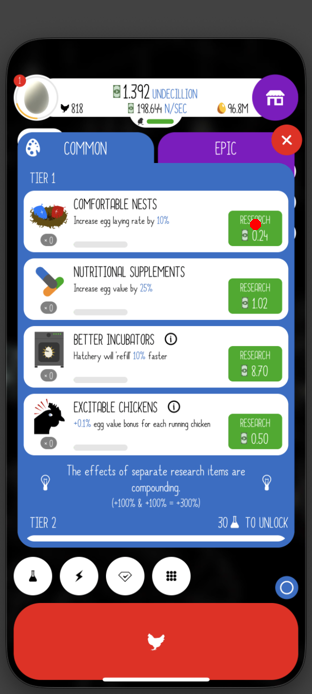
🎉 The program is performing pretty well. Here is the result after a research upgrade loop by the program.
Step 10
Recall the pattern:
- Start from Edible
- Jump to Dilithium
…
My Earning Bonus allows me to jump to Dilithium from a fresh Edible farm.
This should be similar to purchasing houses and trucks. (It’s actually not, I am only presenting the barely minimum version that gets the job down.)
Create egg_jump.py under egg_jump.
from src.interaction.mouse import Mouse
from src.program.debug_class import Debug_Class
from src.play.egg_jump.ui_position import (egg_pos,
                                           upgrade_pos,
                                           yes_pos,
                                           exit_pos)

class Egg_Jump(Debug_Class):
    def __init__(self, logger):
        super().__init__(logger)
        self._mouse = Mouse()

    async def jump(self):
        self.message("Open egg jump menu.")
        self._mouse.click_pos(egg_pos, 0.7)

        self.message("Perform egg jump.")
        self._mouse.click_pos(upgrade_pos, 0.7)
        self._mouse.click_pos(yes_pos, 0.7)

        self.message("Close menu.")
        self._mouse.click_pos(exit_pos)
Add the following to egg_jump/ui_position:
egg_pos = [38, 122]
upgrade_pos = [158, 435]
yes_pos = [197, 299]
exit_pos = [285, 164]
Test.
import asyncio
from src.log.logger import Logger


async def main():
    logger = Logger()
    egg_jump = Egg_Jump(logger)
    await egg_jump.jump()


if __name__ == '__main__':
    asyncio.run(main())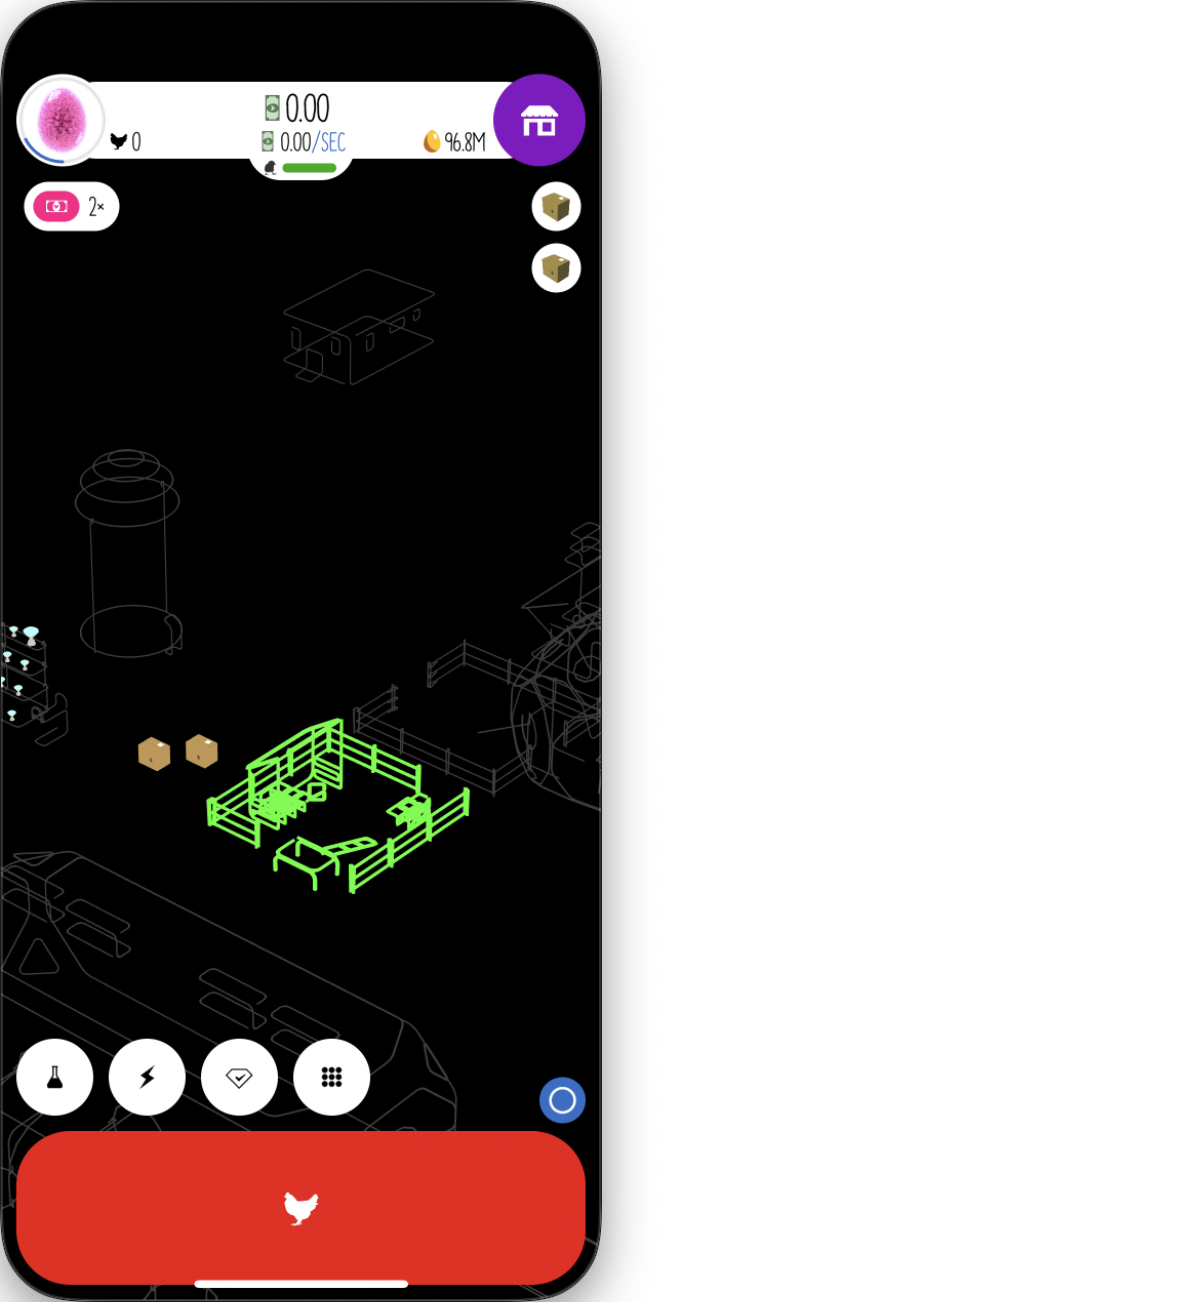
Step 11
The next two steps are:
- Get enough farm value and jump to Universe
- Get soul eggs and prestige
Let me skip ‘Get enough farm value and jump to Universe’ for now.
‘Prestige’ is a very easy step. Create prestige.py under prestige.
from src.interaction.mouse import Mouse
from src.program.debug_class import Debug_Class
from play.prestige.ui_position import (egg_pos,
                                       prestige_info_pos,
                                       prestige_and_collect_pos,
                                       yes_button)


class Prestige(Debug_Class):
    def __init__(self, logger):
        super().__init__(logger)
        self._mouse = Mouse()

    async def start_new_farm(self):
        self.message("Open prestige menu.")
        self._mouse.click_pos(egg_pos, 0.7)
        self._mouse.click_pos(prestige_info_pos, 0.7)
        self._mouse.click_pos(prestige_and_collect_pos, 0.7)
        self.message("Confirm prestige.")
        self._mouse.click_pos(yes_button, 0.7)
Add the following to prestige/ui_position:
egg_pos = [38, 122]
prestige_info_pos = [161, 482]
prestige_and_collect_pos = [157, 500]
yes_button = [194, 299]
Test.
import asyncio
from src.log.logger import Logger


async def main():
    logger = Logger()
    prestige = Prestige(logger)
    await prestige.start_new_farm()


if __name__ == '__main__':
    asyncio.run(main())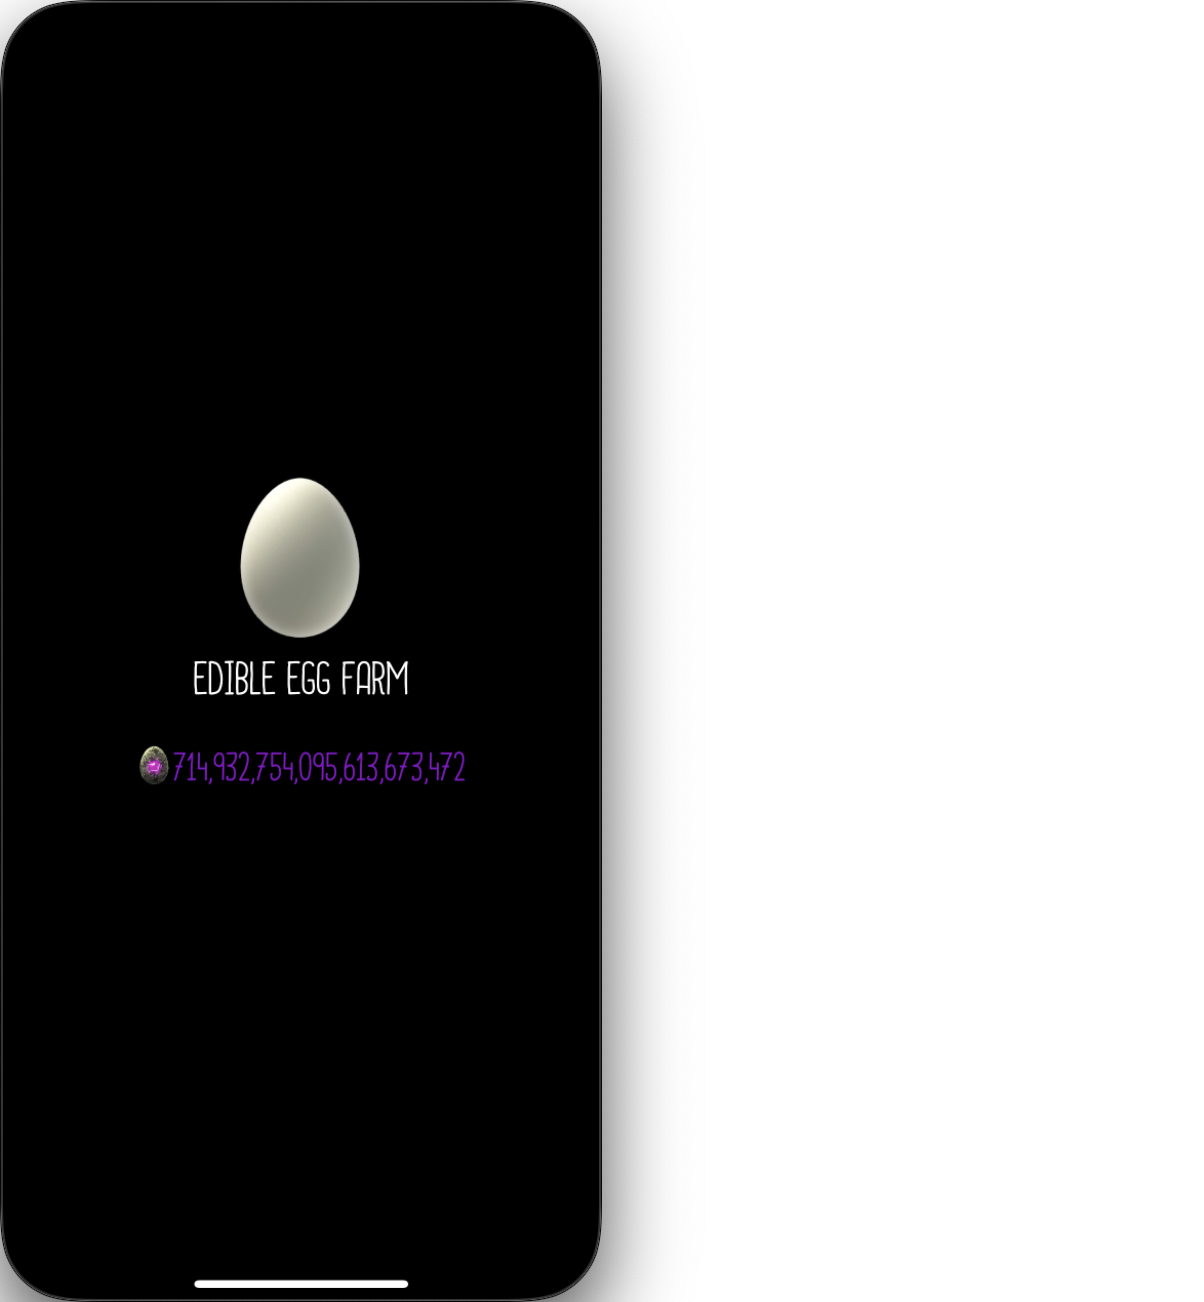
Step 12
Now I will start filling main.py. Every thing will come together in this step.
import time
import asyncio
from src.play.spawner.spawner import Spawner
from src.play.egg_jump.egg_jump import Egg_Jump
from src.play.house.house import House
from src.play.depot.depot import Depot
from src.play.research.research import Research
from src.util.window_getter import get_window_with_title
from src.play.prestige.prestige import Prestige
from src.log.logger import Logger


async def main(window, logger: Logger, run_num=0, debug=True):
    logger.add_content(f"--- Prestige run {run_num} starts. ---")
    start_time = time.time()

    spawner = Spawner(logger=logger)
    # assuming Edible
    # go to Dilithium
    egg_jump = Egg_Jump(logger=logger)
    if debug:
        spawner.set_verbose()
        egg_jump.set_verbose()
    # guarantees to succeed
    await egg_jump.jump()
    # animation
    time.sleep(5)

    # now in Dilithium
    # Start by spawning chickens for 5 seconds
    await spawner.spawn_chicken(5)
    time.sleep(0.5)

    # buy houses
    house = House(logger=logger)
    if debug:
        house.set_verbose()
    await house.buy_new_house()
    time.sleep(0.5)

    # buy trucks
    depot = Depot(logger=logger)
    if debug:
        depot.set_verbose()
    await depot.buy_new_trucks()
    time.sleep(0.5)

    # research
    research = Research(window=window, logger=logger)
    if debug:
        research.set_verbose()
    await research.do_research(12, 1, 0.1)

    await egg_jump.jump()
    # animation
    time.sleep(5)

    # now in universe
    # start by spawning chickens for 5 seconds
    await spawner.spawn_chicken(5)
    time.sleep(5)

    # buy houses
    await house.buy_new_house()
    time.sleep(0.5)

    # buy trucks
    await depot.buy_new_trucks()
    time.sleep(0.5)

    # Research
    await research.do_research(20, 1, 0.1)

    # raise more chicken
    await spawner.spawn_continue(10)

    await depot.buy_new_trucks()
    time.sleep(0.5)

    # raise more chicken
    await spawner.spawn_continue(20)

    prestige = Prestige(logger=logger)
    if debug:
        prestige.set_verbose()
    await prestige.start_new_farm()

    logger.add_content(f"--- Prestige run {run_num} ends. ---")
    logger.add_content(f"Time spent for this run : --- %s seconds ---" % (time.time() - start_time))
    time.sleep(6)


if __name__ == '__main__':
    logger = Logger()
    chosen_window = get_window_with_title('iPhone Mirroring')
    counter = 0
    try:
        while True:
            asyncio.run(main(chosen_window, logger, counter))
            counter += 1
    except KeyboardInterrupt:
        logger.save_content()
The result I got after one prestige.
--- Prestige run 0 starts. ---
Open egg jump menu.
Perform egg jump.
...
--- Prestige run 0 ends. ---
Time spent for this run : --- 692.892648935318 seconds ---
📍 I got this result using an optimized version. Yours is very likely to encounter problems. Some debugging suggestions:
- check if during any step, the program did too many clicks.
- check if during any step, the program missed a click.
- check if the game has lost focus. If yes, you will have to regain focus. Hint: open a random menu and close it.
If you liked this log, consider giving a Star to this repository.
🍯 Happy Coding 🍯
This article, completely original, is copyrighted by its author, me. Please do not reproduce it.
本文为原创作品,作者 Kolyn090 拥有其著作权,受法律保护。严禁复制、转载、仿冒或以任何形式使用。